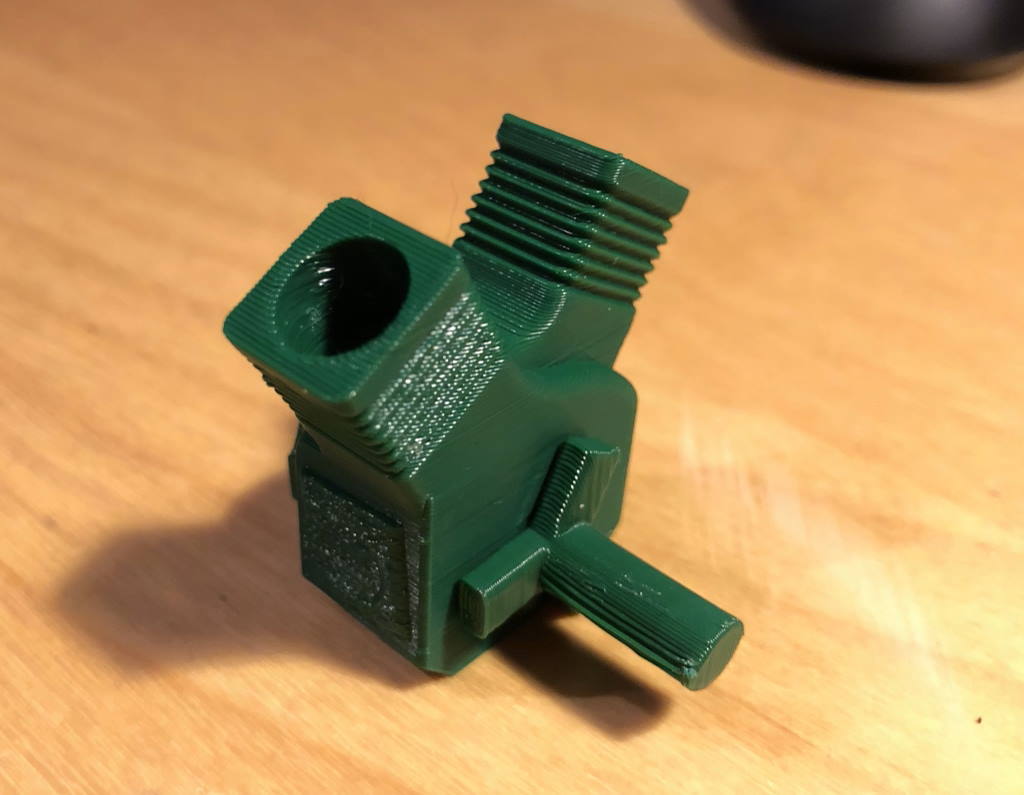
BIQU H2 direct drive extruder review: A direct drive without compromises?
BigTreeTech sent me their BIQU H2 direct drive extruder for review. This extruder the same extruder as mounted on their BIQU BX 3D printer. I’ve had the “World’s lighest direct extruder” for a month now and let’s see if this is a true direct drive without compromises.
Specifications
The BIQU H2 (hydrogen) is a direct competitor to the E3D Hemera direct drive extruder. It comes at about $90 (€80 on 3DJAKE) and this gives you:
- An direct drive extruder of about 220g of weight. To compare to the stock Bowden extruder my Creality CR-6: just the stock fan shroud of the Creality CR-6 alone is nearing 80 grams.
- Extruder has a 7:1 gear ratio with dual steel gears powered by a flat pancake stepper motor.
- The default heat break is PTFE lined. An all metal upgrade is available.
- It works with 1.75mm filament, which your printer probably already uses.
- The heater block uses E3D V6-style nozzles (it comes with a wide UM2 nozzle)
- Comes with a heater cartridge, silent 24V fan, thermistor and cabling
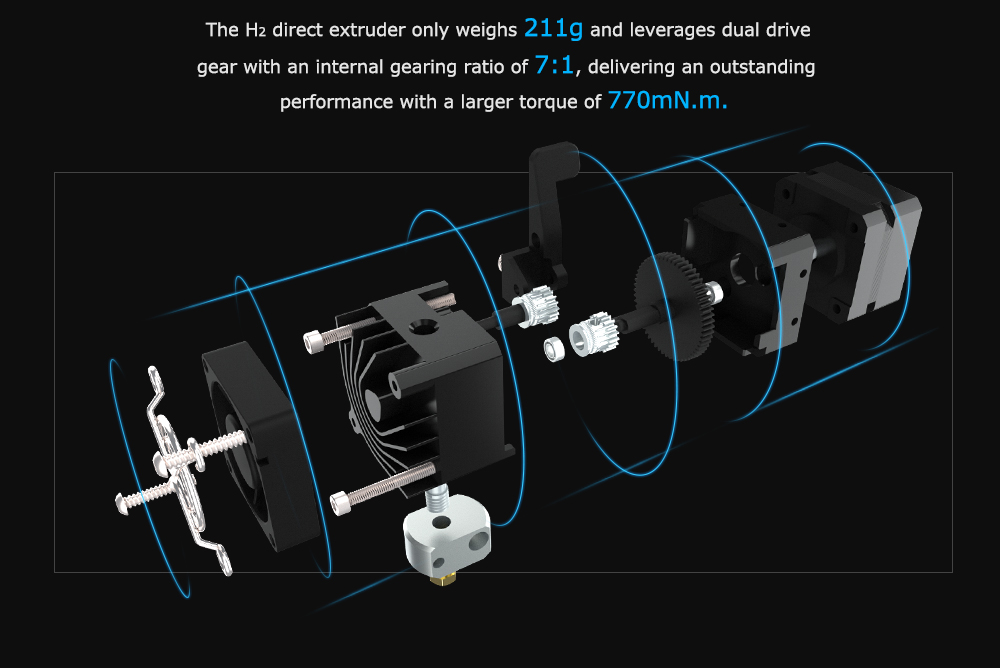 A graphic from BigTreeTech visualizing the gearing of the BIQU H2
Packaging
I wrote an unboxing article earlier about it for full details, so you may want to check that out as well.
The BIQU BX comes in a nice small box, but it will turn out this extruder itself isn’t actually that big.
If we open the box we are immediately greeted by the extruder, and some accessoires.
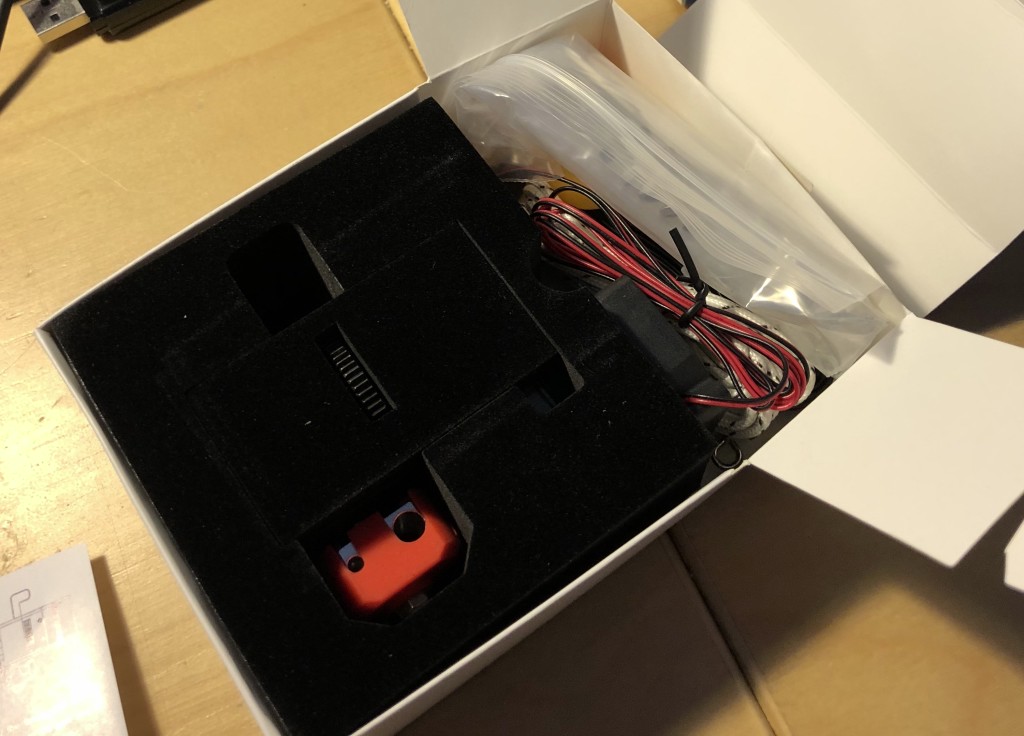 Well packaged we find the extruder at the left side - accesoires at the right side
What’s in the box
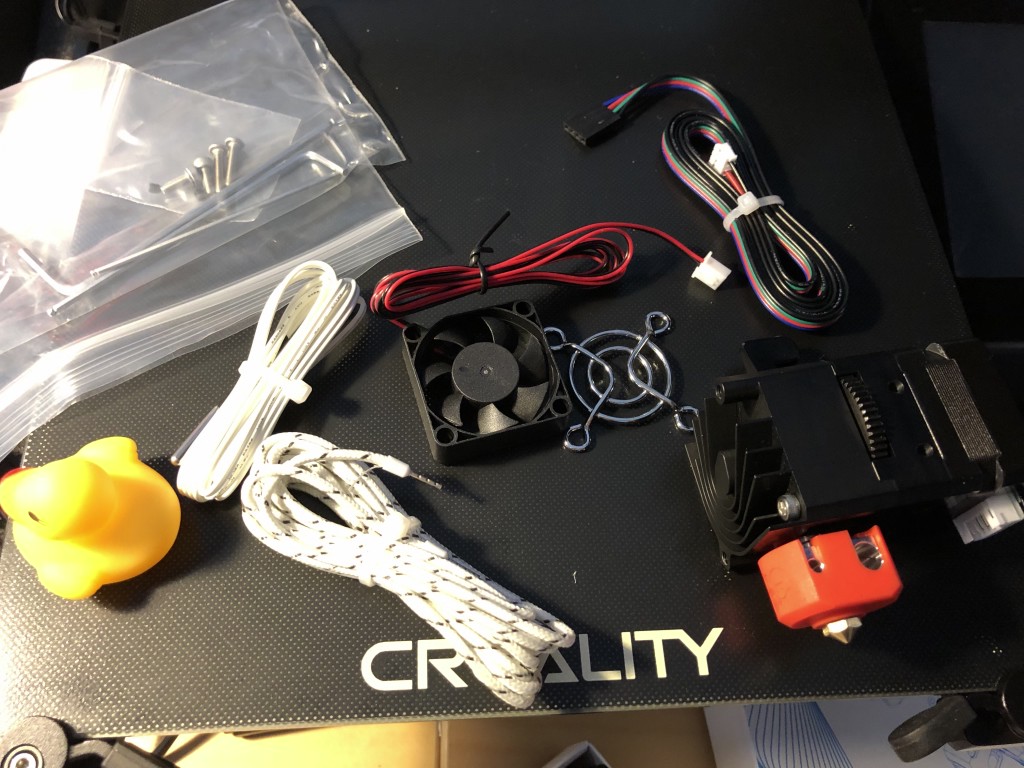 Everything on the plate
Included in the box we find:
- The manual
- 40W Heater cartridge crimped with ferrules
- A HT-NTC100K thermistor cartridge crimped with a JST-XH connector
- Some bolts and screws (M3)
- A 24V cooling fan and fan guard
- A BigTreeTech “good luck” duck
- Allen keys
- A stepper motor cable with a JST connector on one end and a dupont connector at the other end.
 The BIQU H2 manual
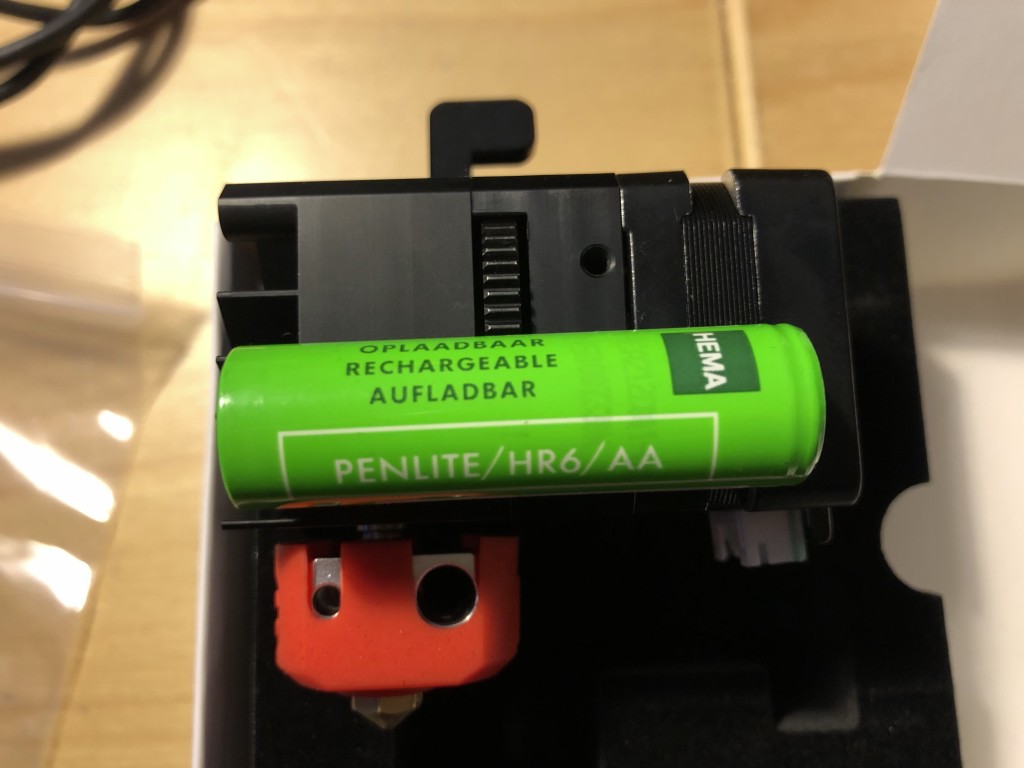 The BIQU H2 compared to a standard AA battery
Mounting it
BIQU has made this extruder very easy to mount. On each of the four sides, there are two M3 screw holes for bolts. You can use it for mounting it to your printer, adding part cooling and mount an Adafruit Neopixe.
If you have a “regular” 3D printer with manual bed leveling, a BLTouch, capacitive sensor, and the cabling running all the way to the motherboard then mounting this extruder is a matter of printing a mount and doing the cabling. There are mounts available from the BigTreeTech website and also dozens available on Thingiverse.
There is also a complete CAD model available so you can start designing you BIQU H2 mount while you wait for it to arrive.
If you have a CR-style printer by which the cabling runs to a breakout board, after which it runs to the motherboard through a proprietary cable, you need to buy some crimping tools to get the cabling at the correct length.
 Mounted to my Creality CR-6 SE. Note that all the available mounting holes makes it easy to design a mount for it.
In my case, on the Creality CR-6 SE, besides the breakout board I also have the strain gauge leveling system. Earlier I wrote on how to mount it to the Creality CR-6. This required some additional effort thanks to how Creality designed the mounting system of the hot-end - but I managed to do it anyway.
Disassembling
The way you will mount the H2 to you printer also makes it easy to disassemble it in case you need to do so.
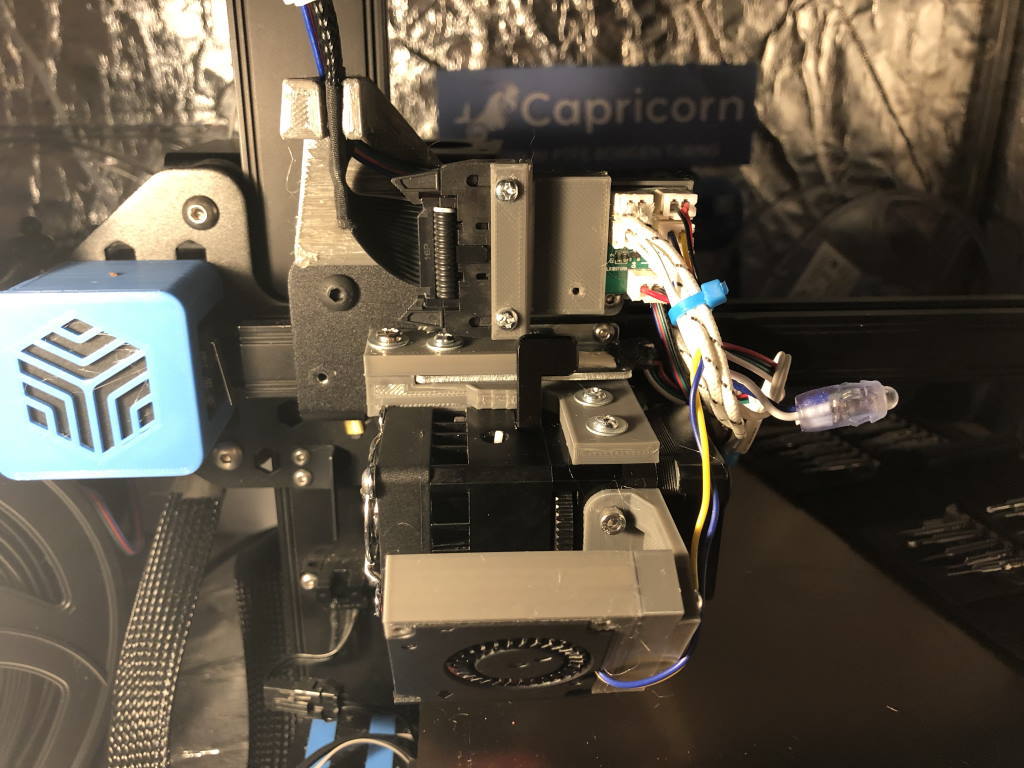
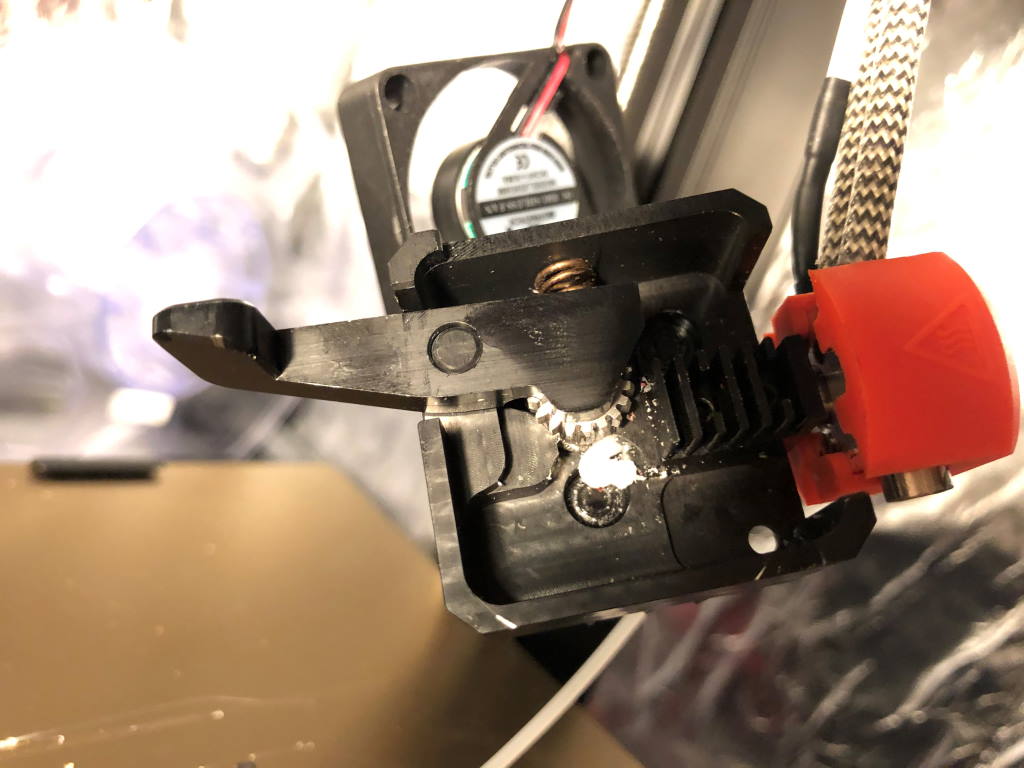
 The extruder part with the gears and the hot end.
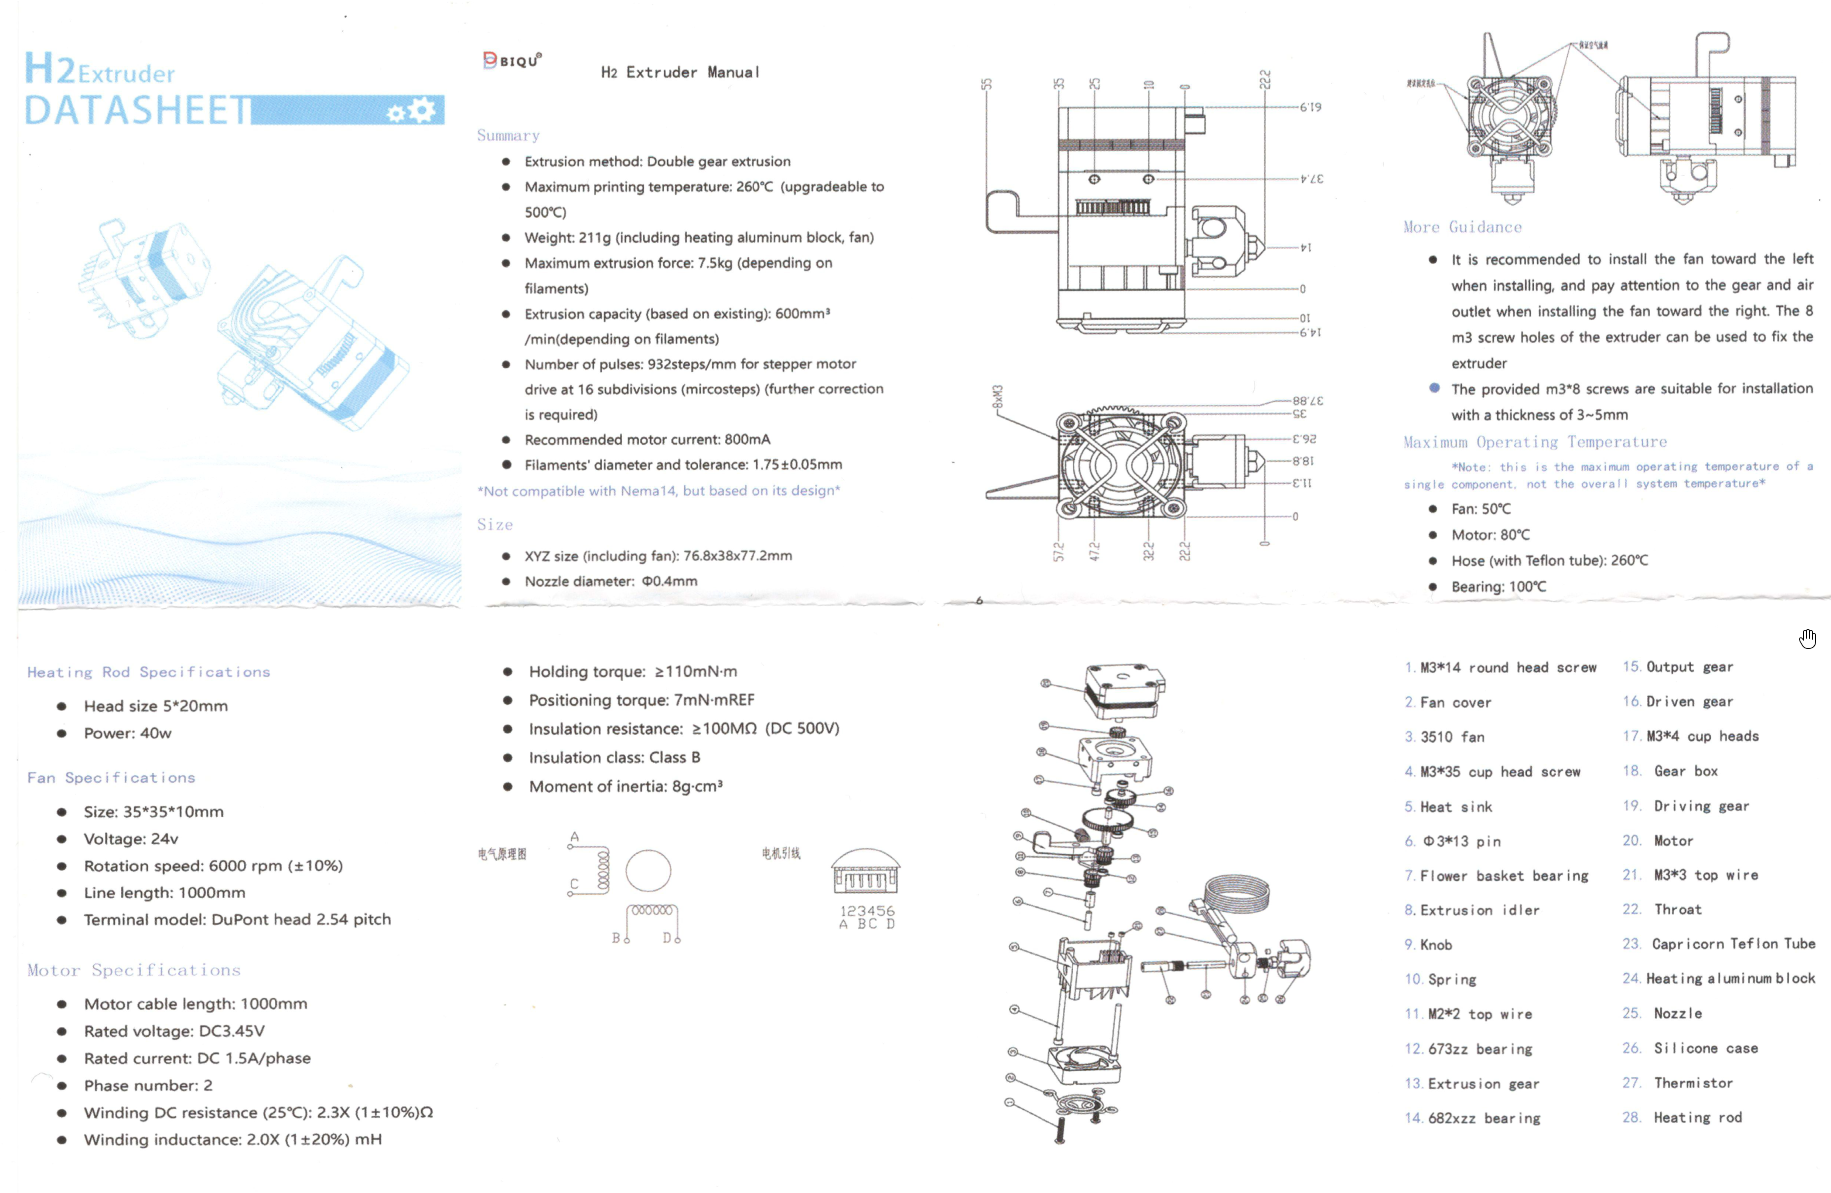
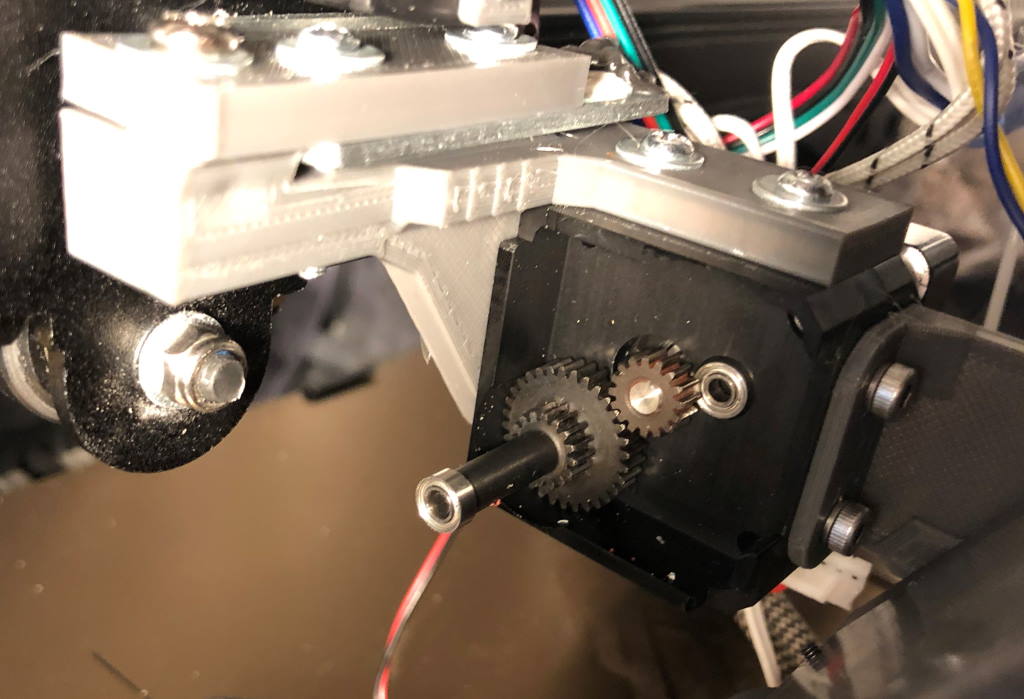
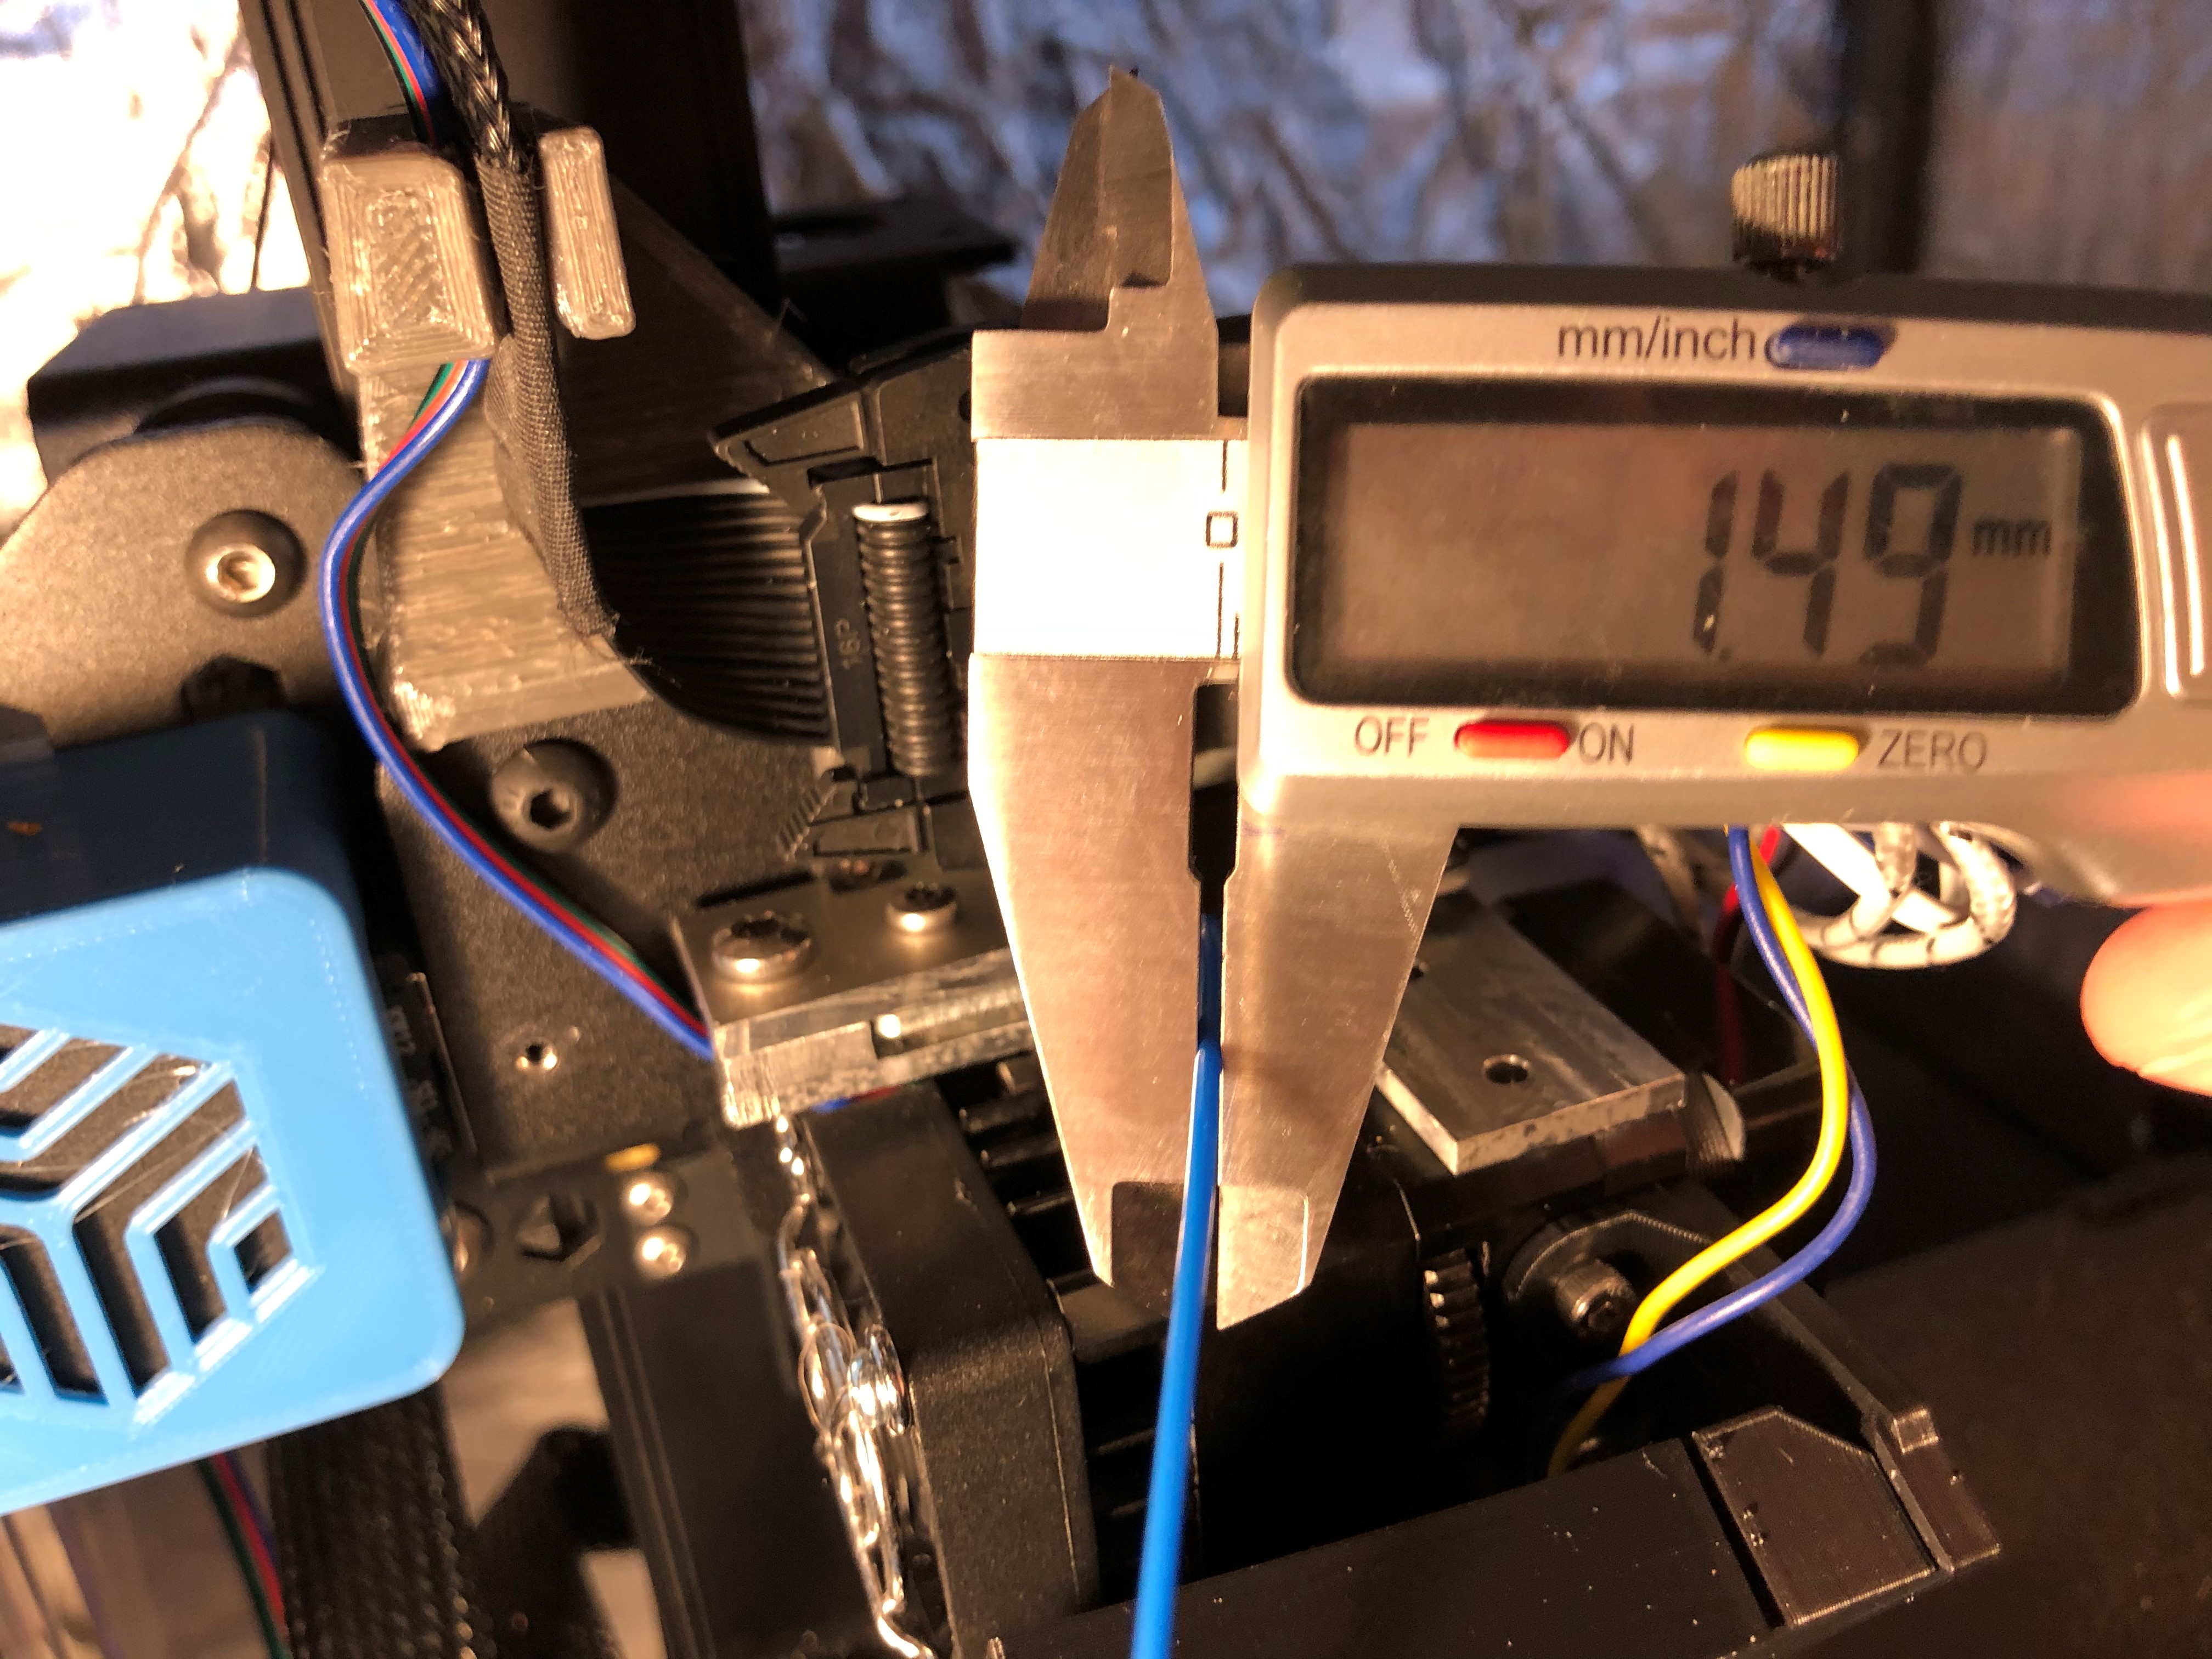
The gearbox has a 7:1 gear ratio. This means that your e-steps (extruder steps/mm) are near 932 steps/mm (as opposed to just 92 steps/mm for a default Creality-style extruder). This doesn’t matter however: the stepper motor on the H2 doesn’t emit any noticeable sound. The tiny stepper probably needs this gear ratio to get enough torque for pushing filament through in case of you would get a jam. I calibrated the extrusion steps on my H2 and the 932 steps/mm is spot-on for me.
Also note that the extruder gears are dual drive. The gears both push the filament through the hotend. The gears are made of hardened stainless steel, so they should probably hold up pretty well with abrasive filaments too.
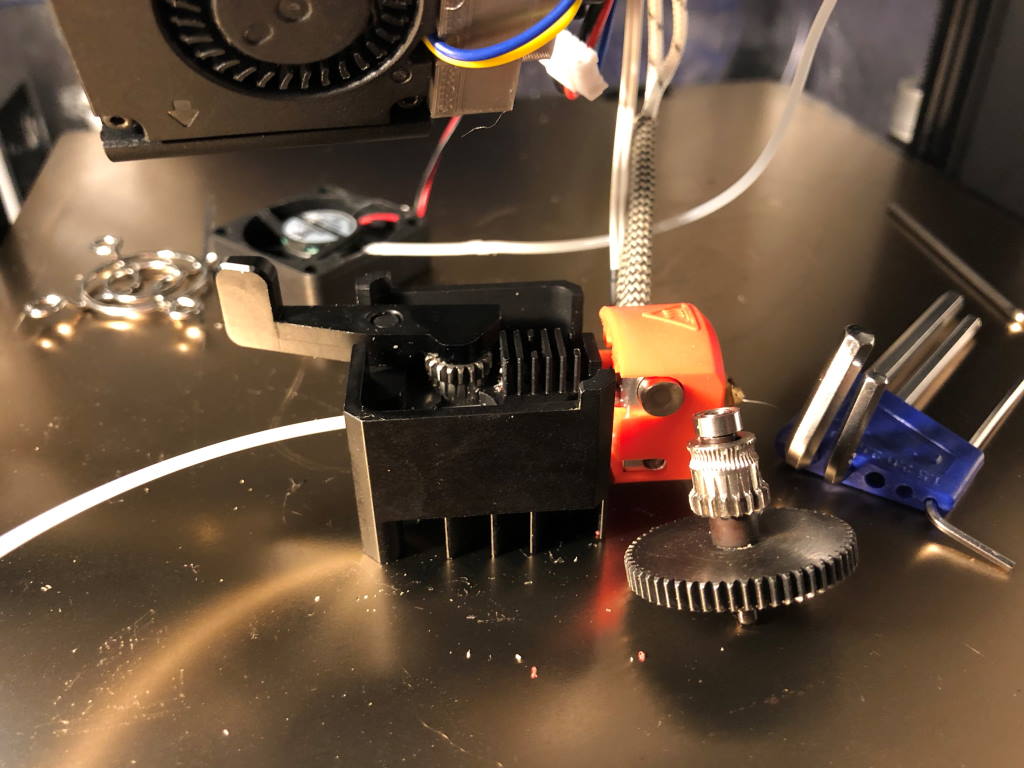
 The other part of the gearbox and the stepper motor.
One thing I did notice while printing TPU and I didn’t have my Z-offset right just yet and that if the nozzle is far too low on the bed: the TPU, which is gripped very well by the H2, has nowhere to go while the extruder attempts to extrude it.
 A bit of TPU that was grinded by the extruder because I had my Z-offset too low and the filament had nowhere to go.
If the TPU has nowhere to go, it is grinded by the extruder. I’m sure this “issue” is not unique to this H2 - it probably happens to any other extruder of similar design. It does mean that at such point you need to disassemble the extruder, so I’m glad it is so easy to do so.
One thing that did notice is that there seems to be no way to adjust the tensioning of the extrusion mechanism. Although the default tension set seems to be fine, there is no easy way to adjust it if you need to do so.
Heater block and nozzle
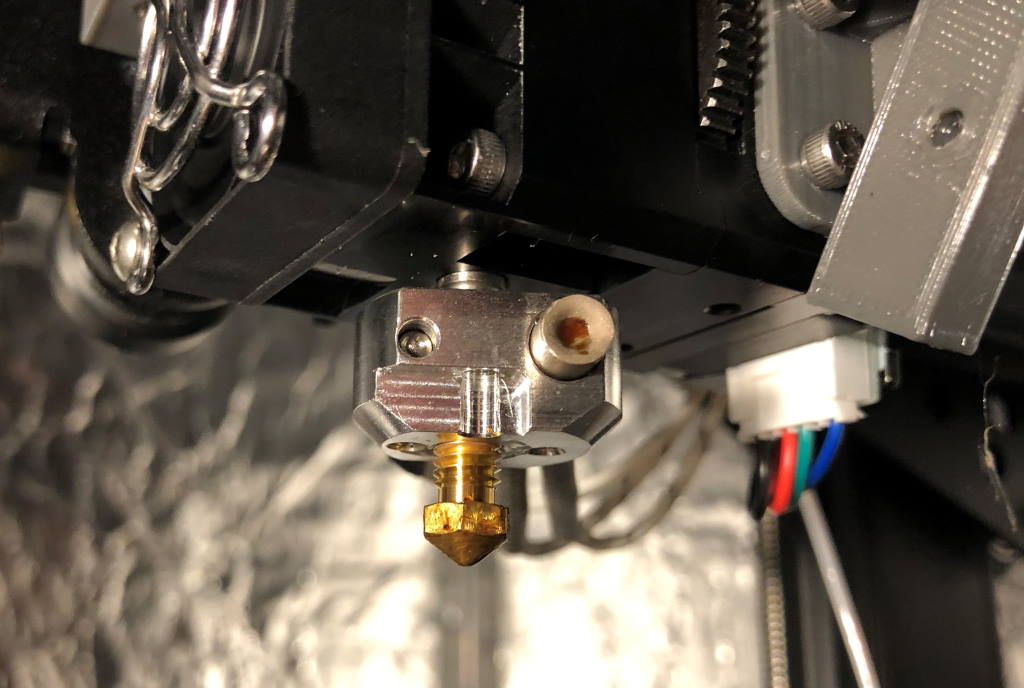
The default heat break of the H2 is PTFE lined with Capricorn, this means by default the printing temperatures are limited to 260C. On the other hand, PTFE is less likely to cause clogging and works very well for PLA, TPU and PETG. There is an all-metal upgrade available from BIQU - though I haven’t tested that.
 The naked heater block while changing a nozzle. After you can put the included silicon sock (heat insulation) back on.
The heater block feels very solid and has an inset you can use to easily hold it in place with pliers or a wrench while you change the nozzle. You need to use two hands when you want to change the nozzle, because the heat break is structural and therefore an one-handed nozzle change is not possible.
 With the nozzle removed you can see the Capricorn-blue PTFE lining of the heatbreak. Also shown: two grub screws holding the heater and thermistor cartridge in place.
The H2 comes with a standard HT-NTC100K thermistor cartridge and a 40W heater cartridge. The heater block uses E3D V6-style nozzles. The thread of these nozzle types slightly longer than the nozzles I have on my Creality CR-6.
The standard nozzle the H2 comes with has a UM2-style head. It works fine, but the larger surface area does give filament some more area to stick to.
The entire assembly is kept cool by a very silent 24V fan - with an included metal fan guard. The fan blows onto the extruder and the fins redirect the air up so it doesn’t blow onto your printed parts.
Prints
I did several prints on the BIQU H2 with TPU, PLA and PETG.
TPU
The direct drive calls for some TPU prints. I started with a standard PLA profile and just went ahead printing with that immediately - not changing any printing speeds.
Printing 4 times four feet for both of my Creality CR-6 printers in TPU.
 This is how one set of 4 prints came out. I had no failures whatsoever. Very sharp and precise corners.
Let’s push it somewhat further by quickly printing the infill of this model.
Or just a standard benchy?
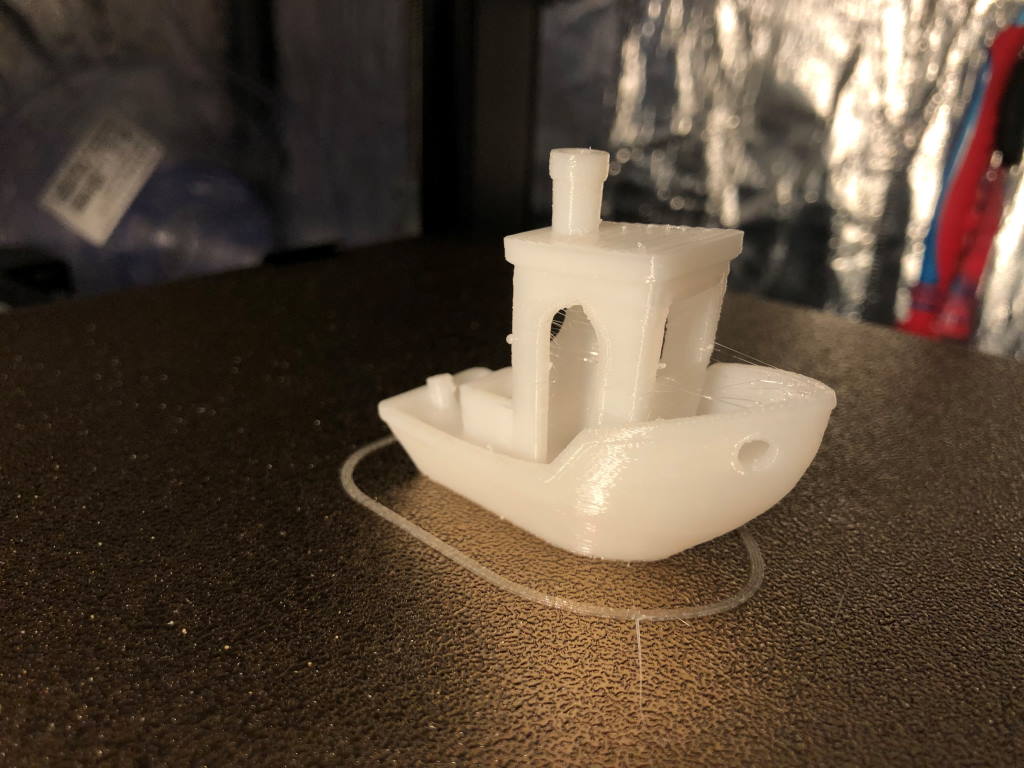 This is how the benchy came out. Given the general stringiness of this SUNLU TPU I don’t think it could have been much better.
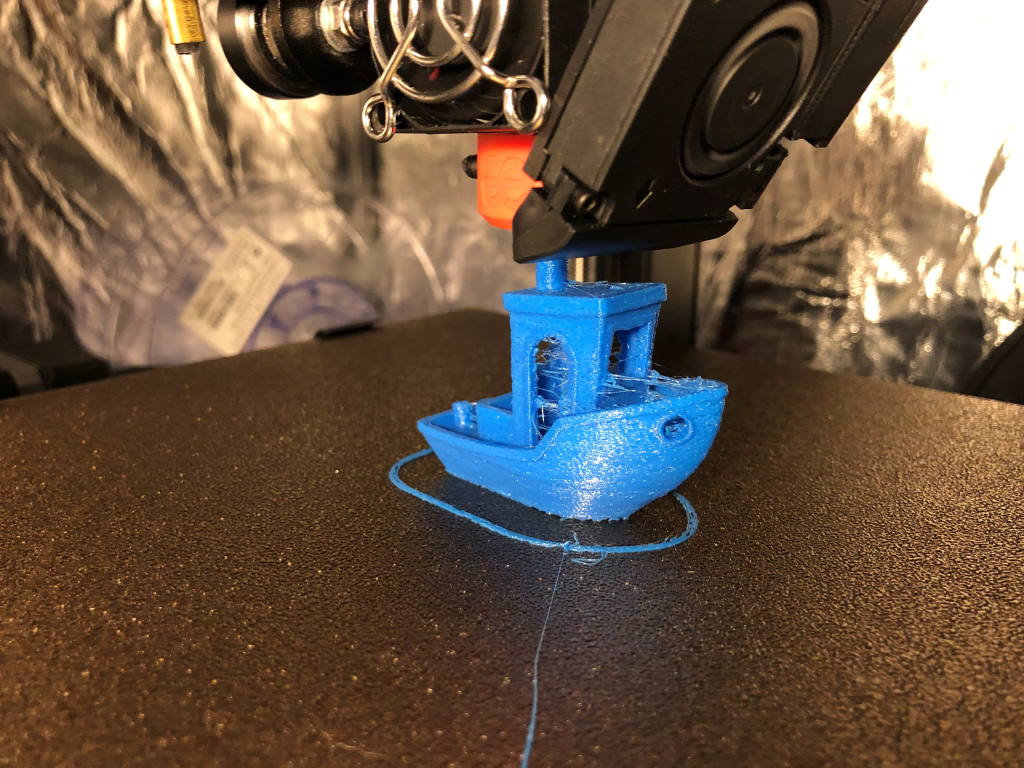 I also printed another benchy in more flexible TPU but it didn’t turn out that great but that turned out to be the filament.
 This 1.75mm filament was actually just 1.5mm filament - it is no surprise it came out very underextruded. The supplier is sending me a new roll.
Other prints
I did also several non-TPU print, just to see how it generally holds up printing with normal printing speeds.
 A spool holder part of the CR-6 SE printed in 3DJAKE ecoPLA Red. The supports came off very easily.
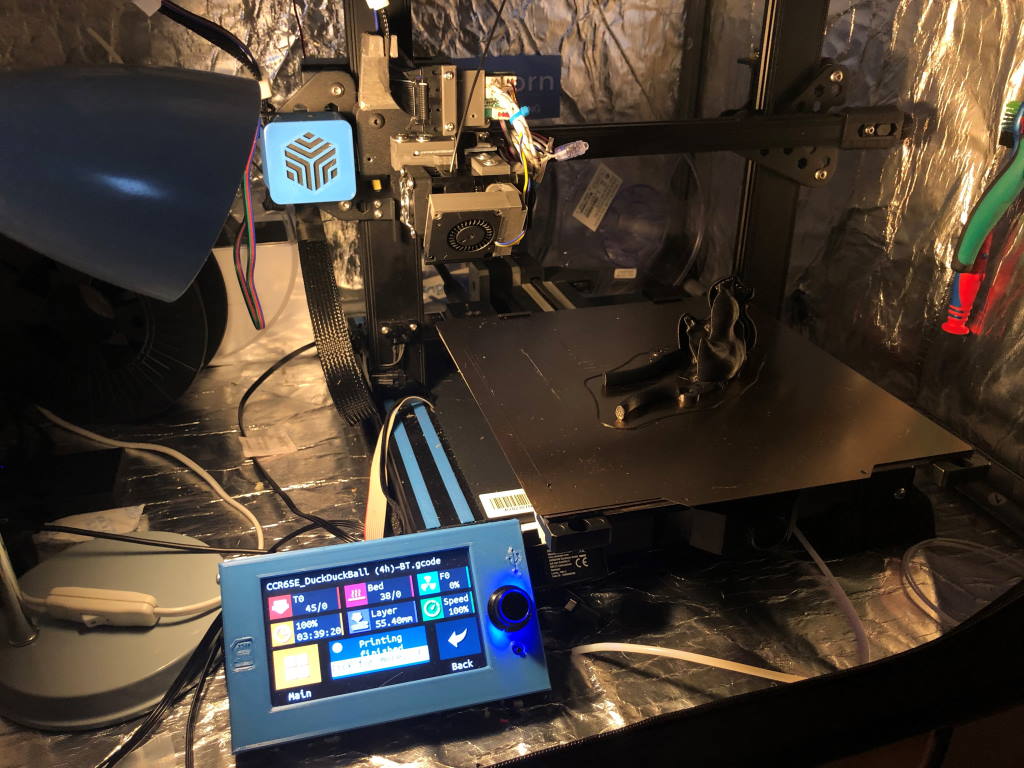 Printing a snowball duck mold. This print requires supports.
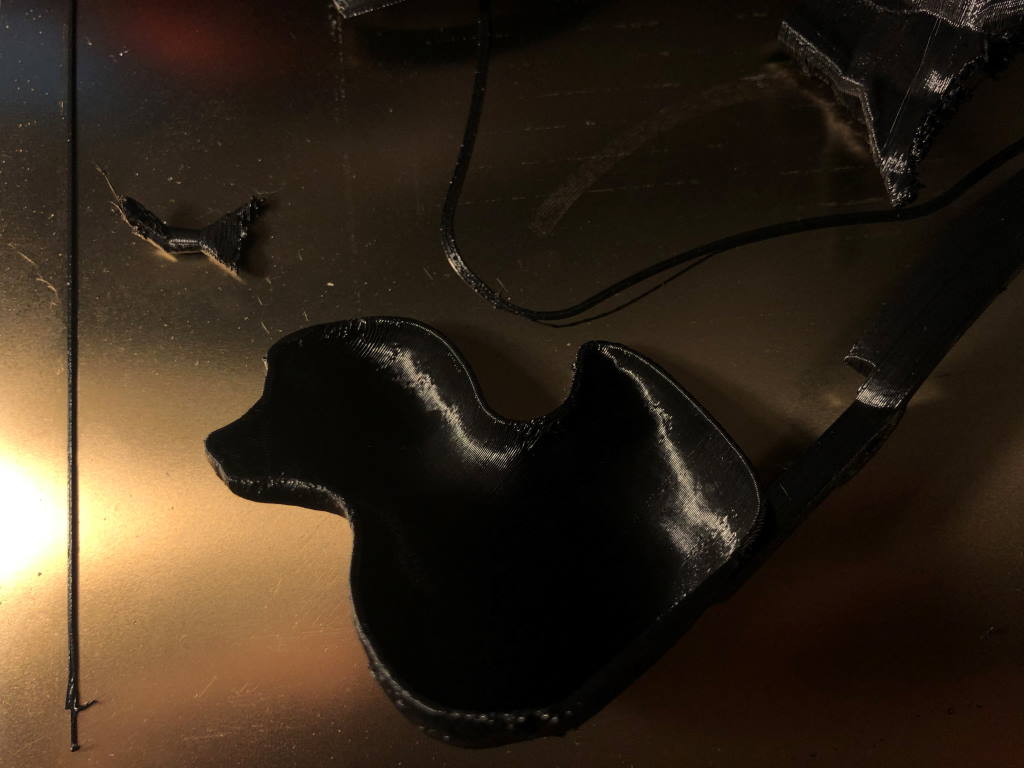 The supports came off very easily. Due to the bad Anet filament I used, the print itself came out a bit rougher than I’d like.
Filament change
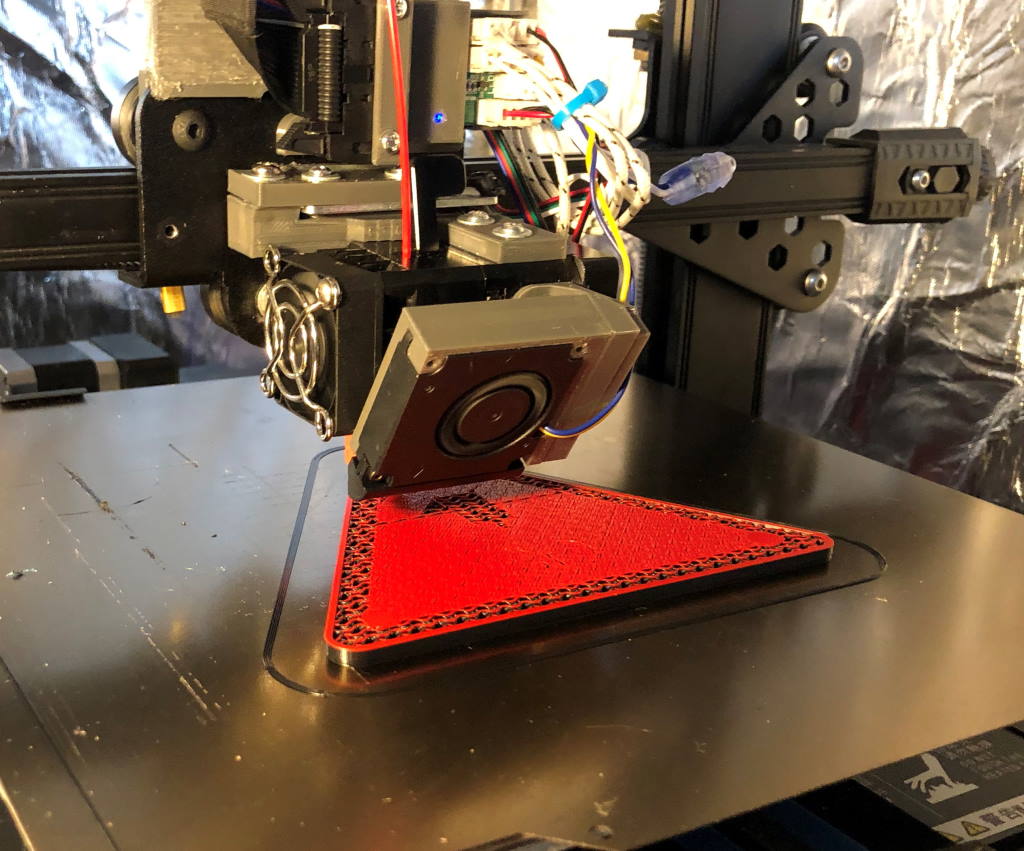 Printing a 3D printing lab warning sign with the Marlin filament change feature
When printing with a filament change, the direct drive also shows its value. The filament path is very short and that makes changing filaments during a print a very quick procedure, with minimal purging required.
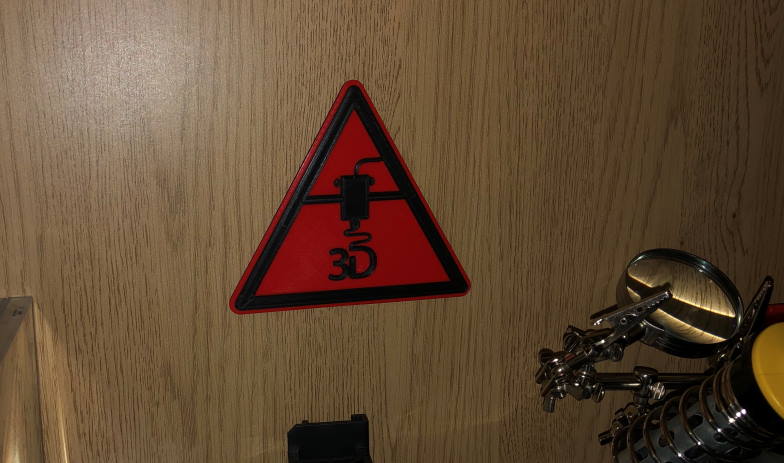 The finished sign, adhered to my book case.
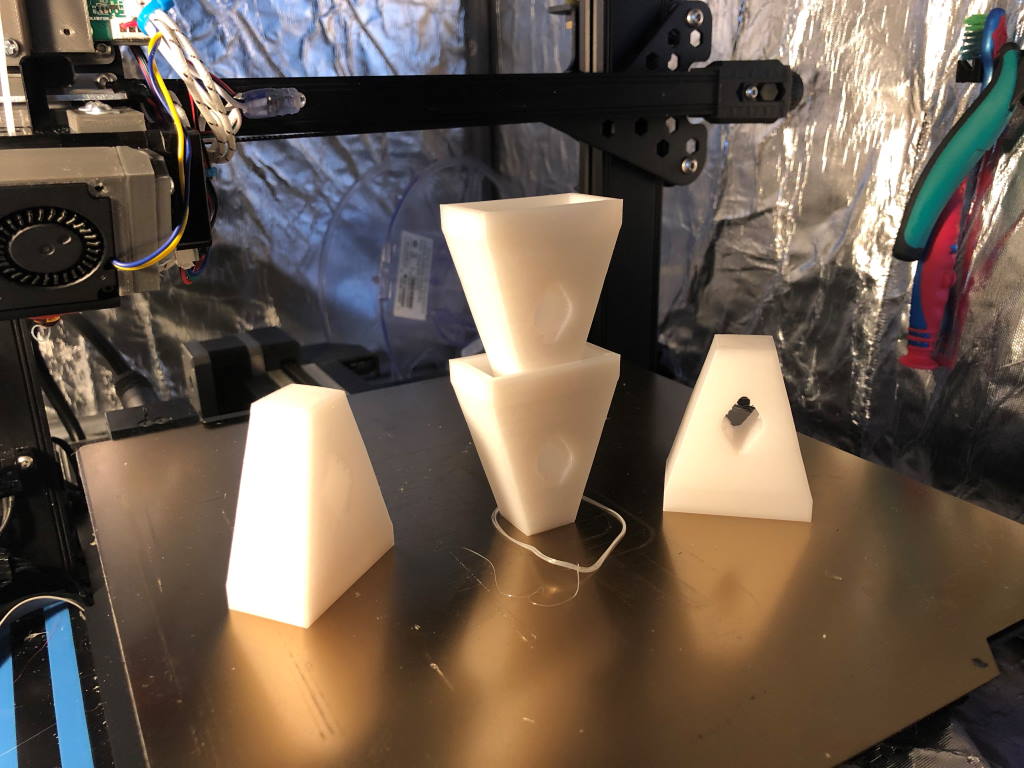
Vases
My cat kept knocking over vases, I needed to print some more.
 A vase printed in vase mode. There is a slight layer inconsistency which is caused by my filament sensor restricting the filament and completely detaching itself during the end of the print.
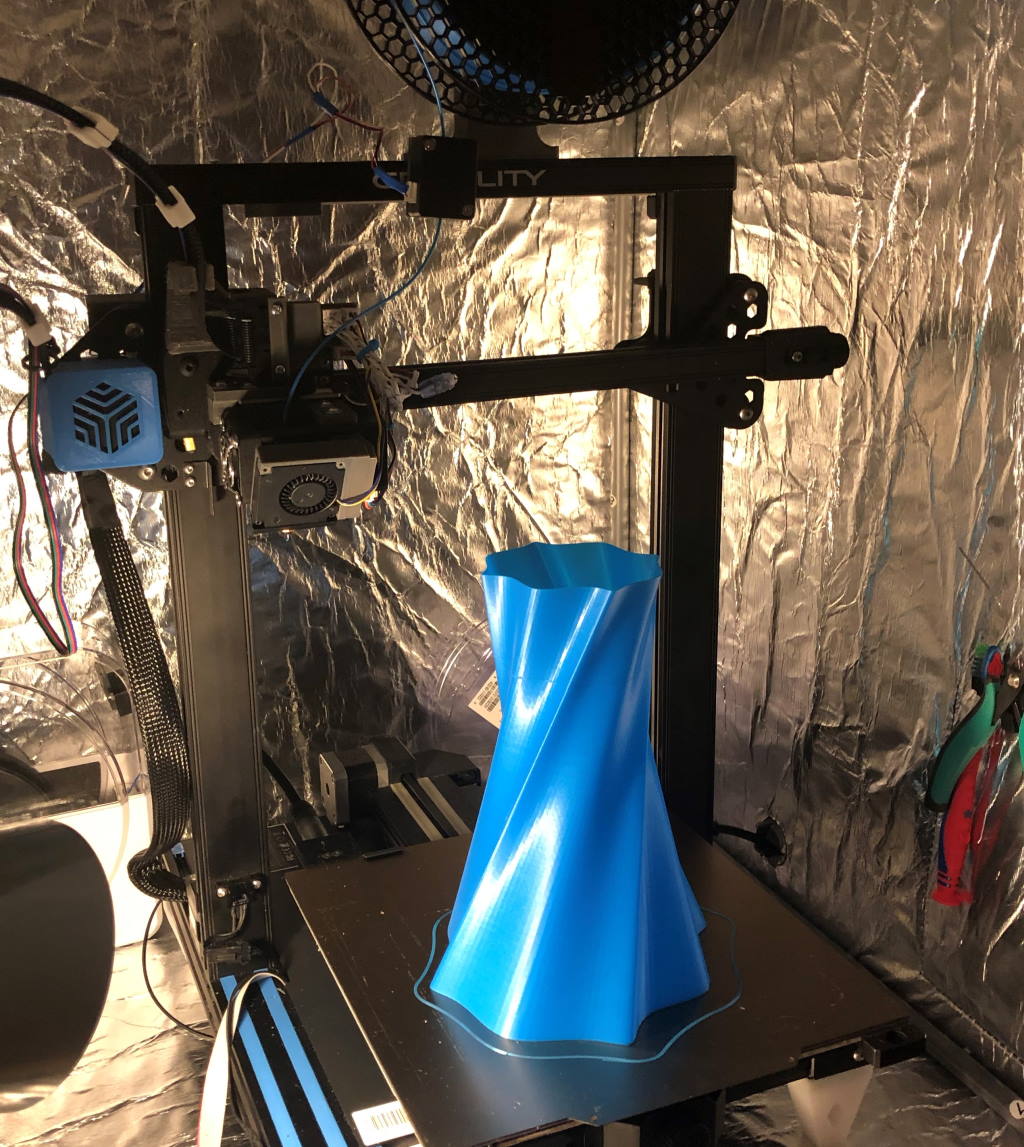
 Another vase, printed in Prusament PLA Azure Blue. This vase is due to the overhangs, thickness and desired to have it water tight, actually not printed in vase mode and requires retractions and travels.
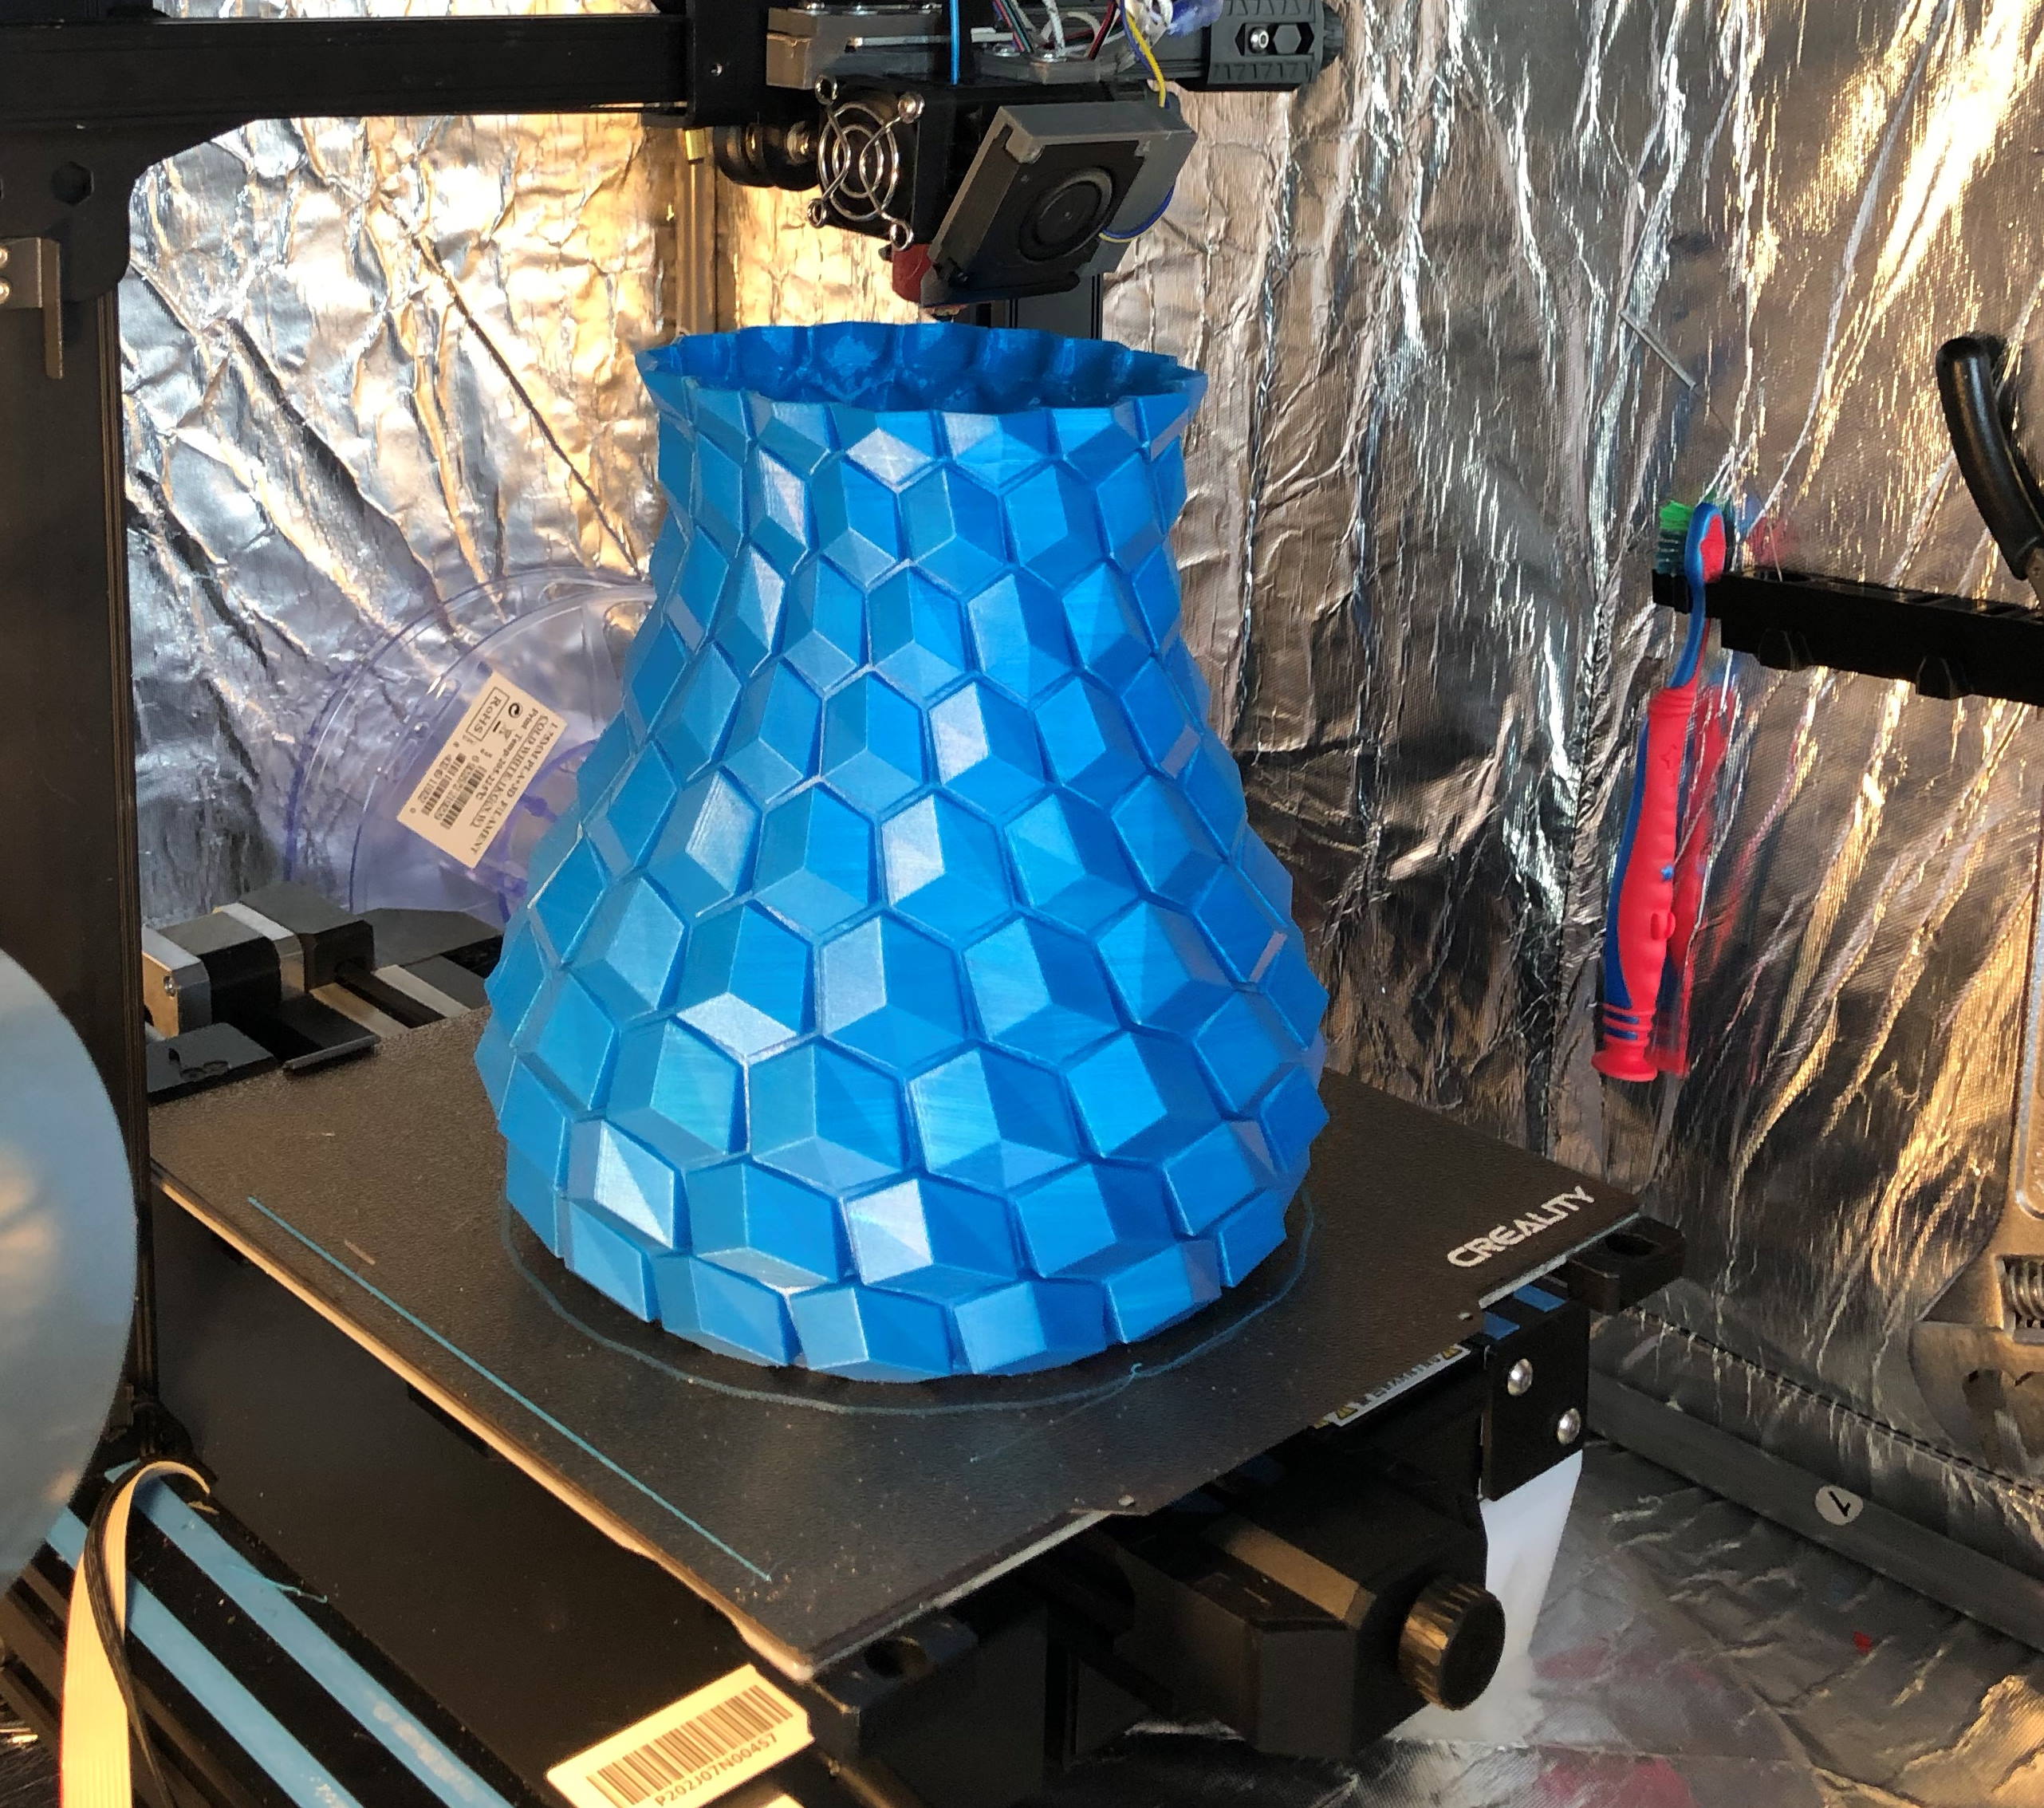
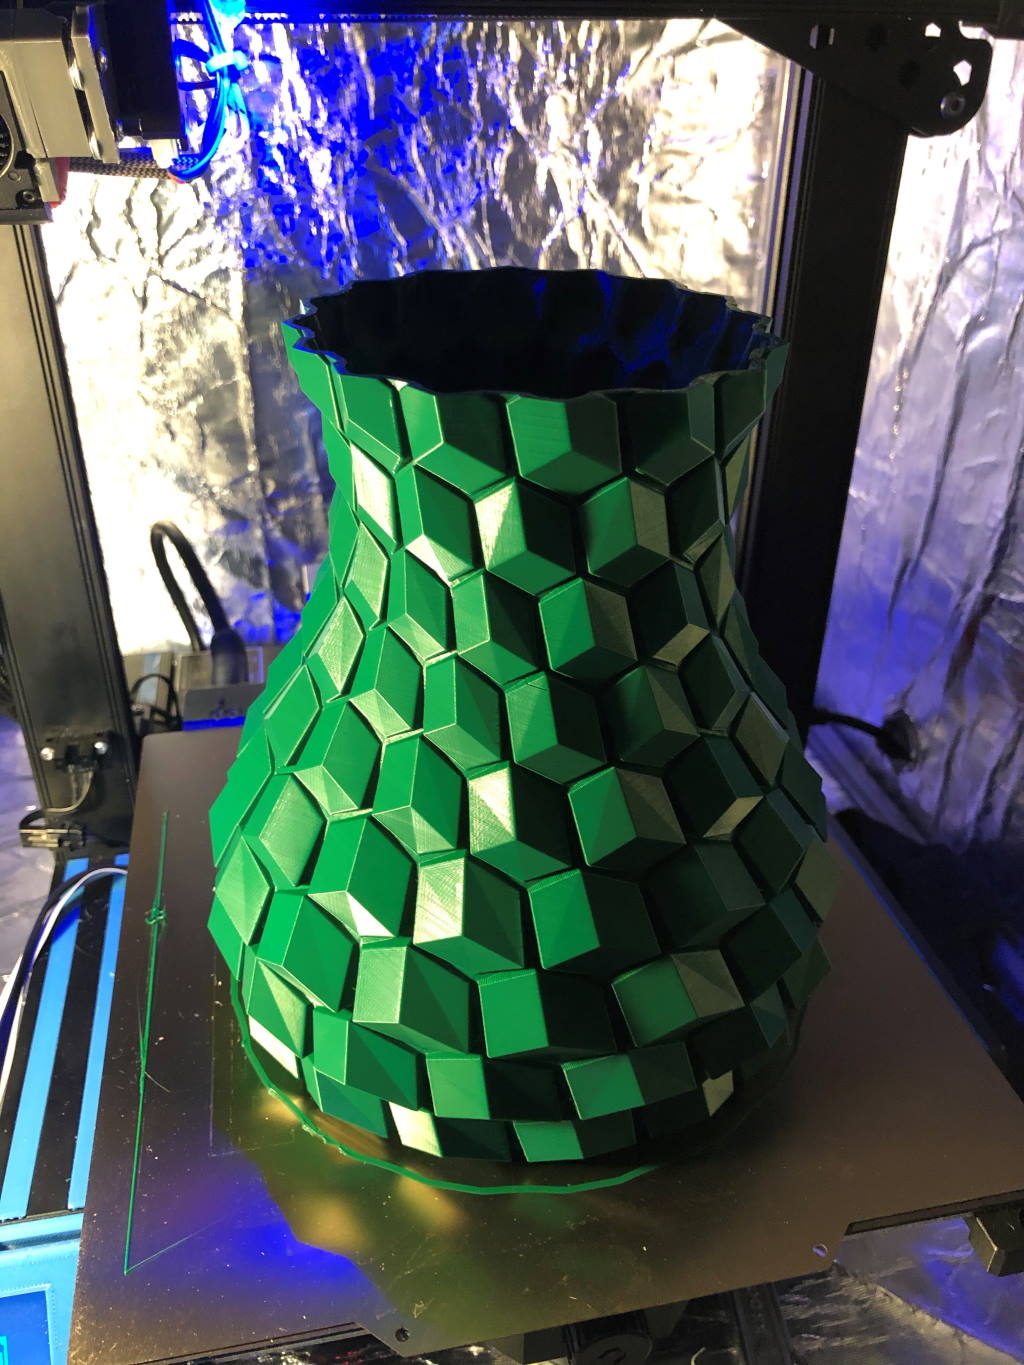 The same vase printed in Polaroid Green Premium PLA.
Hairy unicorn
My daughter loves unicorns, so I printed the hairy unicorn in SUNLU silk filament.
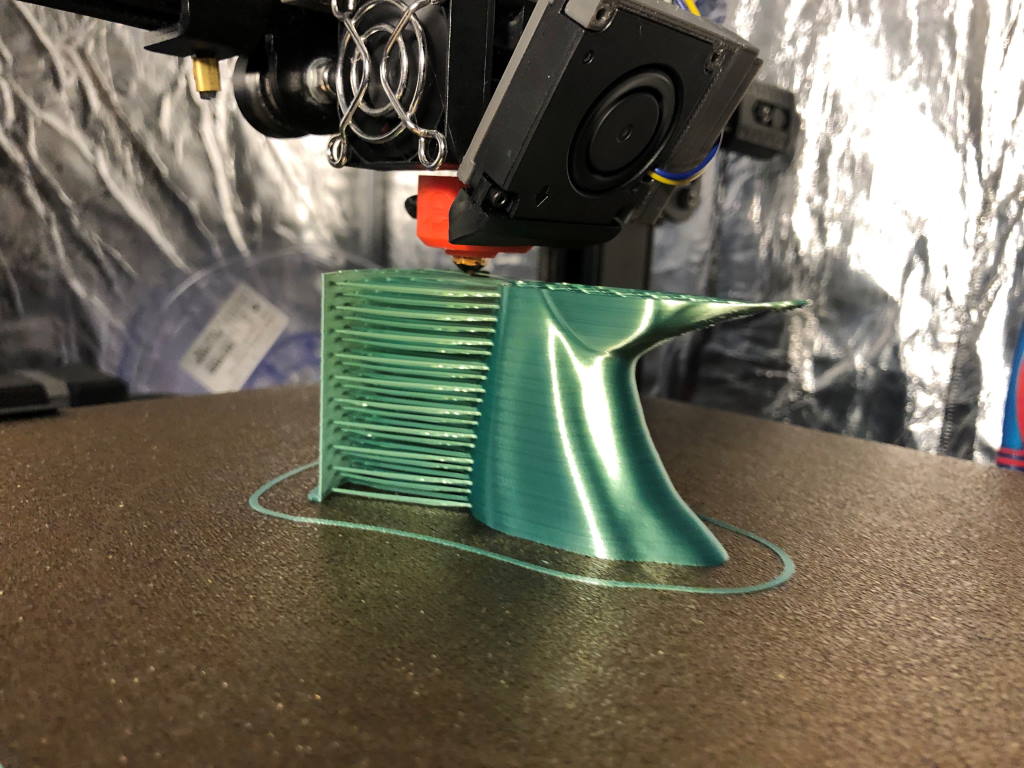 This print works by bridging filament to a wall.
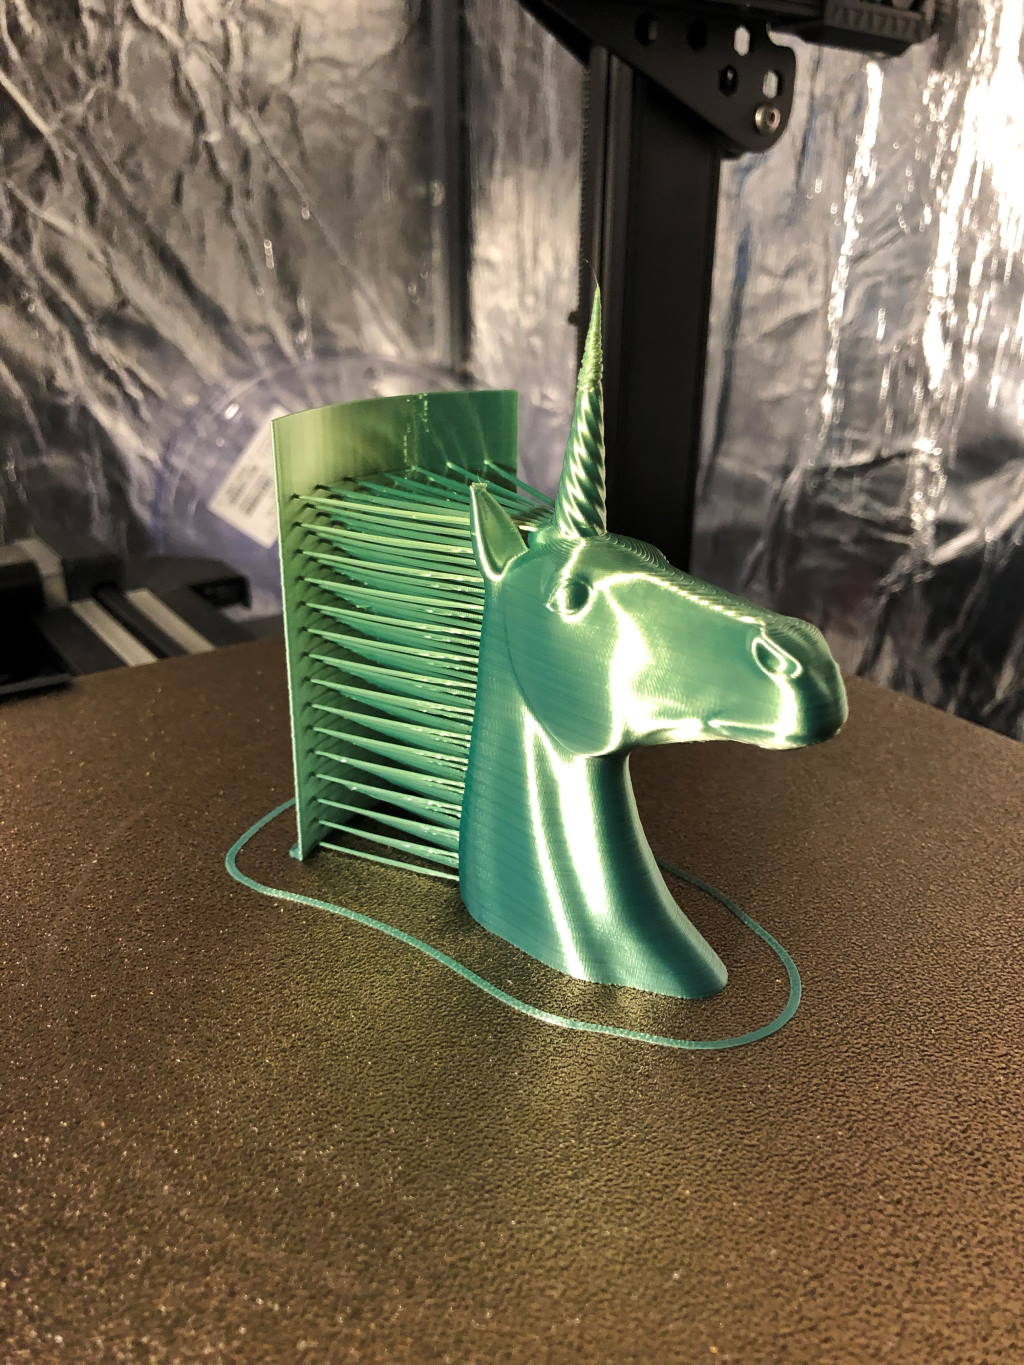 After printing the wall with the “hairs” needs to be removed.
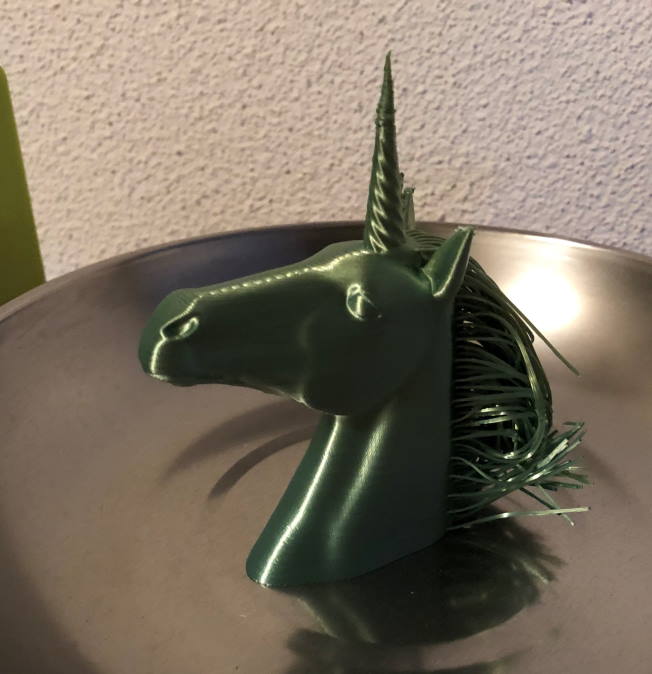 The finished print, after softening the hair in hot water. My part cooling solution needed some improvements - the thin unicorn tip has some melting artifacts.
Unicorn bust
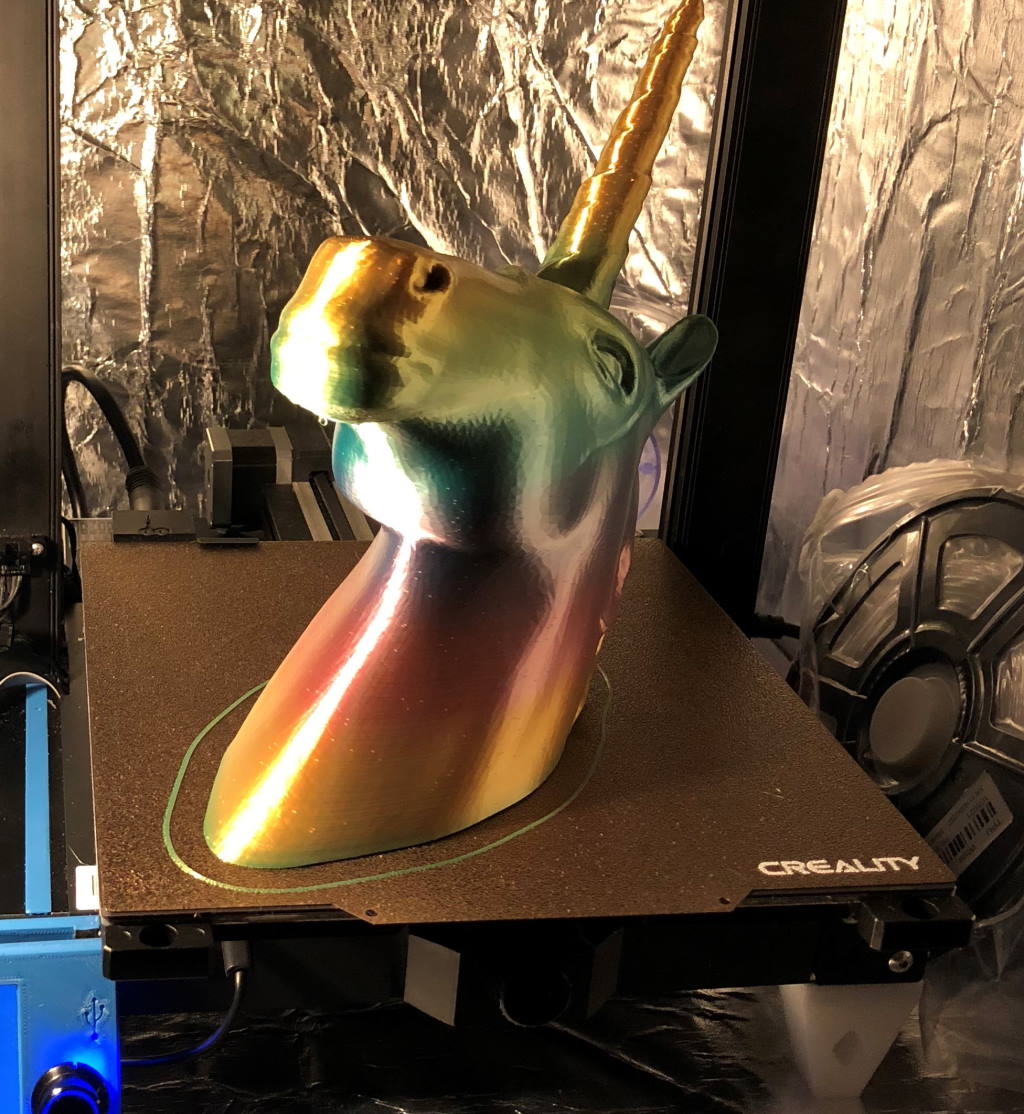 Another unicorn - printed in SUNLU rainbow silk PLA
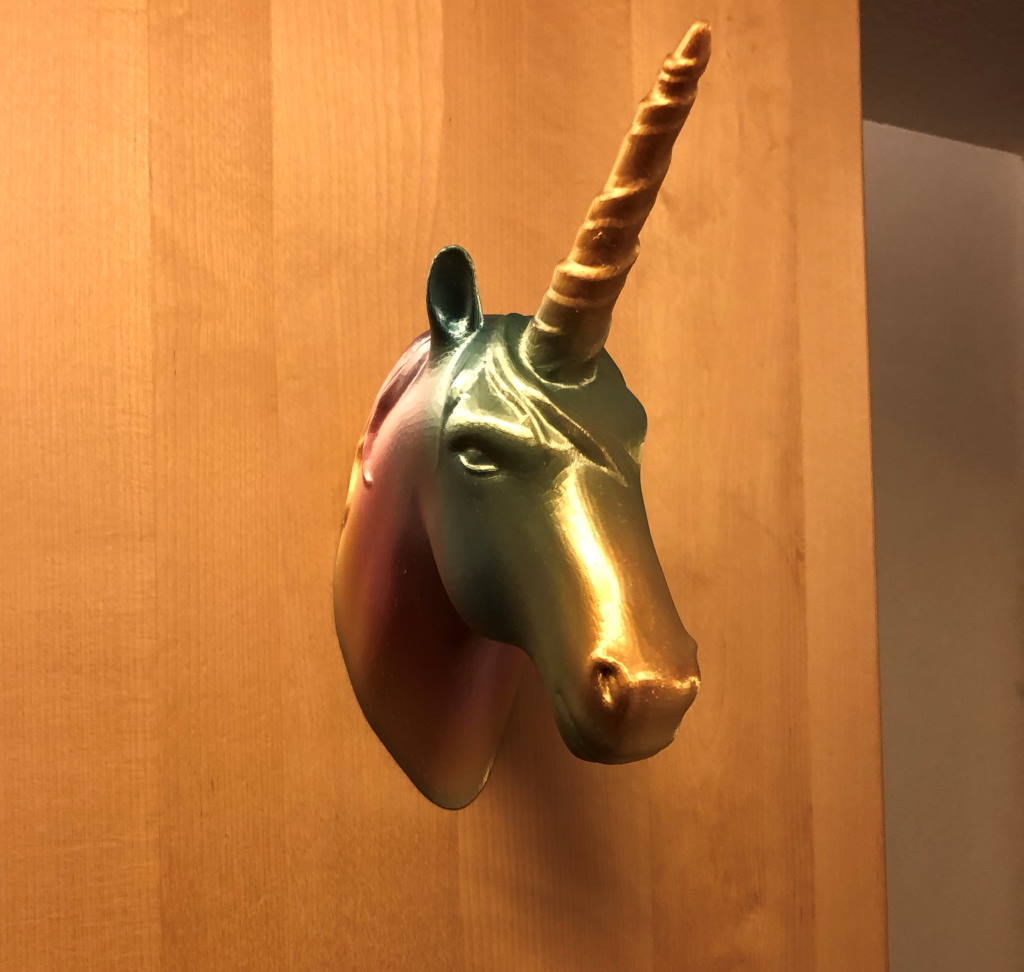 The unicorn mounted
Accuracy tests
I also printed some accuracy tests to see how far I could push the direct drive assembly.
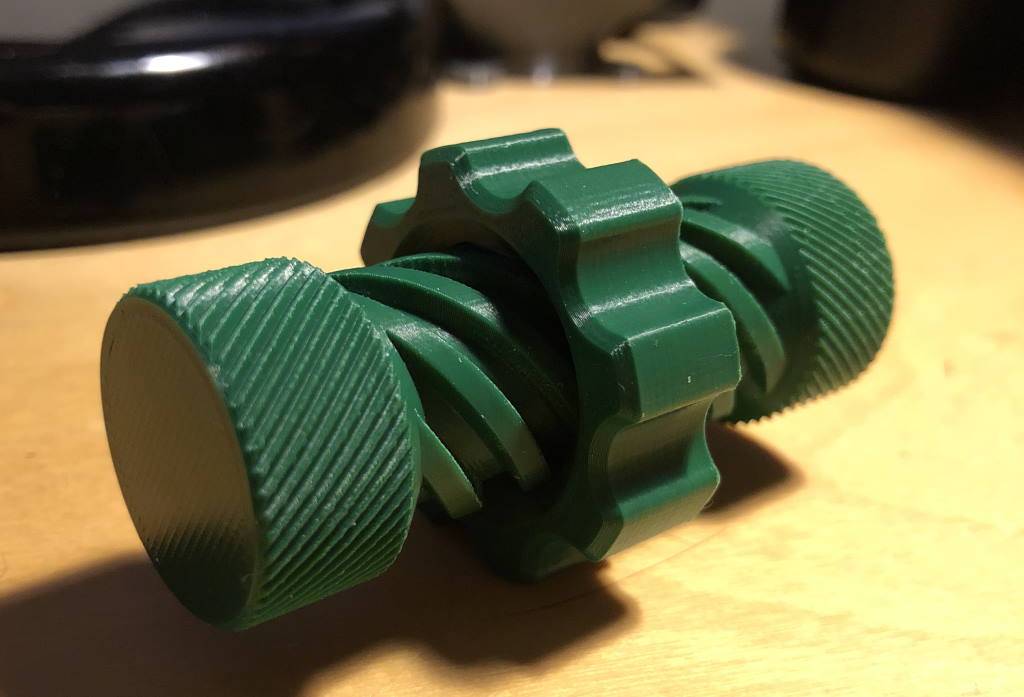
 The Sunshine Print-in-Place V-Twin Engine benchmark. The engine is able to turn after breaking it free.
 The Multi-Start Thread Screw With Trapped Nut with 0.4mm tolerance. Somehow the 0.2m clearance version one got stuck - but I suspect it is 0.2mm clearance in diameter and not between the lines.
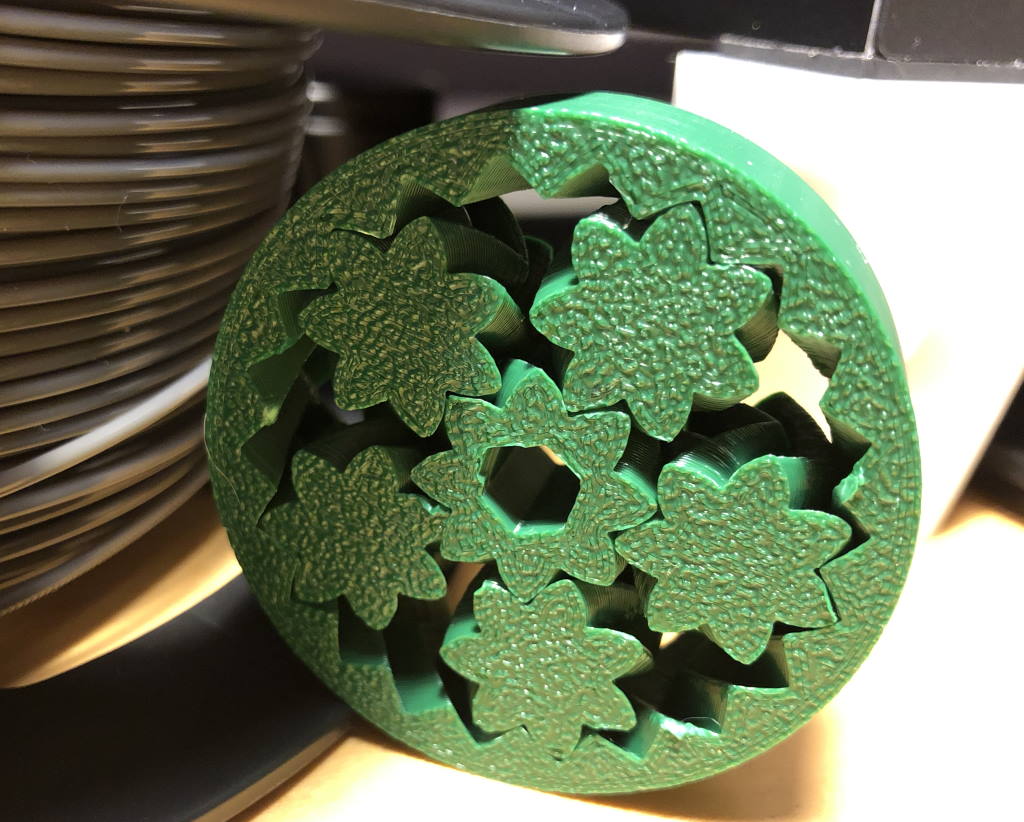 This gear bearing at 0.15mm tolerance came out fine though and I’m able to turn this one just fine.
Pro’s and cons
Pro’s:
- It is light and that probably resulted in that I didn’t need to change anything regarding print speeds or accelerations.
- It is designed so it is easy to mount and easy to maintain.
- TPU printing works very well and can be done at PLA printing speeds.
- Comes complete with everything needed to mount it on most 3D printers.
- Nozzle swapping is made easy.
- Default hot-end cooling fan is very silent.
- Heat break is upgradable to an all-metal version for higher-temperature filaments.
- The default PTFE lined heat-break has Capricorn inside.
Cons:
- TPU can jam when your Z-offset is far too low.
- One handed nozzle swapping is not possible.
- There is no tensioning screw for the extruder mechanism.
Other thoughts:
- There is no part cooling fan solution delivered with the extruder. You can reuse your current fans and print a mount.
- The extruder comes with a 0.4mm UM2-style nozzle with a E3D V6-style thread. Your existing nozzles may not be long enough and you may need to buy new nozzles.
- There is no thermal paste included in the kit - though I didn’t find it necessary because the heat transfer seems to be fine.
- For all filaments 0.5mm retraction or even less seems to be the sweet spot.
Conclusion
To come back to the question I started this review with: Is this direct drive a direct drive without compromises? I’d definitely say so. It has been optimized for weight and that shows: I was able to mount it and I didn’t need to change any accelerations nor printing speeds. If you think about it that on my particular printer this direct drive is suspended on a small piece of metal and not on the rigid X-carriage itself, that makes it even more impressive.
Although it didn’t benefit me much (due to my particular printers design), the BIQU H2 comes complete with all the parts to wire it to a regular Ender 3-style printer.
If you do have some custom cable connectors on your printer it is a little bit more involved, but you’d have to bite the bullet some time if you’d like to change the stock hotend.
For more pictures check out my Creality CR-6 SE mounting kit for the DD and initial unboxing and first impressions.
Update 23-03-2021
I’ve had multiple incidents now by which filament jams in the extruder. While resolvable, I suspect the non-adjustable tension might be the cause. In addition I noticed that I had an increasingly hard time loading filament lately.
Additionally, when disassembling the BIQU H2, and attempting to replace remove the heat break to check for blockages, I noticed one of the grub screws was completely stripped. I won’t be able to get it out because it is buried in the heat sink. For this reason I’ve decided to replace the H2 with a E3D Hemera.
This all said, BIQU did make changes to the manufacturing process. My dad recently purchased a H2, and many of the shortcomings have been resolved. Improvements have also been made: the stepper motor can be removed and problems with the gears some other reviewers found have also been resolved.
Update: BIQU has released a v2.0 revision of the extruder.
Where to buy
The BIQU H2 can be purchased on the official BigTreeTech website. If you like a seller closer to home, 3DJAKE has the BIQU H2 in stock as well.
For higher-temperature filaments the all-metal throat can be purchased from BigTreeTech directly.
What are your thoughts?