Unboxing a Creality Wifi Box and how to install Octoprint on it!
Earlier I’ve demonstrated how you can protect your network by shielding it from cloud-only devices like the Creality Wifi Box. However, you can also unlock the full potential of your Creality Wifi Box by installing the well-known remote printing solution Octoprint. Let’s unbox the Creality Wifi Box and see how it works!
Unboxing the Creality Wifi Box
The Creality Wifi Box comes in a white box with Creality’s motto on it.
 “Create Reality - Achieve Dreams”
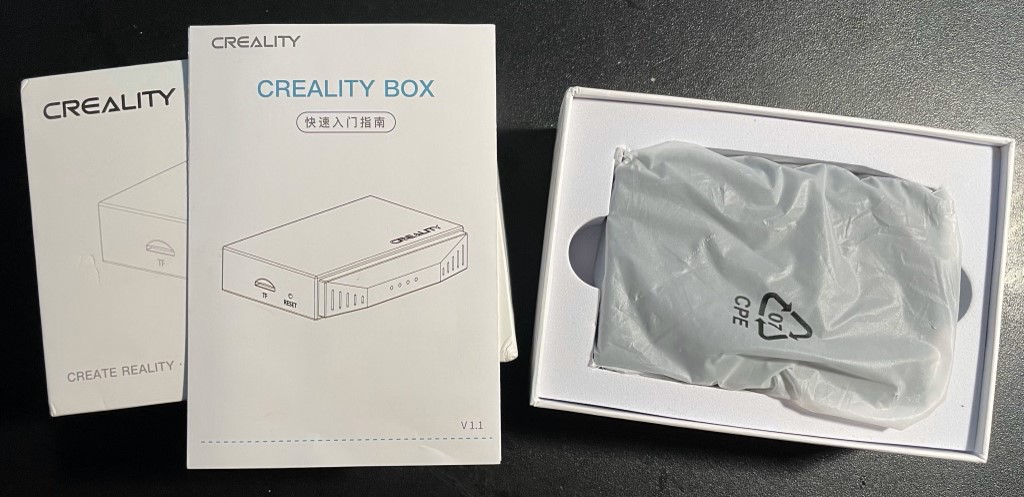 We’re greeted with a manual and the device itself in protective plastic
Removing the protective plastic, it reveals the Creality Wifi box.
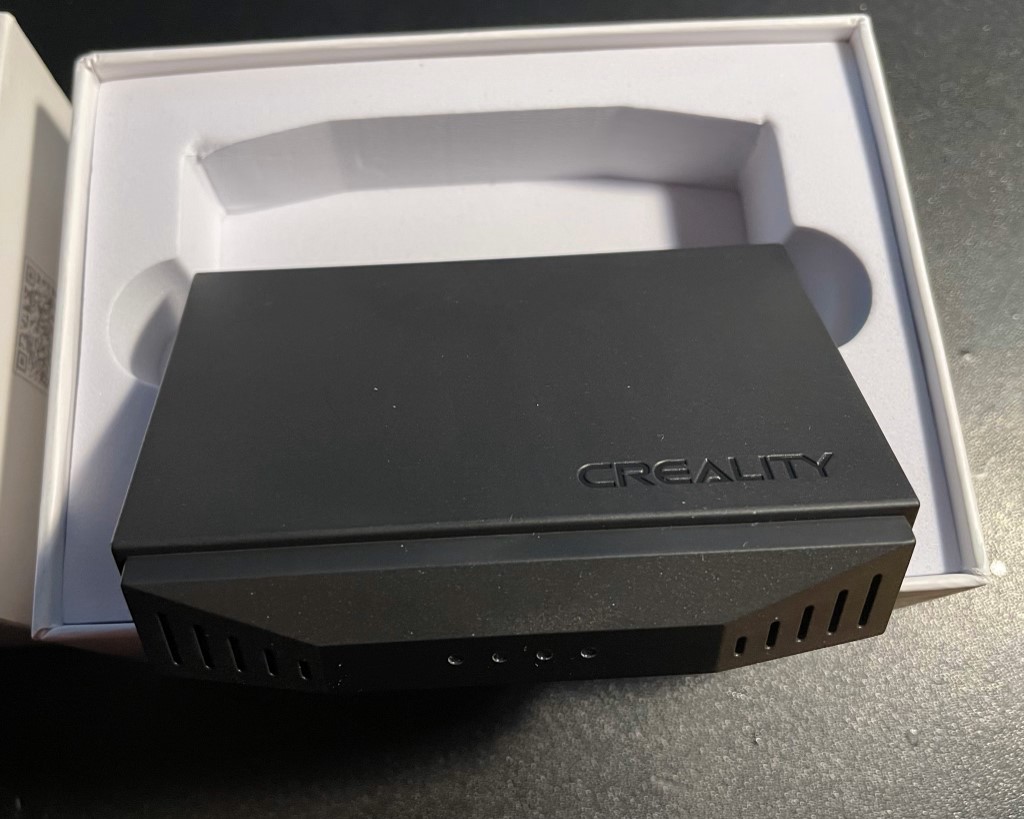 The front of the Creality Wifi Box has four status LEDs
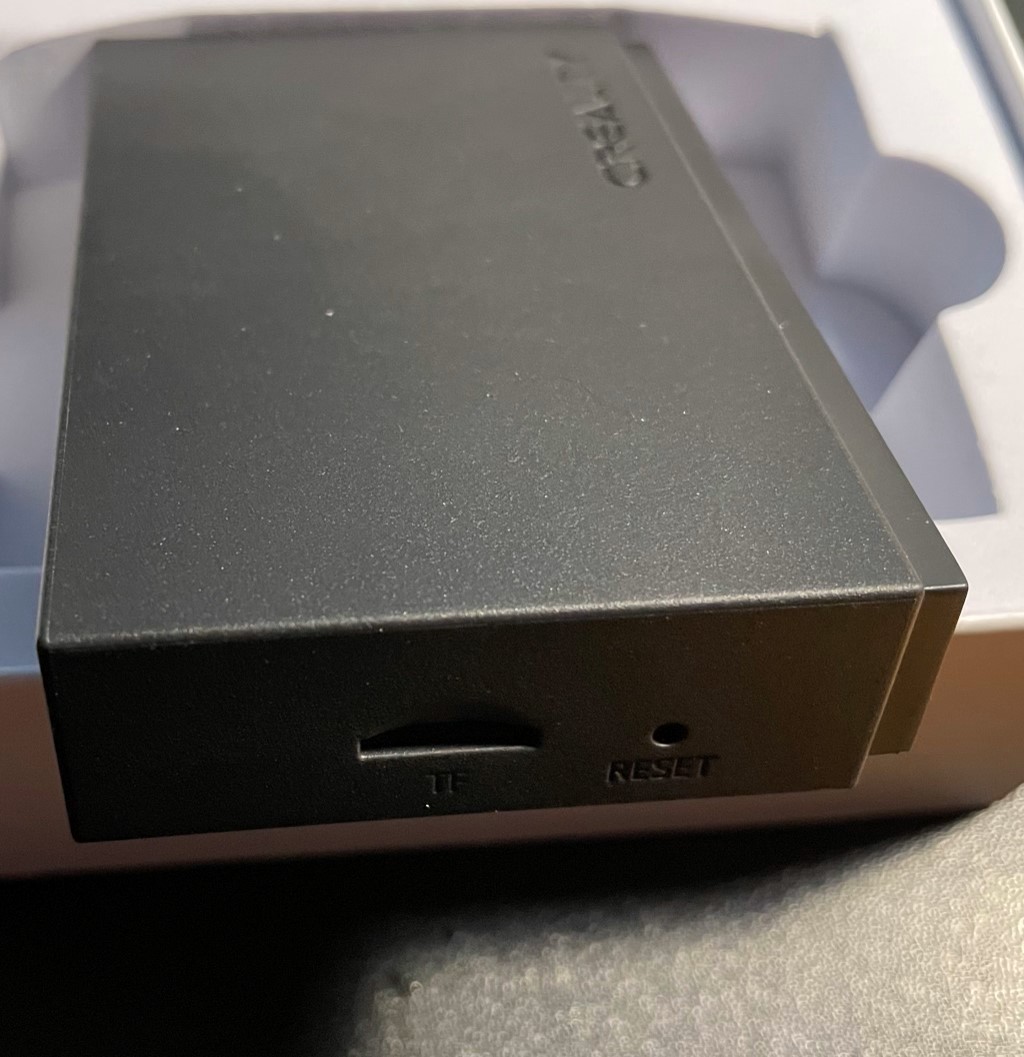 The side of the box has an microSD card slot and a reset button (reachable with a pen)
Though the Creality Wifi Box, regardless whether you run the default firmware or install OctoWRT on it, requires an microSD card - no microSD card has been delivered with it. You need to provide one by yourself.
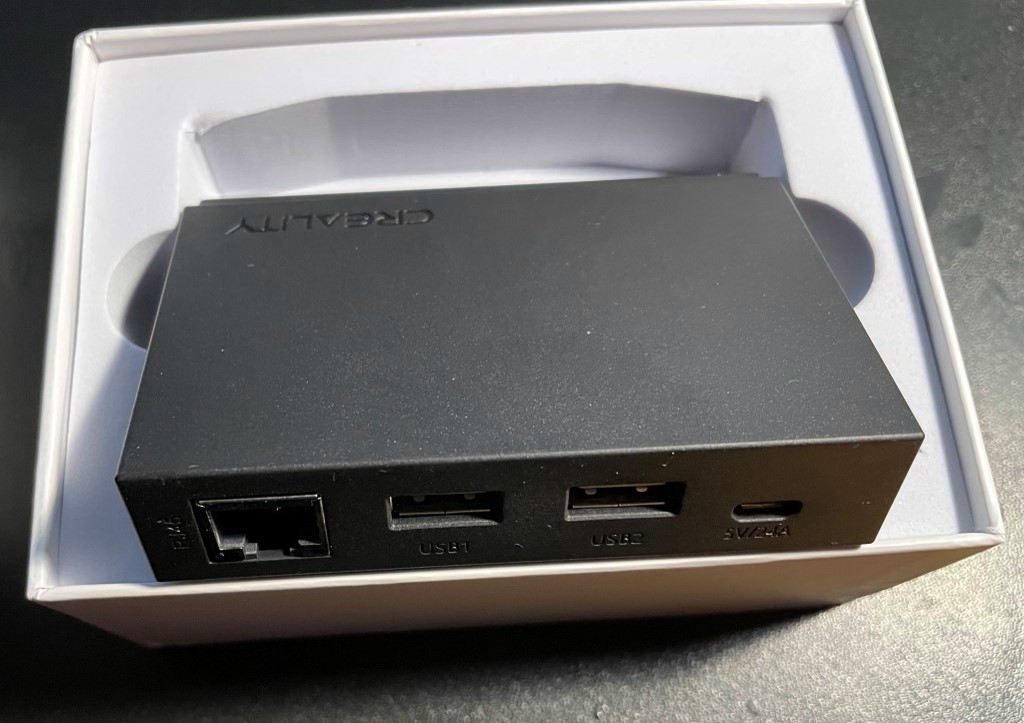 The back side contains room for a wired ethernet connection (if you don’t want or can’t use wifi). There is a USB connection for a printer, and one for an (optional) webcam.
On the default firmware only the Creality webcam and webcams with the same chipset are supported. Hopefully this will better with the alternative firmware we’Il flash!
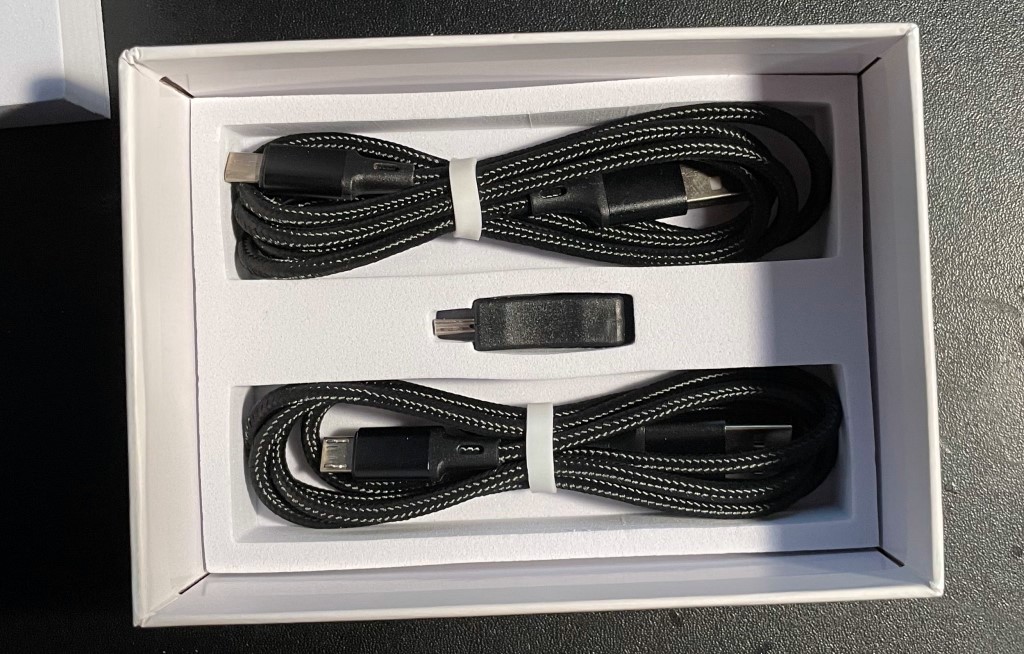
Finally, on the bottom layer of the box we find two micro-USB cables and one micro-USB to mini-USB adapter.
Installing Octoprint
Hackaday has published earlier a complete technical teardown on the Creality Wifi Box, and it took not long for solutions like OctoWRT to appear. OctoWRT is what we will use.
Update 2024-01-06: Unfortunately this particular fork of OctoWrt is no longer maintained, however, @shivajiva101 on Github contacted me. You can use his fork: https://github.com/shivajiva101/OctoWrt
Note: Octoprint is a supported solution on a Raspberry Pi 3 and higher - however it is not supported on low powered devices like the Creality Wifi Box. What does “supported” mean in this case? Well - if you have performance issues - or any issues that could relate to performance - then you can’t ask the authors to do something about it. It is all about managing expectations.
Preparing the SD card
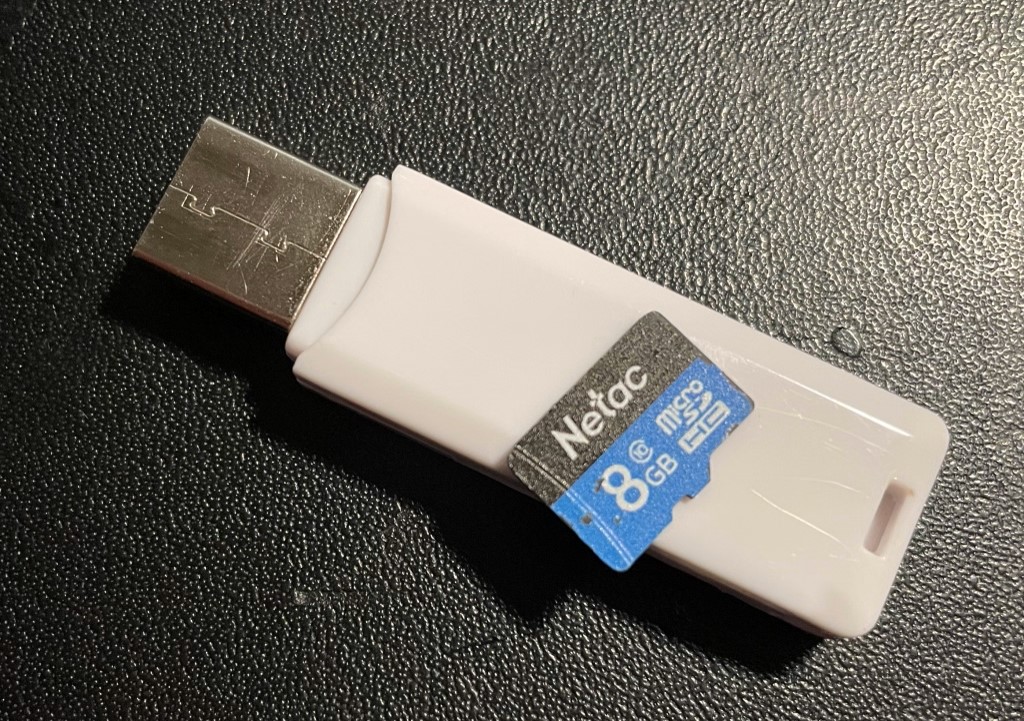
Take an SD card of at 4GB or more. I used an 8GB SD card. We’re going to format this card, and put the necessary files on.
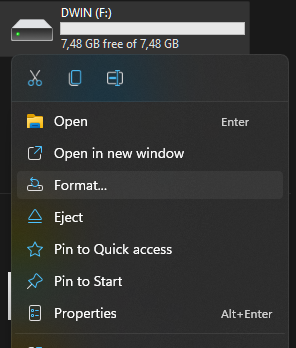
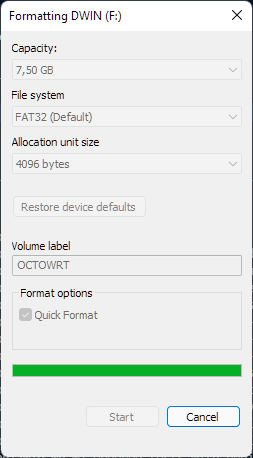
You need to format the microSD card as FAT32.
We’re first going to install OpenWRT, the base operating system, and then install Octoprint on top of it.
Go to the OctoWrt repository KlipperWRT repository and download one of the “*factory.bin” files and put it under a specific name - cxsw_update.tar.bz2 - on the SD card.
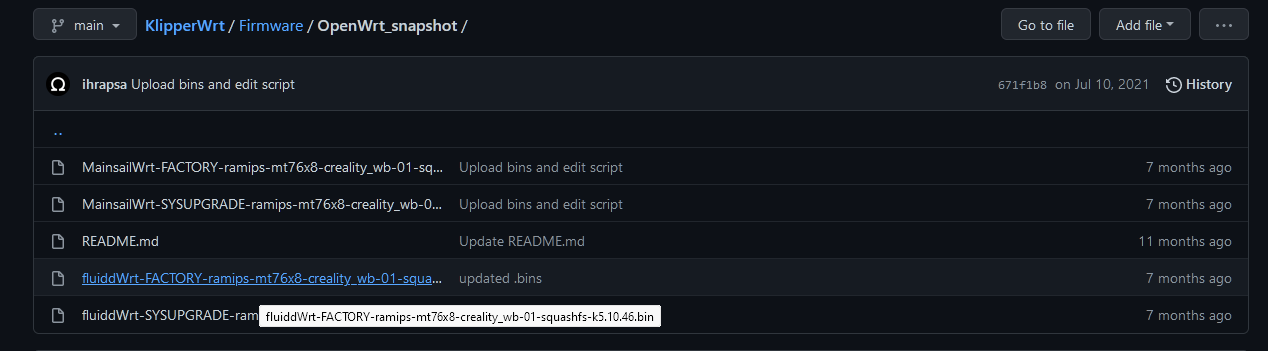 I took file
 fluiddWrt-FACTORY-ramips-mt76x8-creality_wb-01-squashfs-k5.10.46.bin for this installation
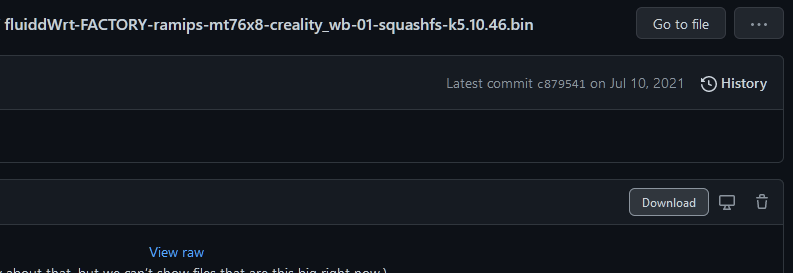 When you click on “Download” you get the file
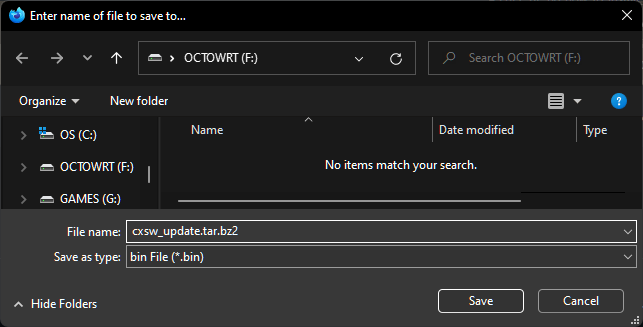 Just save it as
 cxsw_update.tar.bz2 directly on the SD card
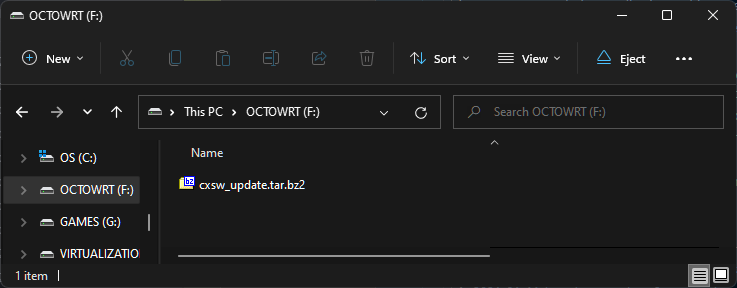 This is what you’Il end up with
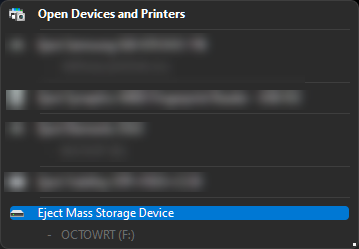 Don’t forget to do a save removal of the SD card
Now put the SD card into the Creality Wifi Box, put a network cable between it and your computer, and connect it to a stable USB power supply.
If you don’t have the option to connect through network adapter (for instance, buy a USB-to-ethernet adapter on your favorite webshop) or wifi - then you need to connect using a USB-to-TTL adapter via serial.
Configuring OpenWRT
The Creality Wifi Box is starting up and flashing the file we just put on the SD card. While it is doing that, we need to configure a temporary IP address on our computer. We can use Powershell for this.
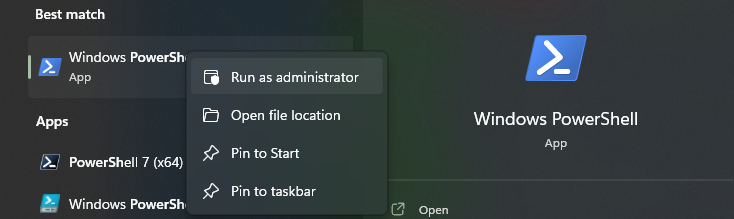 Open a Powershell command prompt as administrator
Once booted, the device will assume the IP address of 192.168.1.1 - so we need to assume an IP address that can communicate with it.
If you will connect over a network cable, read this. If you connect over wifi, read ahead.
We need to find the local network adapter interface index first. For this, type in Get-NetIPAddress and check which index is assigned to your ethernet adapter.
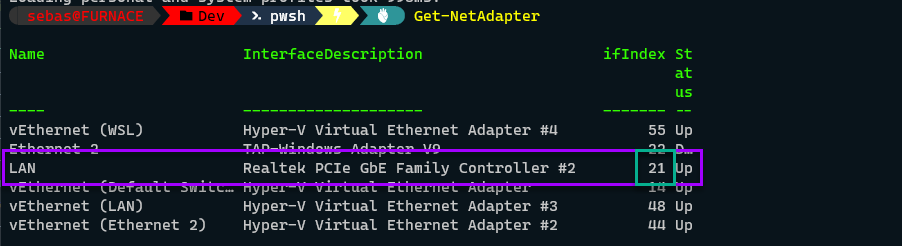 In my case the ethernet adapter is a Realtek, yours might be an Intel or Broadcom. The interface index of mine is _21_.
During the following steps you may temporarily loose internet connection, if you use the ethernet adapter to connect to internet too. If you don’t want that, you need to manually assign it the IP address and DNS servers it probably got assigned manually in your network (New-NetIPAddress –IPAddress 192.168.0.156 –PrefixLength 24 -InterfaceIndex 21 –SkipAsSource $False -DefaultGateway 192.168.0.1 in my case).
We will use this command to add an IP address, for my network adapter with index 21:
New-NetIPAddress –IPAddress 192.168.1.8 –PrefixLength 24 -InterfaceIndex 21 –SkipAsSource $False
This is the result I get:
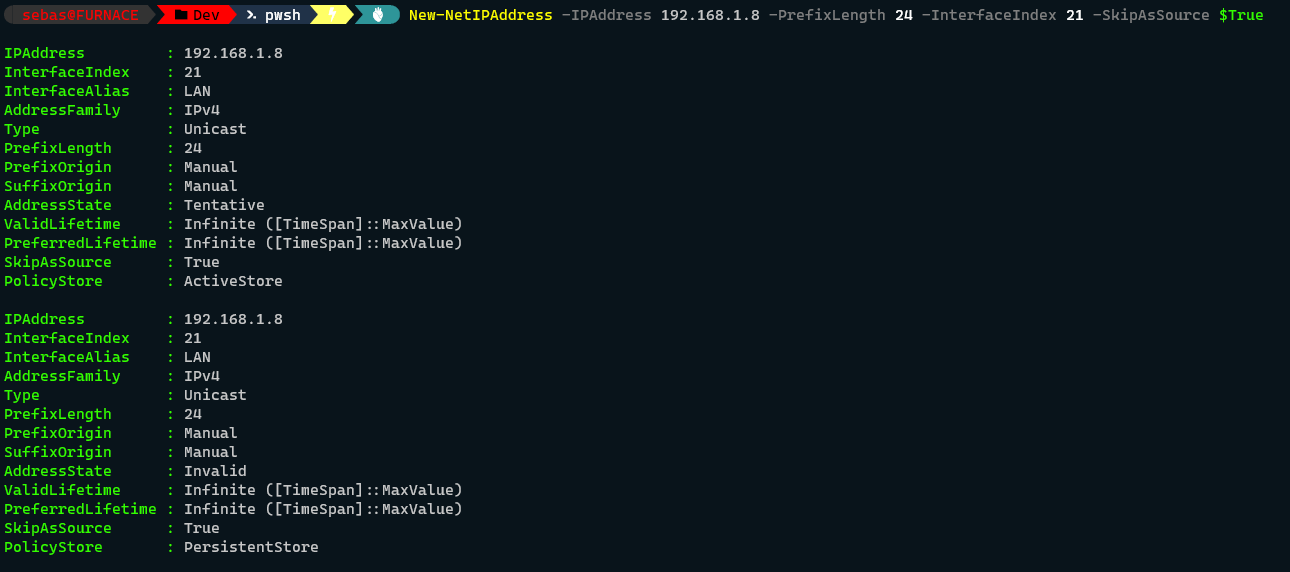 You should have no errors when you execute the command
You can confirm the IP address was properly assigned by running Get-NetIPAddress -InterfaceIndex 21 | Format-Table:
 The IP address of my local network is shown (so I still have internet) and the IP address I will use to connect to the Creality Wifi Box that is now reflashing itself
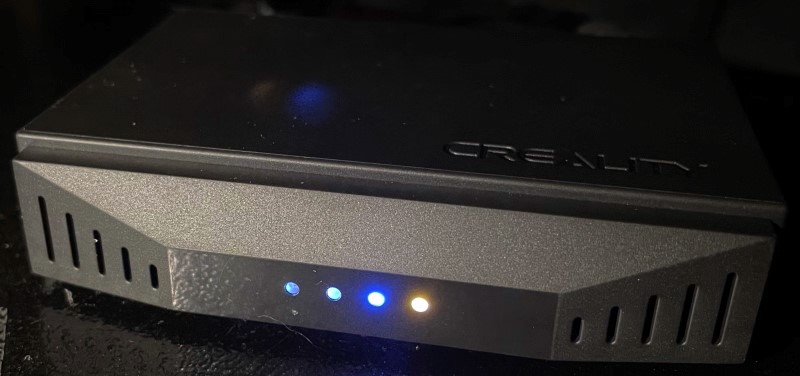 Blue and yellow lights will light up when the firmware is being flashed
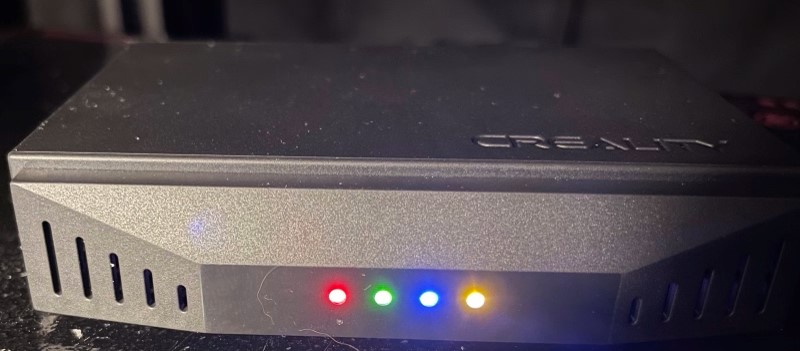 When the device is booting it with go full RGB
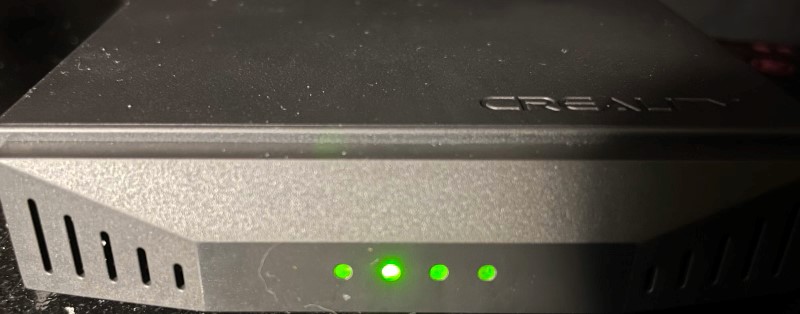 When ready, the device will show a single green light
Now, we can wait for the device to finish its process and make a connection. For this we can run ping -t 192.168.1.1 until we get a response or watch until the KlipperWrt access point comes up:
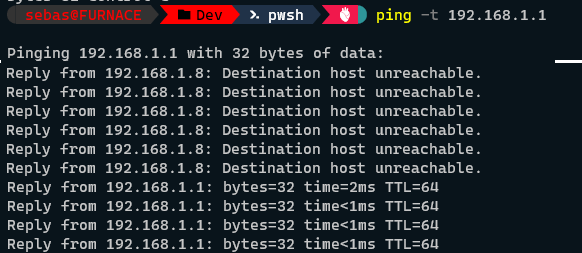 Response to pinging, eventually
 If you only have wifi capability, then you can connect to this _KlipperWrt_ open access point
Note: If you don’t get a response after 10 minutes, press the reset button on the device for 5 seconds and try again.
We can now visit OpenWRT on http://192.168.1.1:81/cgi-bin/luci/:
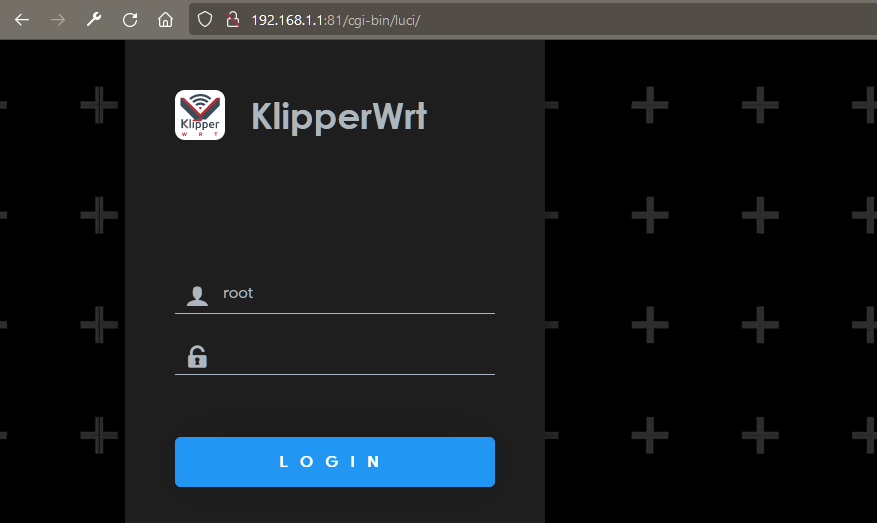 Make sure you visit by
 http and not https
Log in by using username “root” and no password (empty). You’re greeted with a status page.’
 Don’t forget to change the empty password to something secure eventually!
Connecting the device to your wired ethernet
If you will connect your device over ethernet: We will let the device ask for an IP address of your home network.
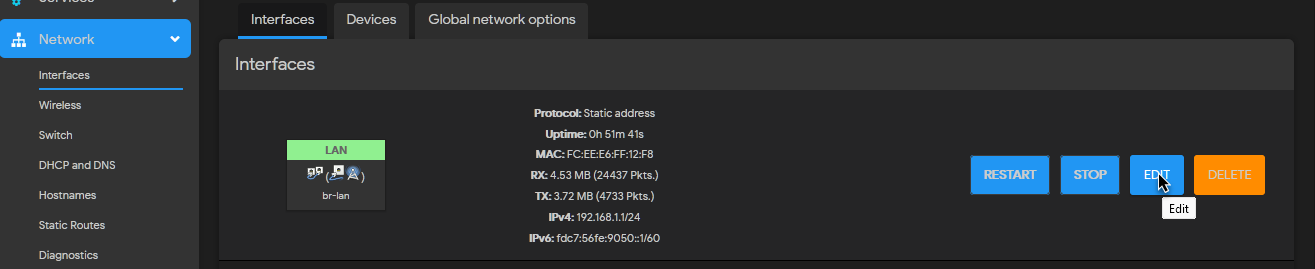 Go to the interfaces page, and edit the LAN interface
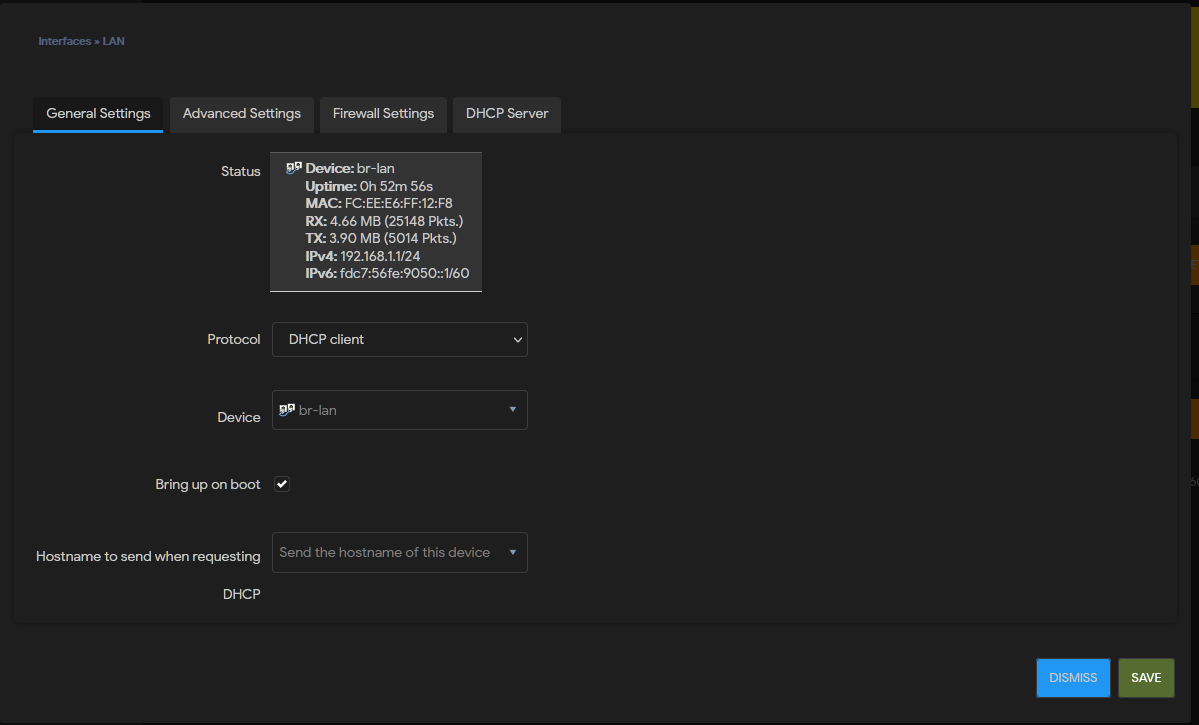 Select “DHCP client” and confirm “Switch protocols?”, and save
It will ask for an IP address at your router and show up.
 The changes will be applied and you will soon be able to see the device appear on your network
Visit your router to see which DHCP leases have been taken:
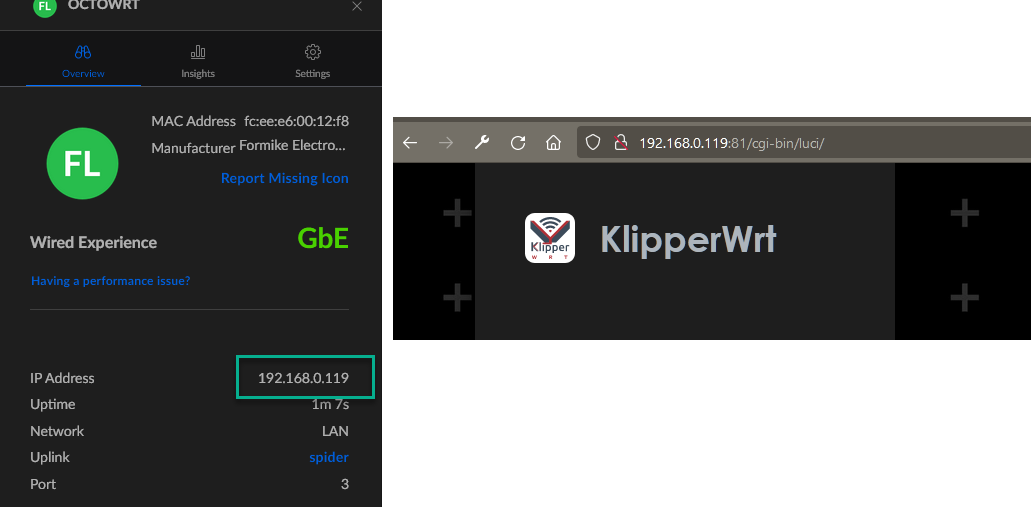 In my case I will now be able to visit the device on IP address 192.168.0.119
Connecting the device to your wifi network
This needs a little bit of different steps. We will link the device to the wireless network and let it ask for an IP address.
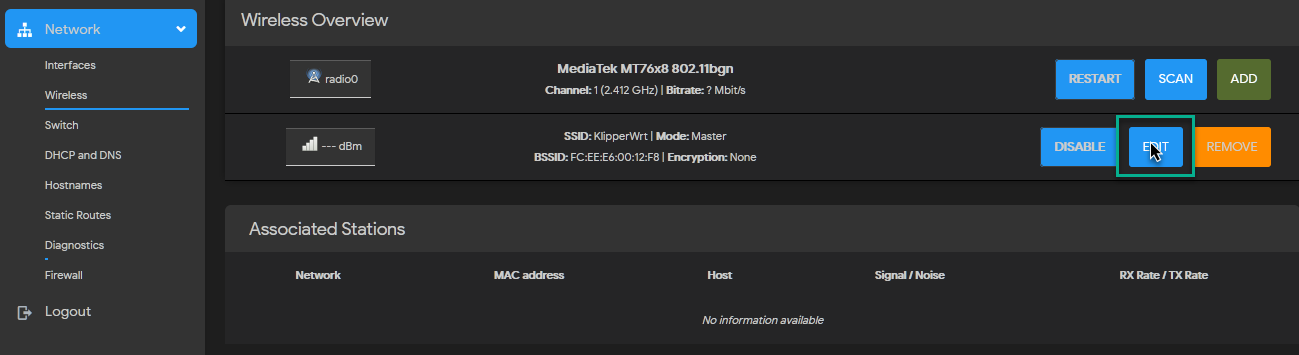 Go to the wireless page and edit the existing KlipperWRT network
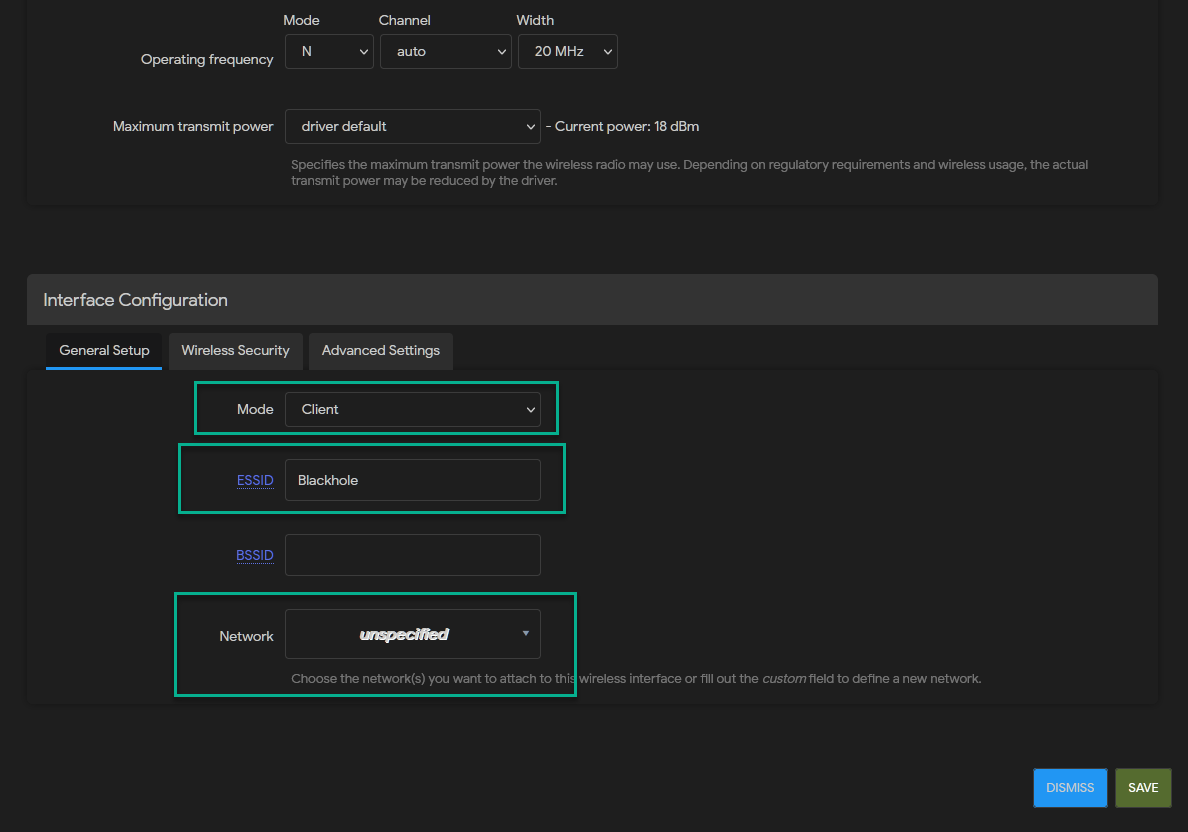 Set it up as an wireless client to your network
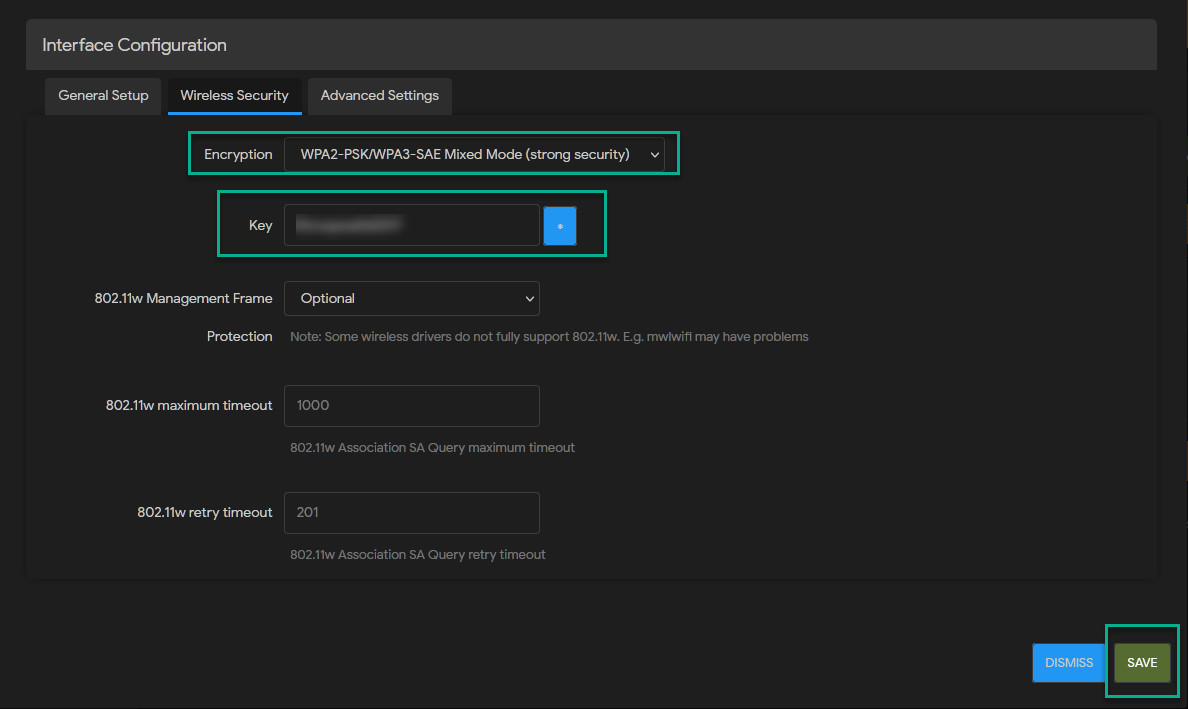 Select the wireless security your network uses, and enter the wireless password
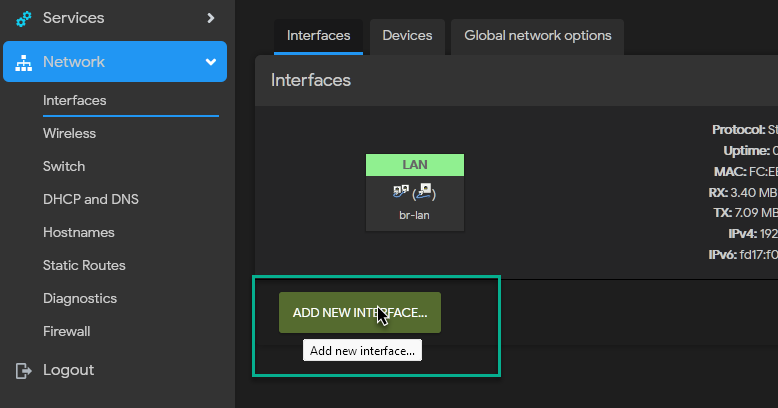 On the interfaces tab add a new interface
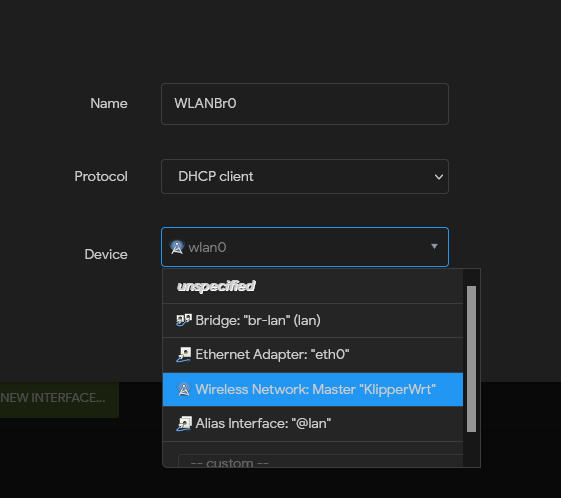 Enter the details and connect it to the wireless interface that for now yet says “KlipperWRT”
After you click save, the interface will refresh and you need to reselect the device.
 Reselect the device, and enter a hostname so you will be able to find the device later on. Click the save button.
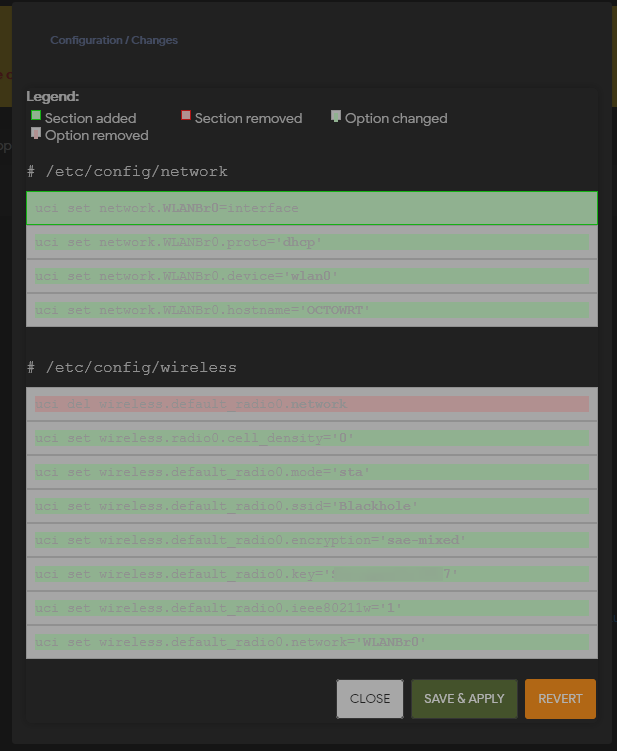 When you click “Save & apply” on the main page, you should see something similar to this. Confirm it.
The changes will be applied and you will soon be able to see the device appear on your network
Visit your router to see which DHCP leases have been taken:
In my case I will now be able to visit the device on IP address 192.168.0.119
With a proper connection set up, we can now focus on setting up OctoWRT itself.
Connecting to a command prompt
When you’ve found the IP address, you can connect over the ssh protocol. For this you can simply use the command prompt on Windows 10 (type in ssh root@ip-address) or download PuTTY.
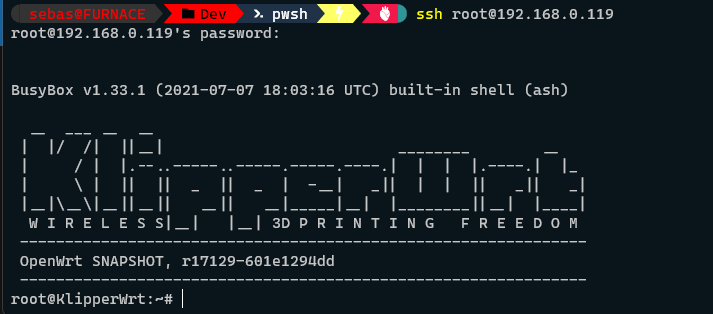 Connected over SSH!
Preparing the system
Octoprint runs on Python and needs a few other dependencies to run. We’re going to install these - but we must first prepare the system. For this we must modify the feeds the opkg package manager gets it data from.
First back up the existing the existing configuration files of opkg:
mv /etc/opkg/distfeeds.conf /etc/opkg/distfeeds.conf.bak;
mv /etc/opkg.conf /etc/opkg.conf.bak;
You can copy and paste the blocks below in one go, these define the new feeds:
cat << "EOF" > /etc/opkg/distfeeds.conf
src/gz openwrt_core https://downloads.openwrt.org/releases/21.02.1/targets/ramips/mt76x8/packages
src/gz openwrt_base https://downloads.openwrt.org/releases/21.02.1/packages/mipsel_24kc/base
src/gz openwrt_luci https://downloads.openwrt.org/releases/21.02.1/packages/mipsel_24kc/luci
src/gz openwrt_packages https://downloads.openwrt.org/releases/21.02.1/packages/mipsel_24kc/packages
src/gz openwrt_routing https://downloads.openwrt.org/releases/21.02.1/packages/mipsel_24kc/routing
src/gz openwrt_telephony https://downloads.openwrt.org/releases/21.02.1/packages/mipsel_24kc/telephony
EOF
cat << "EOF" > /etc/opkg.conf
dest root /
dest ram /tmp
lists_dir ext /var/opkg-lists
option overlay_root /overlay
#option check_signature
EOF
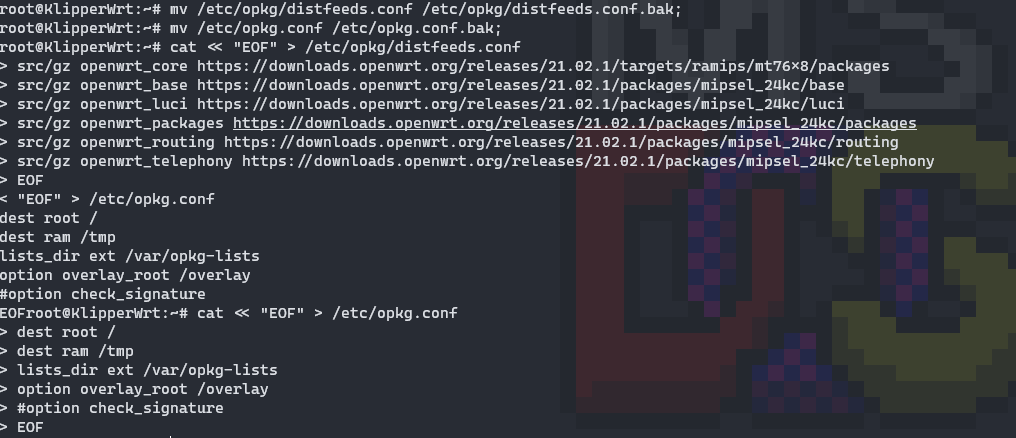 This is what it looks like when pasted in the terminal. If you like, you can confirm the contents by typing
 cat /etc/opkg.conf and cat /etc/opkg/distfeeds.conf. The “>” are added automatically when you paste it in the terminal.
Next, we will format the microSD card with proper partitioning.
cd /tmp
wget https://github.com/shivajiva101/OctoWrt/raw/main/scripts/1_format_extroot.sh
chmod +x 1_format_extroot.sh
./1_format_extroot.sh
This is how the output will look like:
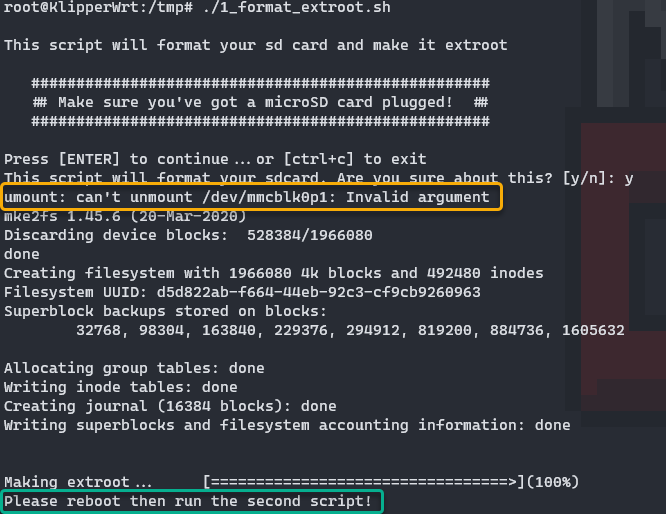 Ignore that error message highlighted in yellow - it’s fine! Note: this script will take a minute or so to execute.
Now let’s reboot, to be sure. Type reboot and confirm. You will loose the connection and need to watch the device coming online again. It will show a solid green LED when ready.
Now we’re going to make sure Octoprint has more memory to work with by enabling swap memory that uses the SD card as scratch space:
opkg update && opkg install swap-utils zram-swap
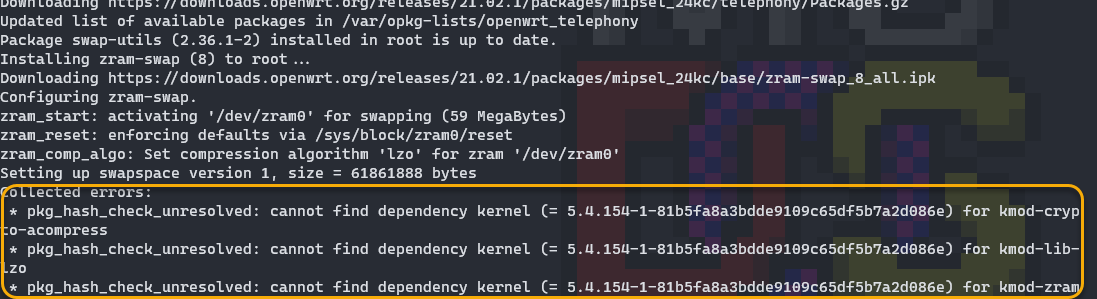 Don’t worry about the errors, the packages still got installed properly!
 By running
 opkg list-installed | grep -iE ".*(zram).*" you can confirm everything got installed
Now we’re going to enable swap on the SD card:
dd if=/dev/zero of=/overlay/swap.page bs=1M count=1024;
mkswap /overlay/swap.page;
swapon /overlay/swap.page;
mount -o remount,size=512M /tmp;
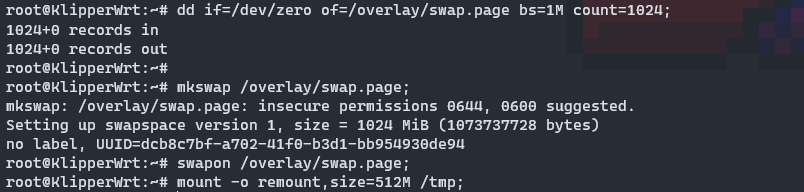 The first command will take a while to execute and show no output while it is working. Be patient!
We will also want the system to re-enable swap every reboot:
cat << "EOF" > /etc/rc.local
# Put your custom commands here that should be executed once
# the system init finished. By default this file does nothing.

## Activate the swap file on the SD card
swapon /overlay/swap.page

## Expand /tmp space
mount -o remount,size=512M /tmp
exit 0
EOF
Note: this might be a good chance to rename the system to something different than KlipperWrt, because we’re not installing Klipper!
uci set system.@system[0].hostname='OctoWrt'
uci commit system
/etc/init.d/system reload
Installing Octoprint
Finally we got our system set up! Let’s install Octoprint dependencies and itself!
opkg update
opkg install gcc make unzip htop wget-ssl git-http
opkg install v4l-utils mjpg-streamer-input-uvc mjpg-streamer-output-http mjpg-streamer-www
The above commands will install some dependencies. These will take a while to execute - but should execute without errors.
If you don’t have a webcam plugged in, you may see the following: /etc/init.d/mjpg-streamer: device '/dev/video0' does not exist.
Now let’s install Python 3. The last two lines will install a precompiled package that Octoprint needs.
opkg install python3 python3-pip python3-dev python3-psutil python3-netifaces python3-pillow
wget -O /tmp/python3-regex_2021-8-3_mipsel_24kc.ipk https://github.com/ihrapsa/OctoWrt/raw/main/packages/python3-regex_2021-8-3_mipsel_24kc.ipk
opkg install /tmp/python3-regex_2021-8-3_mipsel_24kc.ipk
The following upgrades the package manager. This command will take a while. It will give a warning about running as root, but you can ignore it.
pip install --upgrade setuptools
pip install wheel
pip install frozendict
pip install immutabledict
Let’s check what Octoprint is the most recent - 1.7.3 right now - and put the version number in this command:
pip install Octoprint==1.7.3
This command will obviously install the bulk of the data, and will certainly take a while. It hang a while on installing PyYAML for a while too but it did continue after 5~10 minutes.
For my piece of mind, I opened a second ssh session and ran htop to watch what happens:
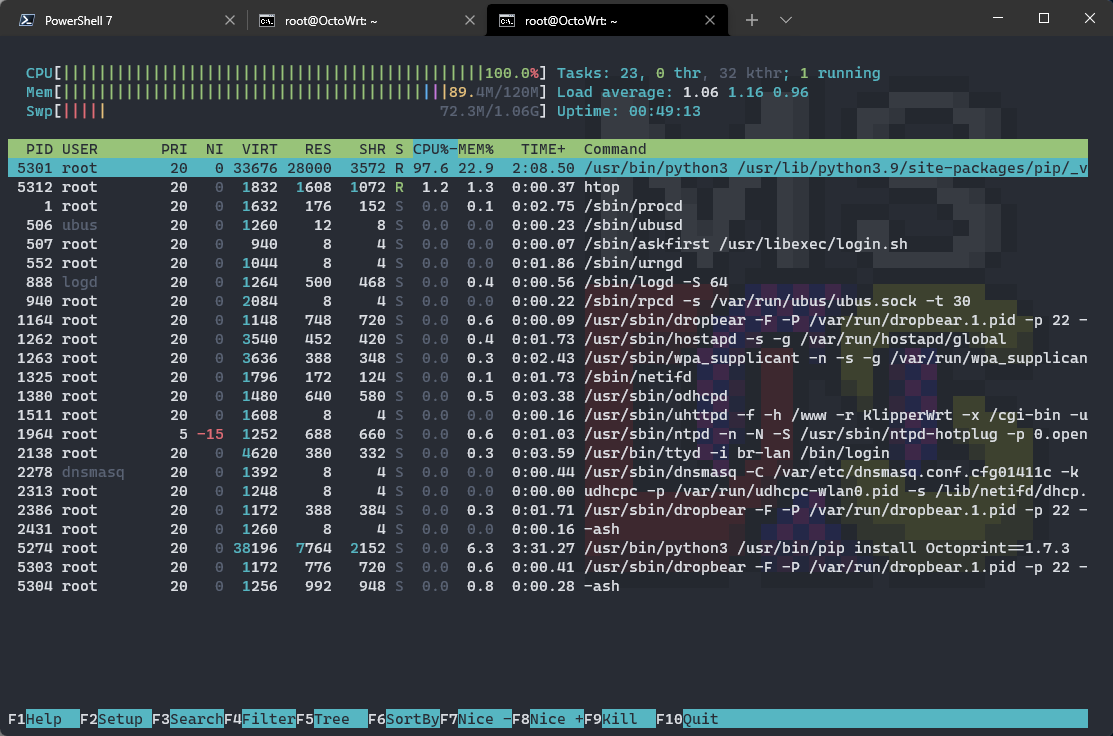 Watching that there was actually work being performed and the device did not freeze gave me some peace of mind: For this you can run
 htop
I ran into the following error about netifaces however:
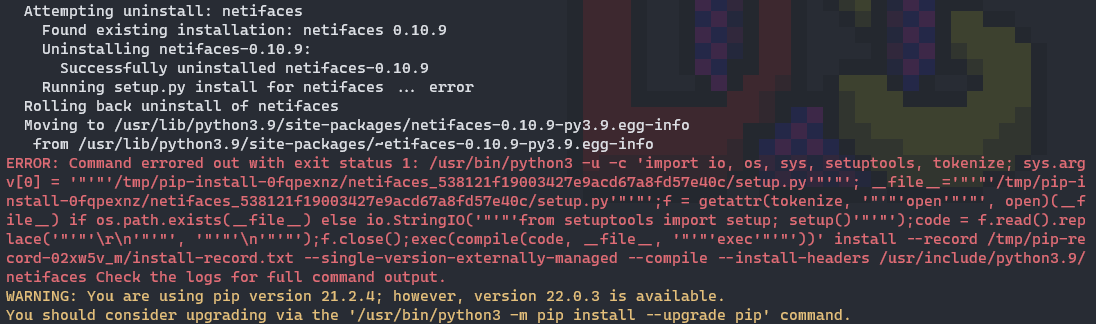 “Command errored out with exit status 1:” and “Running setup.py install for netifaces … error”
To get more information about this, you can re-run the command with the --verbose flag:
pip install Octoprint==1.7.3 --verbose
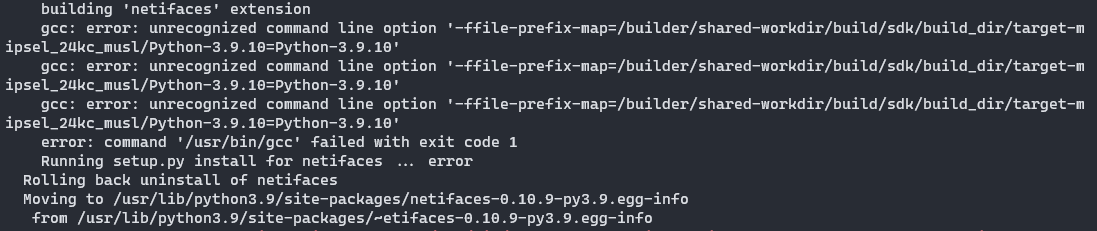 More information when running with the
 --verbose flag
Well, that gave more information! It says: gcc: error: unrecognized command line option '-ffile-prefix-map. Why? Well this option was introduced in gcc 8.0, and we run gcc 7.4.0.
GCC 8.0 is not yet available for the version of OpenWRT we run, so I had to cross compile the library on my own computer. With that done, I uploaded it to the OctoWrt issue and I could now also use it myself.
So, you only need to execute:
cd /tmp
wget https://github.com/ihrapsa/OctoWrt/files/8036126/python3-netifaces_0.11.0-1_mipsel_24kc.ipk.zip
unzip python3-netifaces_0.11.0-1_mipsel_24kc.ipk.zip
opkg install python3-netifaces_0.11.0-1_mipsel_24kc.ipk
ln -fs /usr/lib/libpython3.9.so /usr/lib/libpython3.7.so.1.0
And now we’re ready to install Octoprint:
pip install Octoprint==1.7.3 --verbose
And eventually:
 Success!
By copy/pasting this block, we will create a service that will automatically execute when the Creality Wifi Box boots:
cat << "EOF" > /etc/init.d/octoprint
#!/bin/sh /etc/rc.common
# Copyright (C) 2009-2014 OpenWrt.org
# Put this inside /etc/init.d/

START=91
STOP=10
USE_PROCD=1

start_service() {
    procd_open_instance
    procd_set_param command octoprint serve --iknowwhatimdoing
    procd_set_param respawn
    procd_set_param stdout 1
    procd_set_param stderr 1
    procd_close_instance
}
EOF
chmod +x /etc/init.d/octoprint
service octoprint enable
The above commands will run without any error or output.
Time to reboot! Run reboot.
You will lose connection, but you can watch with a command like ping -t [ip address here] when the device is booted.
Troubleshooting Octoprint startup
It may take quite some time, especially the first time, for Octoprint to initialize. You can log into Creality Wifi Box via ssh again, and run htop to see if anything is happening:
 htop is a task manager
In addition you can watch the log file - if it exists - via this command:
tail -n 1000 -f /.octoprint/logs/octoprint.log
If the process isn’t running or quickly dies, you can run octoprint serve --iknowwhatimdoing manually and see what the output is. When you’re done troubleshooting and Octoprint runs, you can press Ctrl+C to terminate.
Configuring Octoprint
When Octoprint is running and the box has had 5-10 minutes to do its thing, you should be able to visit it in your web browser:

192.168.0.119 is my IP address - but you also may be able to find it already on hostname:5000 or octoprint.local:5000
The first time after booting, when you’re visiting the user interface, it needs to build and cache it. This will take a while and you’Il see in the log something like this:
octoprint.server.util.flask.PreemptiveCache - INFO - Adding entry for / and {'path': '/', 'base_url': 'http://192.168.0.119:5000/', 'query_string': 'l10n=en', '_timestamp': 1644441437.925116, '_count': 1}
But eventually…
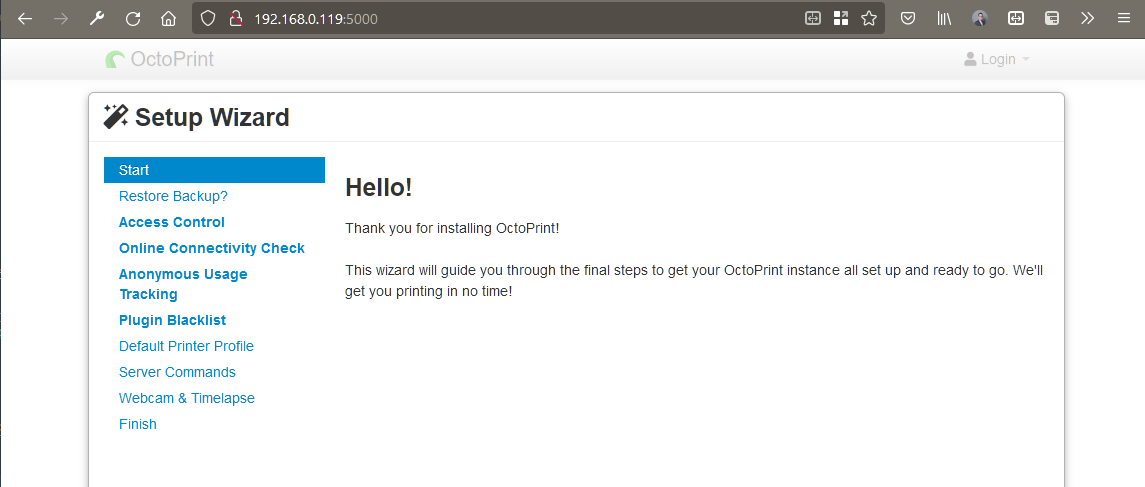 There it is! Now we can start the configuration.
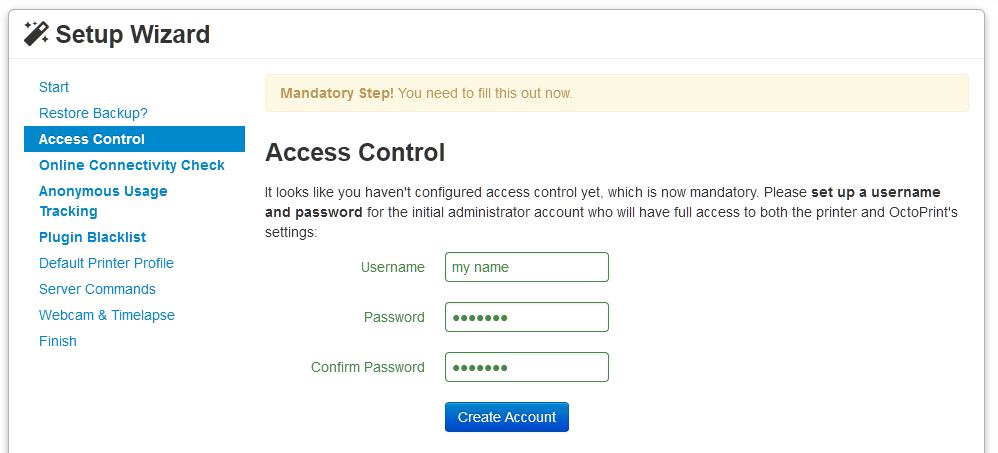 Set up an account
Complete the rest of the initial configuration wizard, patiently. The section where you specify the server commands is important:
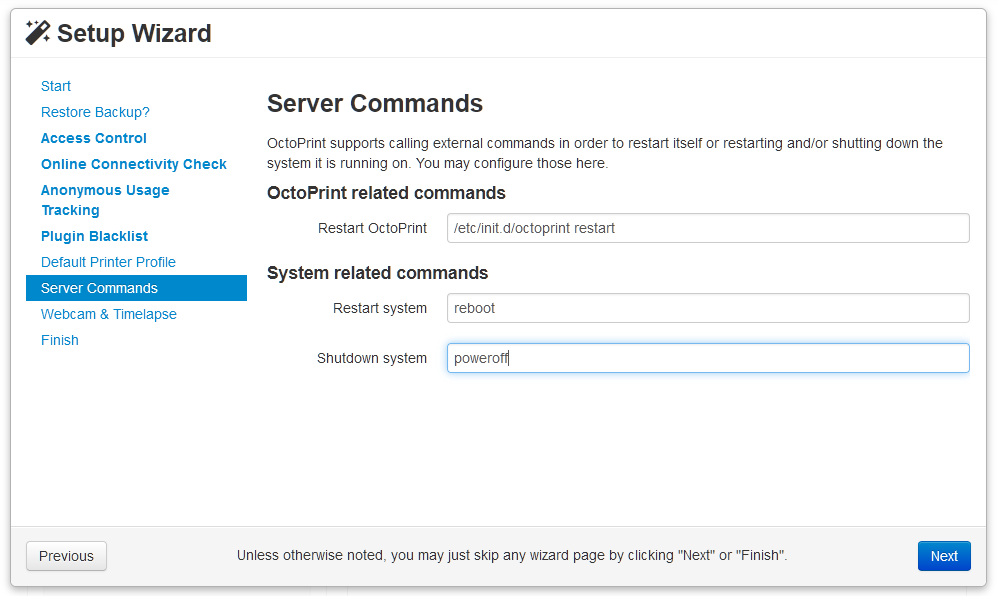 This tells Octoprint how to reboot the system and how to restart itself (for instance after installing plugins)
Fill in this information:
- Restart Octoprint:
/etc/init.d/octoprint restart - Restart system:
reboot - Shutdown system:
poweroff(Note that this will shut down the device safely, but actually does not power it completely off)
For the section of the webcam, you can use these URLs if this is the only instance in your network (alternatively use the IP address):
- Stream URL:
http://octoprint.local:8080/?action=stream - Snapshot URL:
http://octoprint.local:8080/?action=snapshot
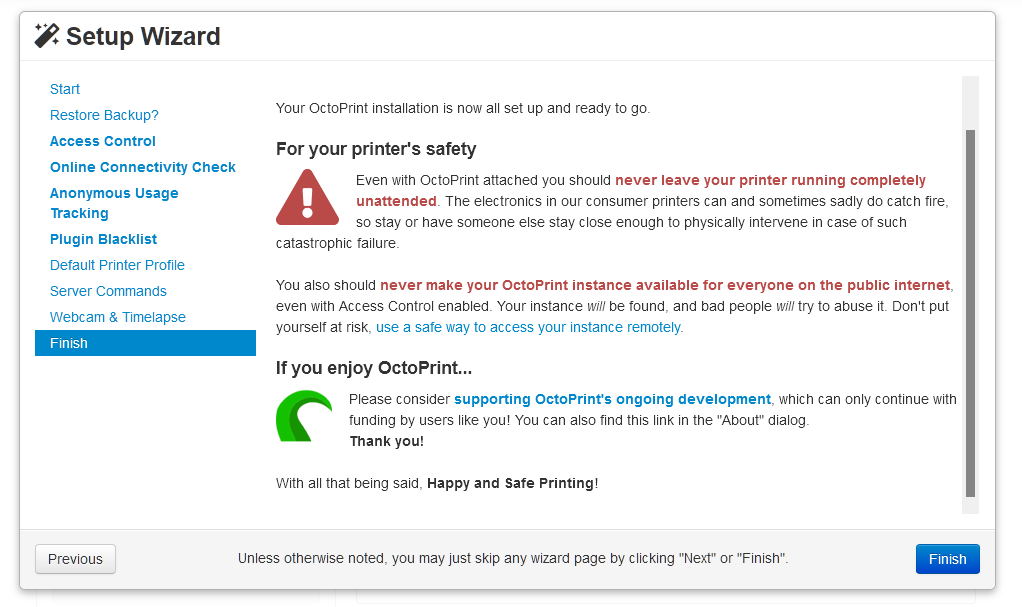 Finished! Octoprint will restart after completing the wizard
Configuration tips
Some configuration tips in regard to Octoprint below.
Hide unusable serial ports
Hide the following serial ports from Octoprint in Settings -> Serial connections:
/dev/ttyS0/dev/ttyS1/dev/ttyS2
These are internal ports of the device and are not used for printing, but they do confuse the auto connect.
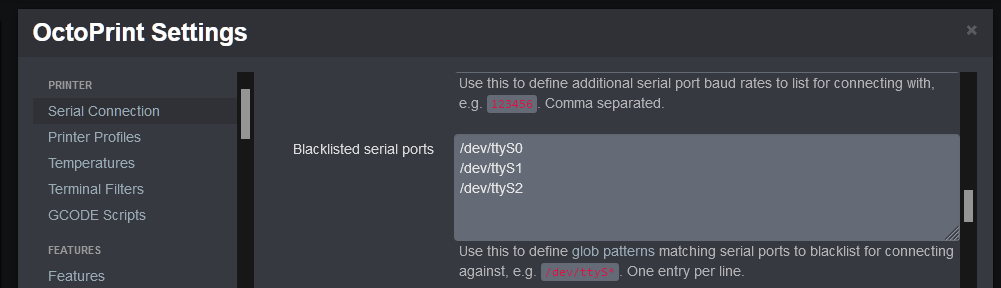 Hide those useless serial ports
Disable anonymous usage tracking
This has a slight load on the system and will not help the project as this device is not supported anyway.
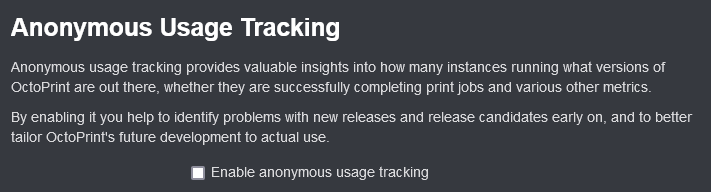 Sorry foosel, I don’t think you’re helped with this telemetry anyway
Plugins
Octoprint has great support for plugins, but because this device is so limited you should be careful adding any plugins that will run during the printing process. This includes things like timelapse plugins and plugins that modify or analyse the gcode in real-time.
However, you can safely install plugins that improve the user interface, like:
- Gcode documentation plugin
- Themeify because we like everything dark
- OctoPrint-WideScreen for efficient use of screen space
- Octopod allows notifications on your phone
- Portlister to automatically connect to printers
Any plugin you install incurs some performance hit on the system, but the user interface plugins generally only need additional time on initial startup.
Some plugins, which rely on more features in Linux than OpenWrt provides, like Resource Monitor, don’t work.
Onedrive Backup
If you like to use the Onedrive-Backup plugin, you need to install some dependencies manually:
opkg update
opkg install python3-cryptography
pip install "msal<2.0.0"
pip install "https://github.com/cp2004/OctoPrint-OneDrive-Backup/releases/latest/download/release.zip"
Troubleshooting
You can view the Octoprint logs via:
less /.octoprint/logs/octoprint.log
Check if Octoprint is running at all:
ps w | grep -i octo
You should get something like “/bin/octoprint” at least.
Check what processes are running:
htop
If plugins run into compilation errors while downloading some plugins, you may be able to install the Python package via opkg. There is a list of packages here. If a plugin needs the cryptography pip package for instance, search for “python3-cryptography” or “python-cryptography”.
Conclusion
I hope have shown you in some more detail how to install OctoWrt and gave some more in-depth guidance along the way.
OctoWrt would not be possible without the work of ihrapsa and shivajiva101 on getting Octoprint working and figgyc on getting OpenWRT to run on this device. I’d like to than them both for this!
Happy printing!
 The end result!
What are your thoughts?