Protect your network with virtual LANs - trying out the Creality Wifi Box
Just for fun and giggles I wanted to try the Creality Wifi Box. After Teaching Tech’ critical review last year I was curious how the state of the Creality Cloud ecosystem is today. The Creality Wifi Box essentially connects your printer to the Creality Cloud, and the device cannot be accessed locally. For this reason, it has no business being on my network other than to use my internet connection. So, to protect my network from any possible vulnerabilities we can use virtual LANS - VLANs. Let’s see how!
The Situation
The image below shows the situation. I have some devices, like my computer, a home server and a Zigbee gateway. The Creality Wifi Box has no business accessing these devices. I may trust Creality, but I still want isolation of cloud-accessed devices, because you can never underestimate the internet.
 Simplified network diagram. How can we make it so the Creality Wifi Box can only access the internet and not any other devices?
In this article I will show you how to configure it in your network. However, if you don’t have a switch you can skip that particular section. If you connect your device over wifi, I will show that as well.
The Solution
There is a simple solution for this. Just run a dedicated ethernet cable to a dedicated router, or use a dedicated wireless router and connect the wifi box to that. However, this so cumbersome to have multiple devices and ethernet cables - just to isolate some devices!
There is a good and almost free alternative for this: Virtual LANs - also known as a vlan. With virtual LANs each ethernet packet from a particular device is receives a tag, and will then be isolated and handled separately. Note: The default VLAN for all devices (also the devices you are already using right now) is VLAN 1.
 The network endpoints don’t necessarily need to be aware of the existence of the VLAN. The network switch can tag the traffic, and then the router can sort it out. The network packets from the Creality Wifi box is marked in purple.
In the above diagram the network port assigns a tag “VLAN 2” to all data packets from the Creality Wifi Box. The port from my computer is not assigned any VLAN, so it defaults to VLAN 1. The packets travel together on the shared network connection between the switch and the router. The networks are not aware of each other - only the router is aware, on which the VLAN also has been configured.
How to configure it
I will show you how to configure it. In my network I have a Netgear GS108Ev3 managed switch and an Unifi Dream Machine as a router. You may have different network devices, but conceptually it all works the same. The buttons and inputs might just be in a different order 😉
Configuring the switch
On my switch, I have my Creality Wifi Box on port 1, my outgoing line that eventually ends up at my router is on port 8. In your switch configuration interface you enable 802.1Q VLAN. You also add the VLAN, in this case I give it VLAN the ID 2.
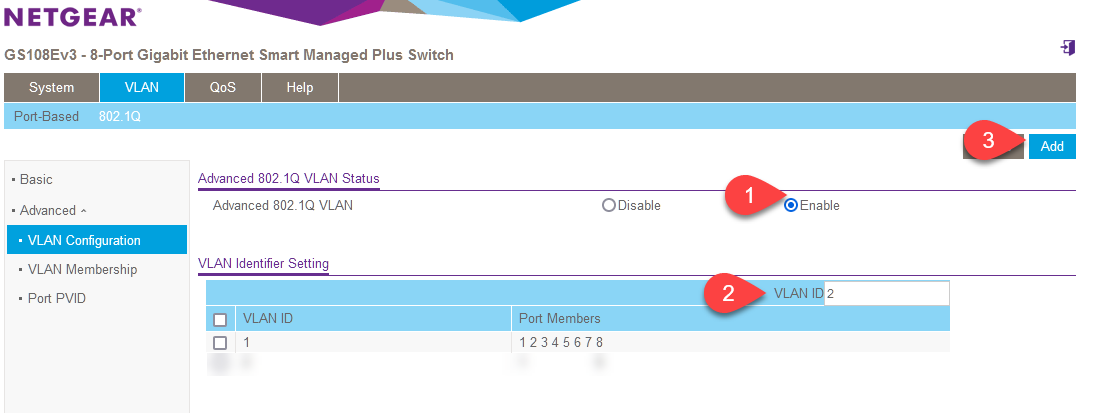 In this first step we define _that_ we want a second VLAN
Next, we must define how each port responds to each VLAN. We call this: assigning membership to a port. We do this for each VLAN (both default and the new VLAN 2).
 VLAN 1 (default VLAN) needs all ports to be assigned as _untagged_. This means the switch will not interfere with any traffic that carries the default VLAN tag.
 For VLAN 2 I set port 8 (which goes to my router) as _tagged_, so traffic destined for VLAN 2 will be accepted. For port 1, which goes to the Creality Wifi Box, I set it as _untagged_ so that it may receive traffic which is untagged and can tag it (purple in the earlier diagram).
Finally, we must tell the switch that we want all untagged traffic to receive a tag. Remember, the Creality Wifi Box doesn’t know and cannot be configured to send traffic on VLAN 2, so we have the switch tag the traffic.
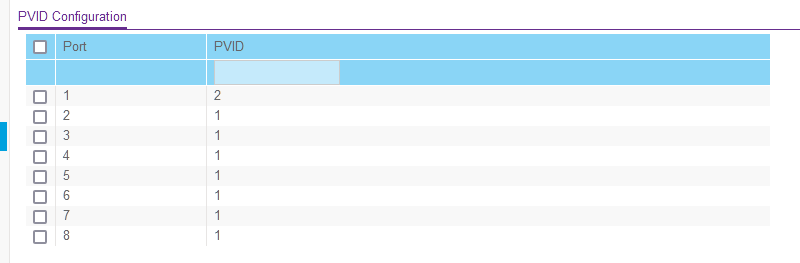 We tell the switch we want all traffic from port 1 (where the Creality Wifi Box is) that has no tag, to be tagged as VLAN 2 (purple)
That finishes the switch configuration. Now we need to tell our router that we have an additional network.
Configuring the router
Next up, configuration of the router. The router is what brings it all together.
We need to tell the router that we have an additional network.
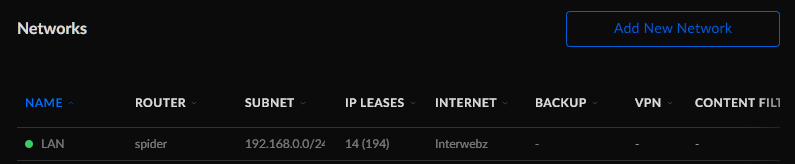 Add a new network
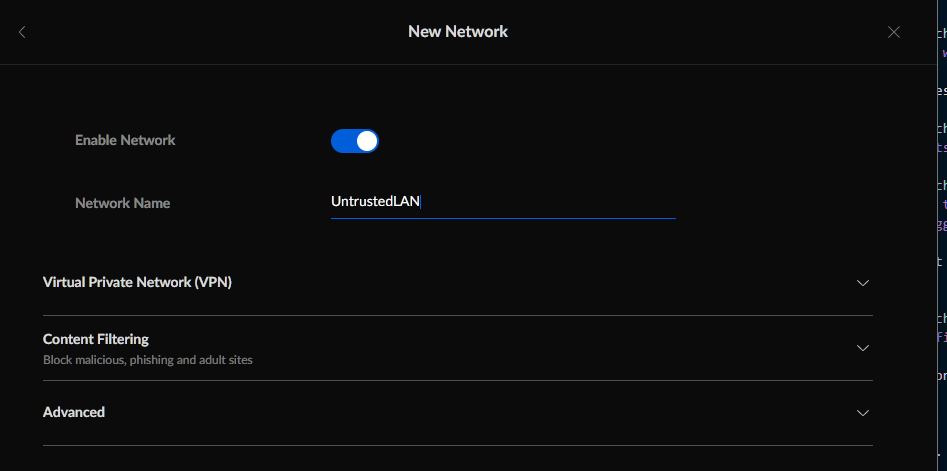 I called this network UntrustedLAN - you can recognize this later when setting up the firewall.
Next is the most critical part - we assign a VLAN to this network. We also assign a separate IP address range. When the Creality Wifi Box asks for an IP address, that request will be tagged with VLAN ID 2, and it will end up getting an address assigned in this range.
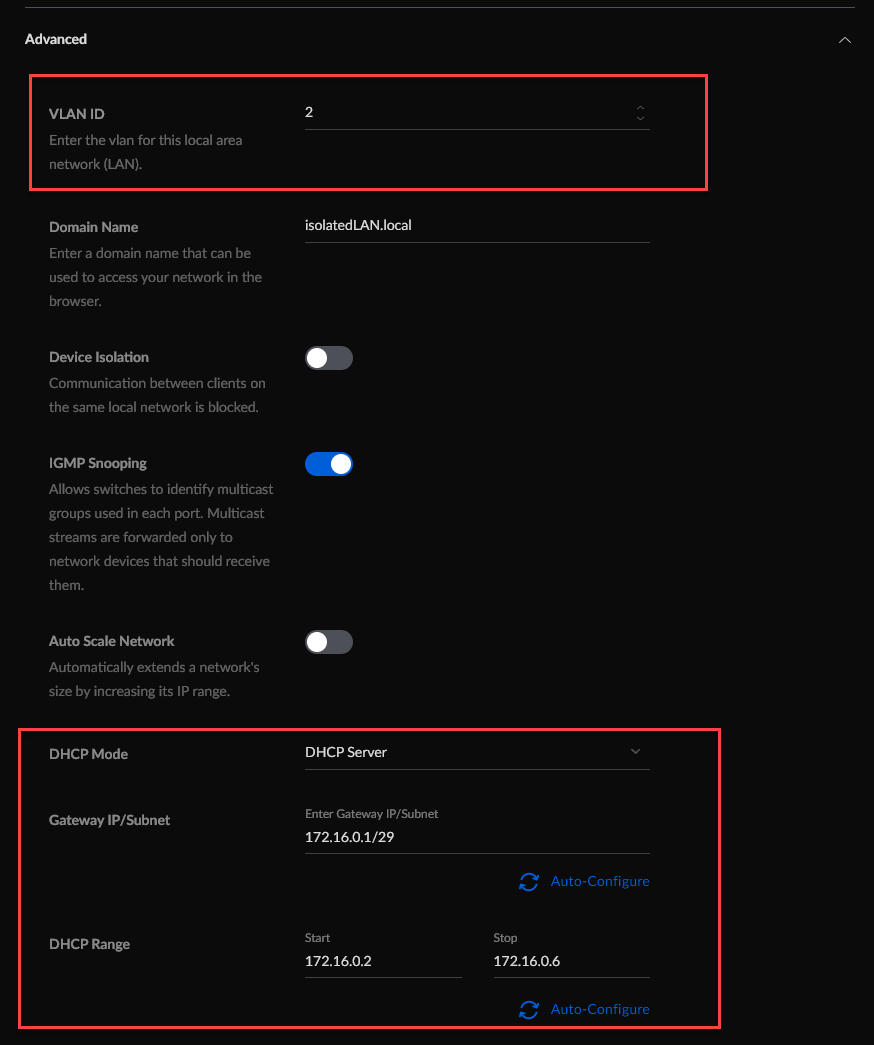 I also assigned a domain name to this network, that’s not very important.
Next, we will make sure the firewall blocks any traffic from the VLAN 2 to our regular network.
 Choose to add a new rule
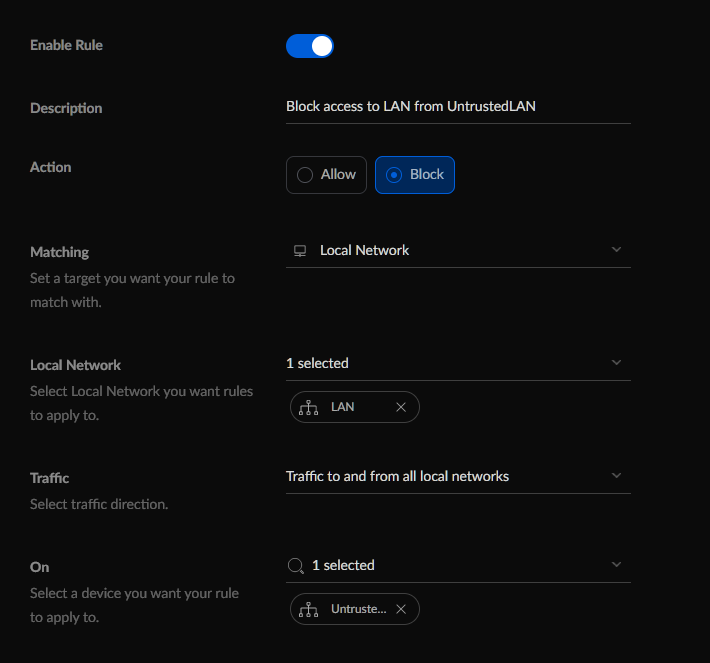 Block all traffic matching our LAN that comes from our VLAN 2 (UntrustedLAN)
That’s it from the router.
Wifi
If you like a wifi network to be isolated, then you can assign that wifi network to the network we’ve created earlier.
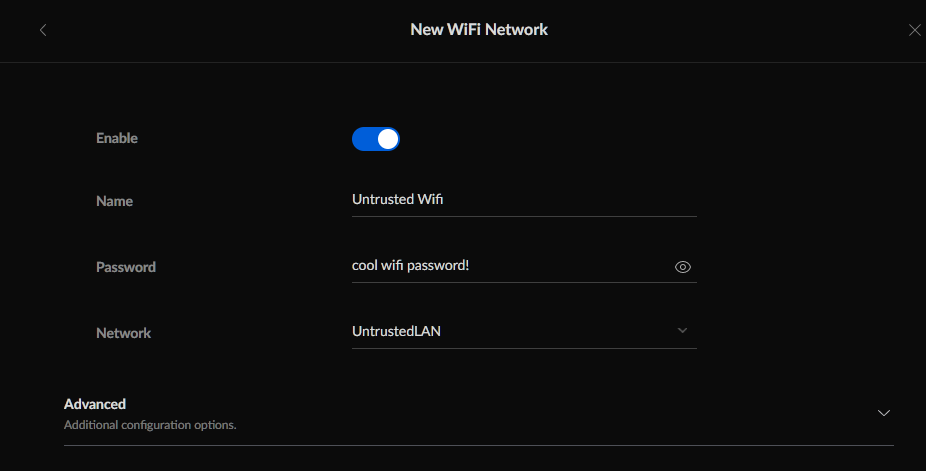 When you assign the entire wifi network to the UntrustedLAN, it becomes part of the VLAN. You can then connect the Creality Wifi Box to that wifi network.
Summary
This article has shown how you can secure your network by placing isolating certain network devices to a separate virtual LAN. It is only software configuration in your router and wireless access point or switch. Afterwards, the device will be limited in what network devices it can access.
Though I have a UDM and Netgear switch, the procedure will be similar on other devices, like OpenWRT-based devices. You need devices which support 802.1q based VLANs though, port based VLANs work differently and do not tag traffic.
Happy networking!
What are your thoughts?