How-to: Compiling the CR-6 Community Firmware (Marlin) with Visual Studio Code and Platform.io
This guide will show you how to compile the CR-6 Community firmware we’ve been working on for the past couple of months. Always wanted to compile your own firmware, with your own acceleration and stepping defaults? This visual guide is for you.
Installation of the tools
To get started, let’s first download our tools. We need Visual Studio Code and its Platform.io plugin.
Visual Studio Code installation
Let’s install Visual Studio Code first. If you have already installed it, make sure it is up to date or follow the steps below.
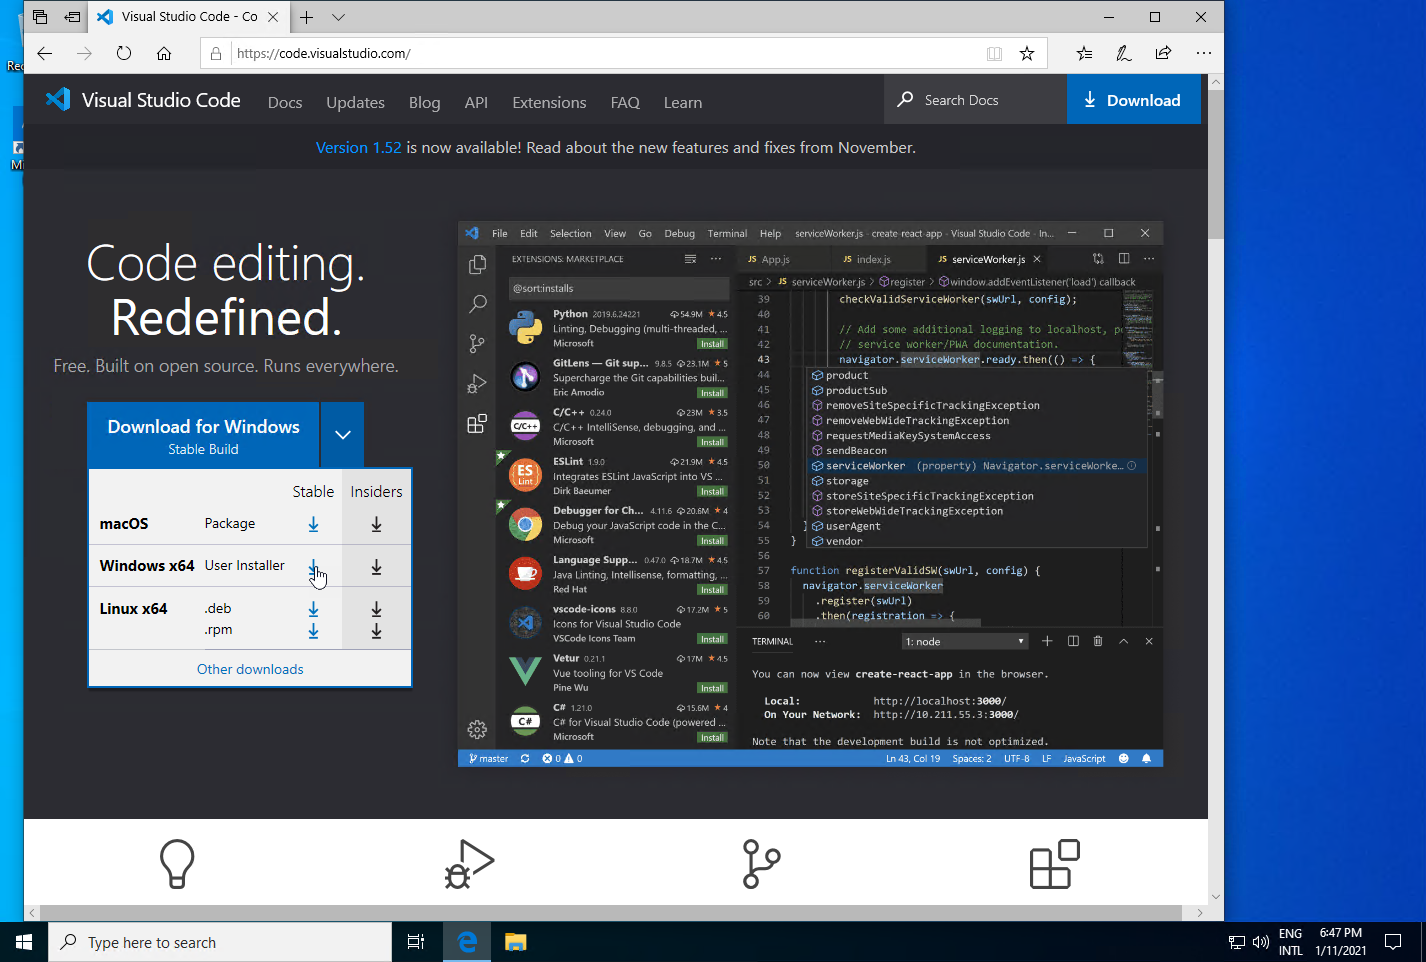 Go to code.visualstudio.com and select the package appropiate for your operating system.
I’m using Windows 10, so I download the Windows 10 package.
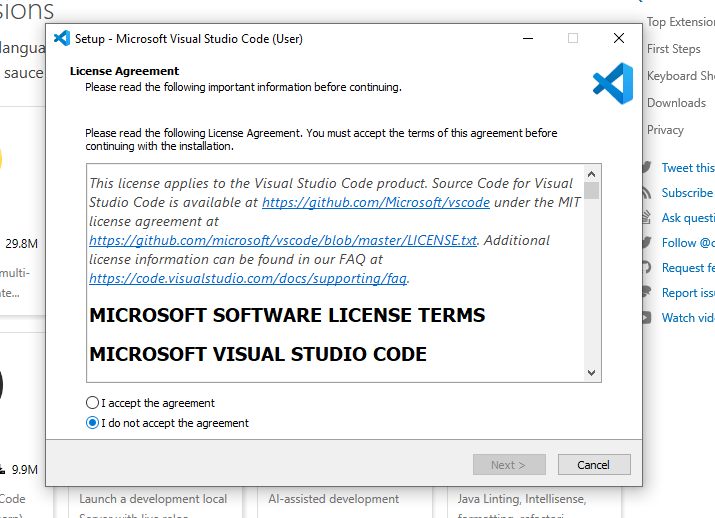 Accept the license agreement.
Follow the setup wizard.
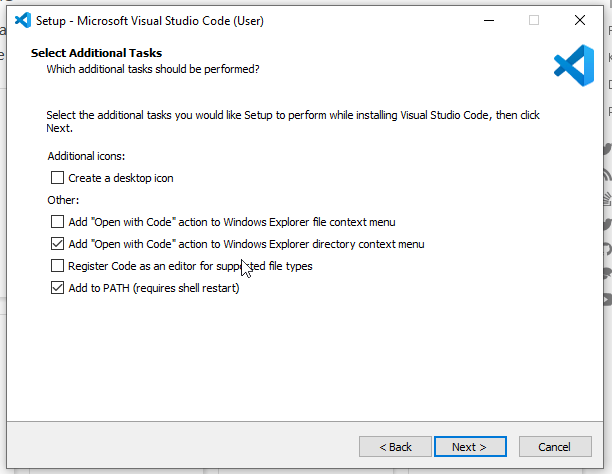 Be sure to select the options as selected, when using Windows
Follow the rest of the wizard and let the installation start.
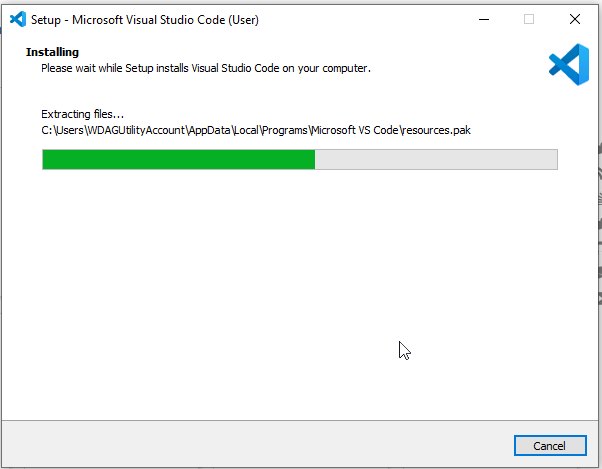 Let the install run its course
Eventually the installation finishes.
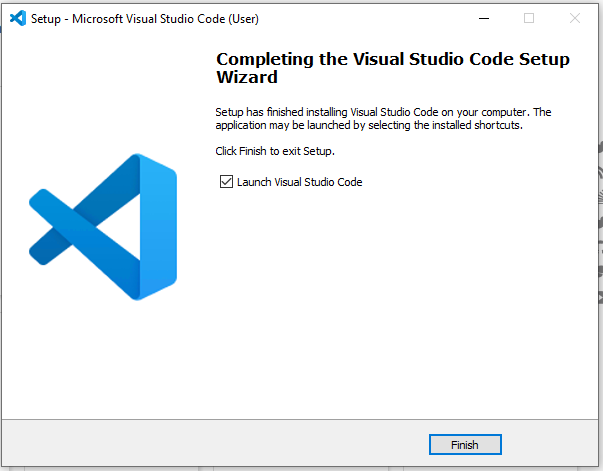
When the installation has finished, let it open Visual Studio Code.
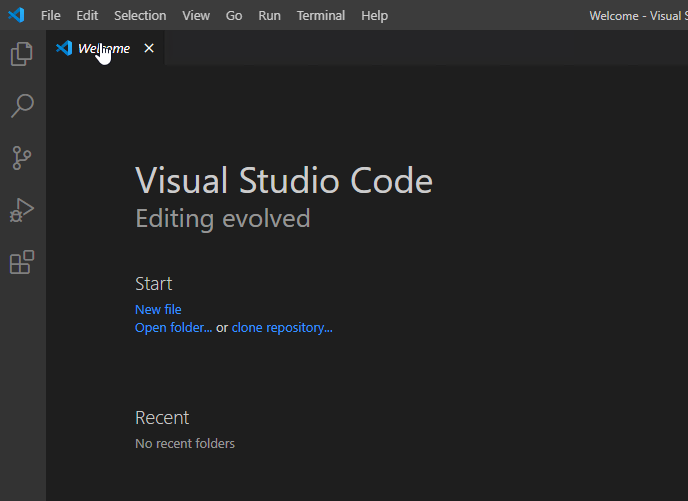 You are greeted with the welcome page
Platform.IO plugin installation
Where Visual Studio Code is the text editor, Platform.io is the toolset that allows you to actually compile the firmware. It automatically downloads all dependencies and simplifies compilation to a click on a button.
Find the extension manager at the left side, search for platformio and install it.
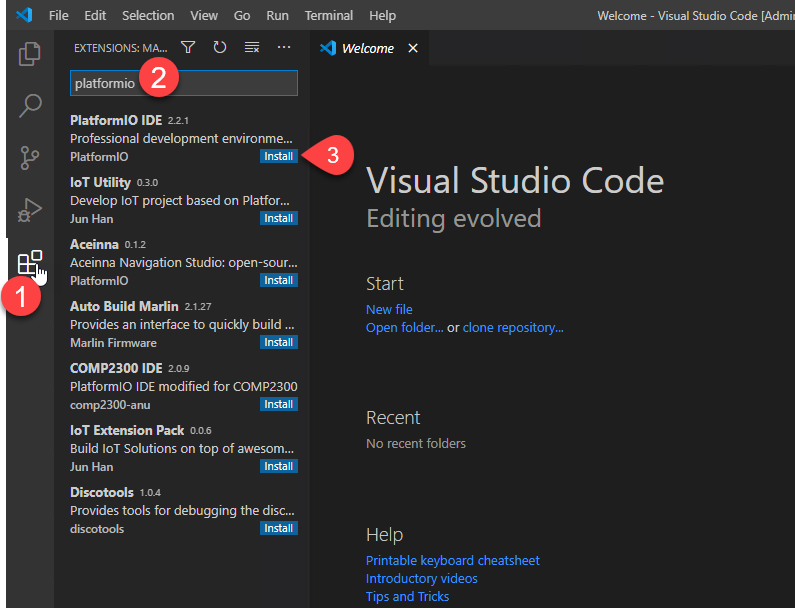 By clicking “Install” the extension will be installed
Extension installation will take a few moments.
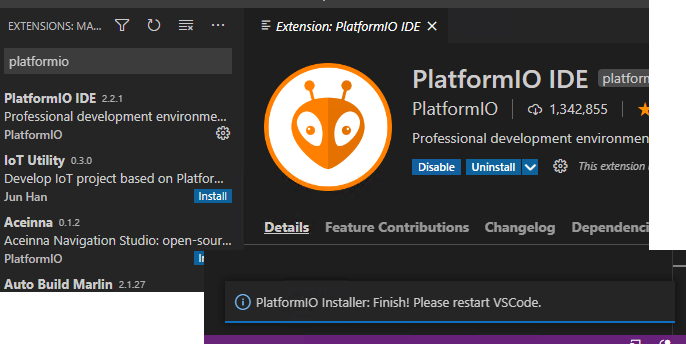 When the extension installation is complete, Visual Studio will prompt to restart the editor
Close Visual Studio Code when the extension is installed - we will first download the firmware source code.
Download source code package
I won’t bore you here with installation of a source control system like git - let’s do it simple and easy, and just download the source code directly.
You have two choices when downloading source code:
- You can download the latest source code from the home page. You will have the latest source code but also possible issues and you’Il have to build the CR-6 touch screen software too.
- You can download the source code of the latest official release. If you have not purchased a BigTreeTech TFT you need to still flash your touch screen too - you need the files in the archive for that.
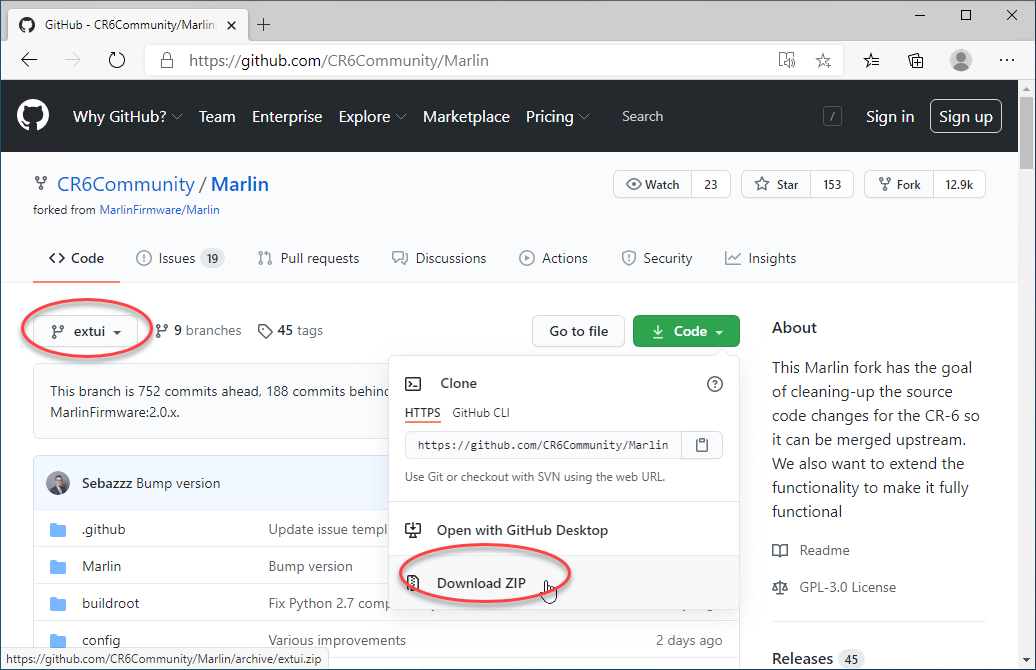 This is how you download the latest sources
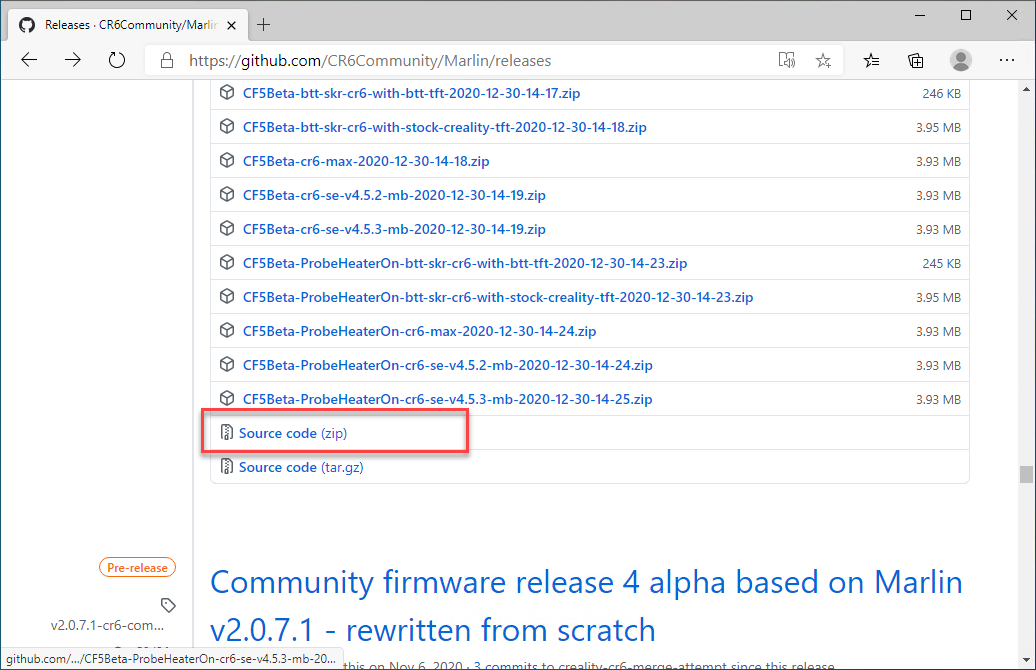 This is how you download the source code from the latest official release
The source code is in a zip file - you need to extract it.
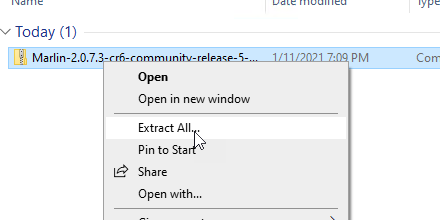
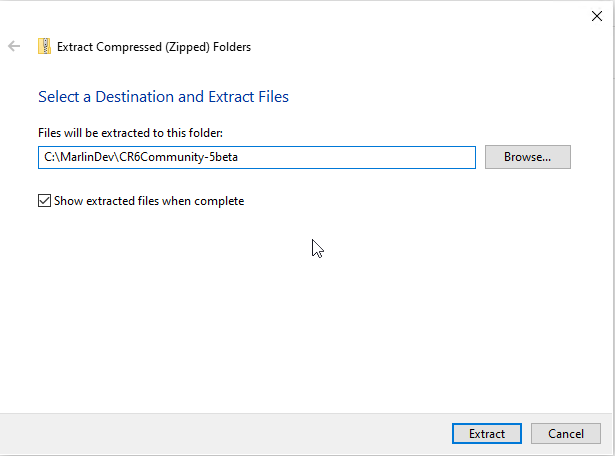 Make sure you choose a short path to extract the source code to
Now we have everything extracted - we must change some files so it compiles right for our board.
Prepare the source code
You need to change some files so the configuration of the firmware is right for the particular hardware configuration you have.
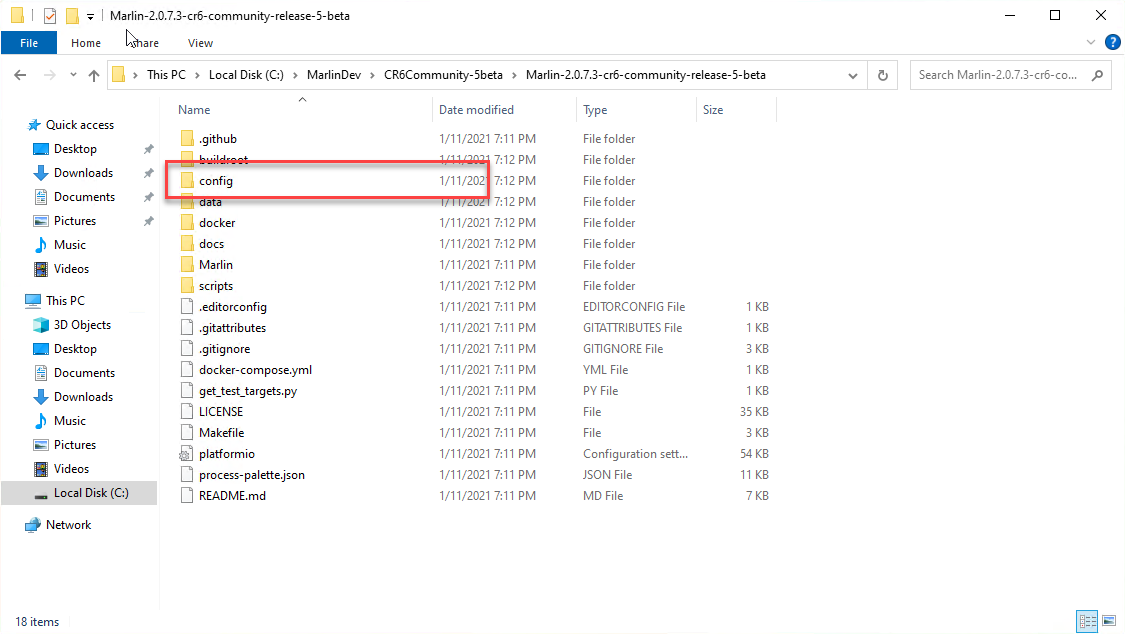
In the extracted source you’Il find the “config” directory. Navigate to it and choose the correct folder like shown below.
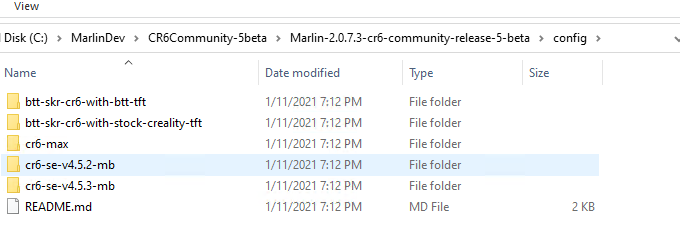 There are several folders here - for different hardware configurations of the CR-6 SE and MAX
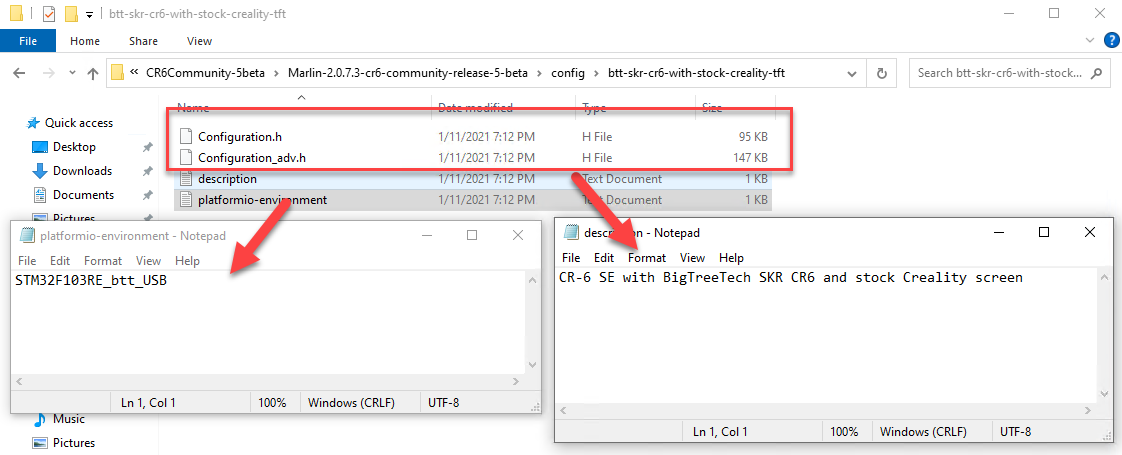 Note the description file, platformio-environment file (you need this for later) and the Configuration[_adv].h files
Each configuration folder has a “description.txt” file. This contains the description of the particular configuration. Open it to check you have the right configuration files.
Once you have found the right configuration files, open platformio-environment.txt and take note of the contents. You’Il need this later.
Copy the Configuration.h and Configuration_adv.h files - and go to the “Marlin” folder in the source code.
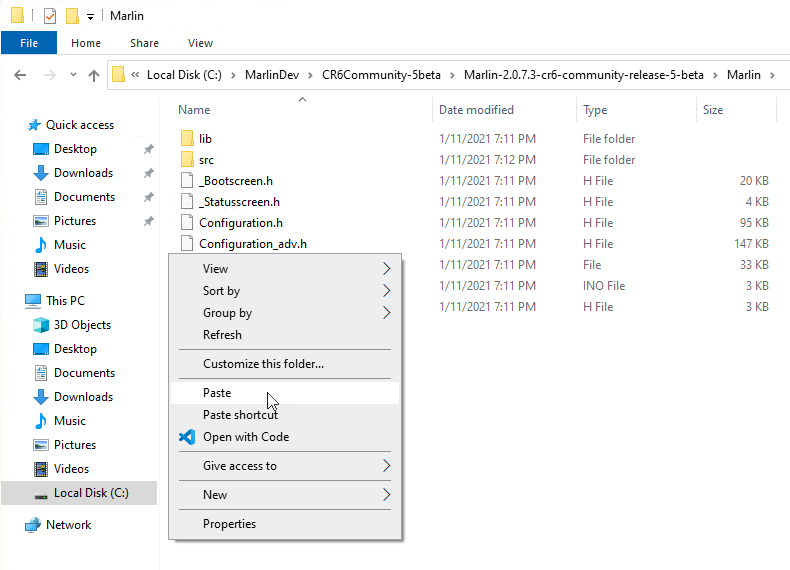 Inside the Marlin folder, overwrite the two Configuration_[adv].h files which are already there
Next, go to the root folder of the source code (the one with platformio.ini in it), and open Visual Studio Code in that folder.
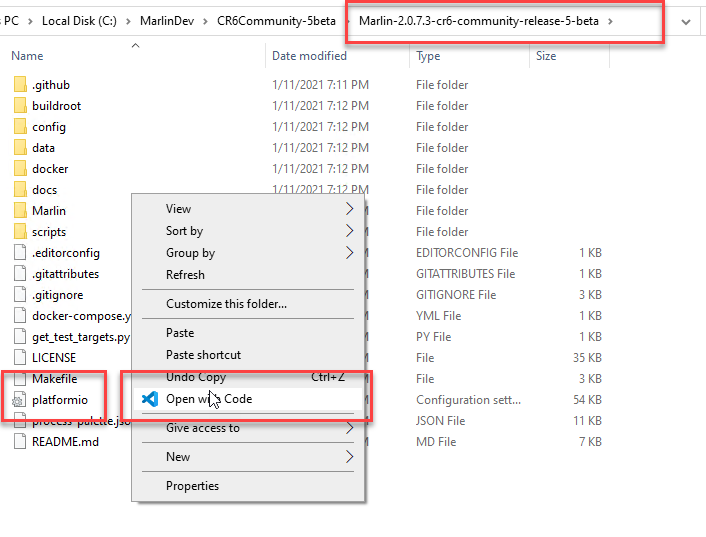 You can right click and select ‘Open in VSCode’ or alternatively open Visual Studio Code and select to open this folder
Remember that platformio-environment.txt file from a few steps ago? We need to set that value in the platformio.ini file, next to the default_envs = statement.
 Replace the value (if different) with the value of
 platformio-environment.txt of your config folder
Now we are ready for our first build!
Build it!
You can now build the source code! In the bottom status bar you will find a checkmark. Click it and the build will start.
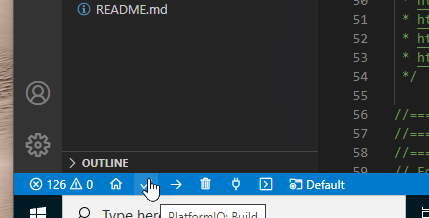 That tiny check is easy to miss, but it is the one you need
When the build starts a terminal will open and a lot of text will appear and scroll up.
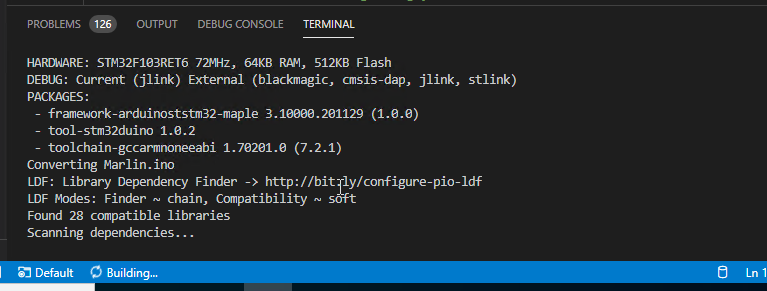 This might take a while, especially if you have a lower-end processor
But after a while the process is done, and the firmware will show up:
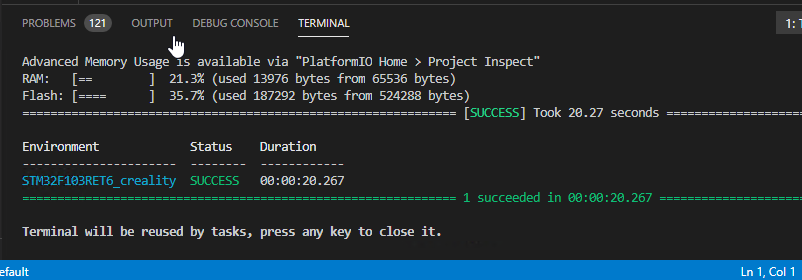 Build succeeded!
Finding the files
Now the build is done, you can find the files in .pio/build folder.
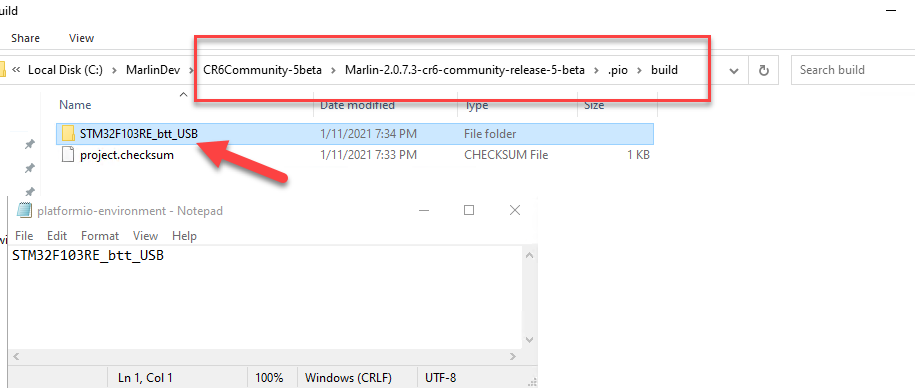 This matches the platform.io env from the
 platformio-environment.txt file
From the direction you need to pick the .bin file.
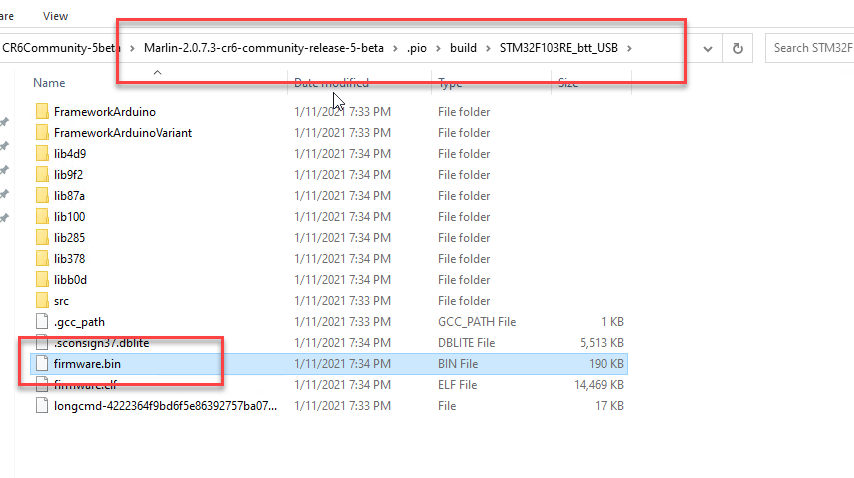 A lot of files, but the firmware.bin or firmware-[numbers].bin file is the only one that matters
Now you can take this file, put it on an SD card and flash it according to the instructions in the release notes.
Altering your configuration
The default configuration contains settings that are generally good for your printer. If you want to make any changes, follow the documentation of ‘Configuring Marlin’.
Troubleshooting
“File not found” or “No such file or directory exists”
Try:
- Installing Git for Windows and rebooting your computer afterwards (or re-open Visual Studio Code)
- Move the source files to a shorted part (for instance C:\Temp) or enable Windows long paths
The “checkmark” compilation button is missing
You may have opened the platformio.ini file itself, or the wrong directory. You must open the directory of platformio.ini. Not a child directory nor the parent directory.
Final thoughts
I hope this short guide has helped you compile the CR-6 Community Firmware. If you’d like to support the CR-6 community firmware developers - please check the Credits section of the readme.
Thank you!
What are your thoughts?