LDO Voron V0.R2 build notes, tips & tricks
There are sometimes things you would have liked to know in advance before starting on something. Two weeks ago I purchased a LDO Voron V0.2 kit from a local reseller (3DJake). I very much enjoyed building and configuring my Voron V0.2R1 3D printer, but there are some things that are unclear or can be improved - in both the build manual of Voron and the LDO kit itself. I hope my tips and tricks here help the next person attempting to build a Voron V0.2.
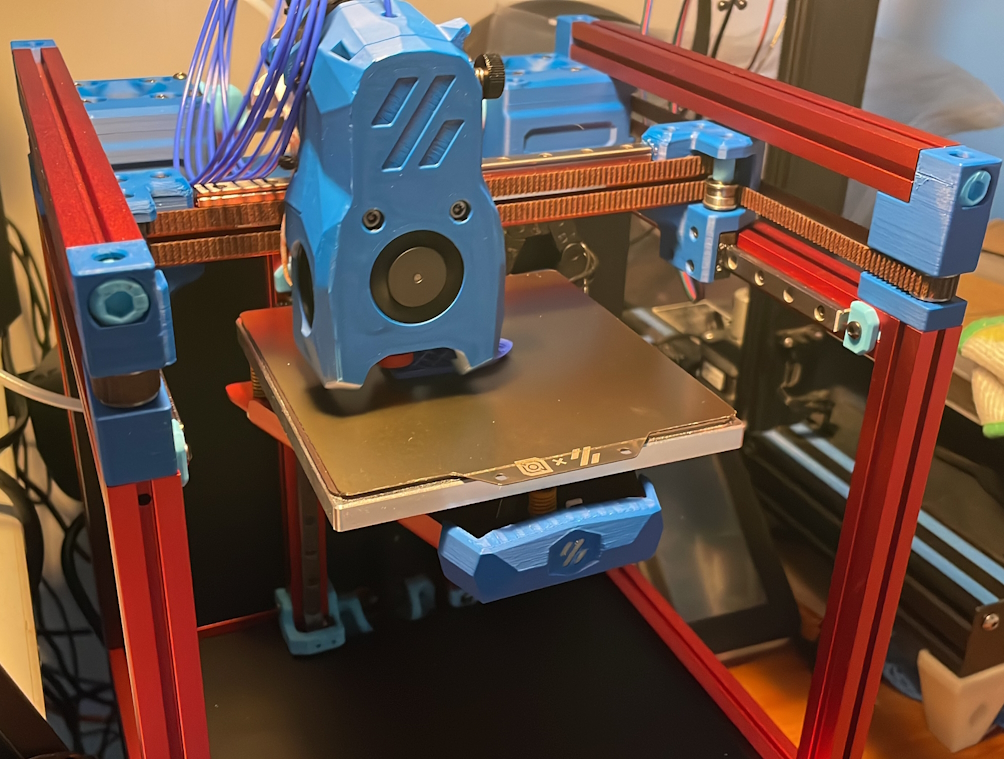
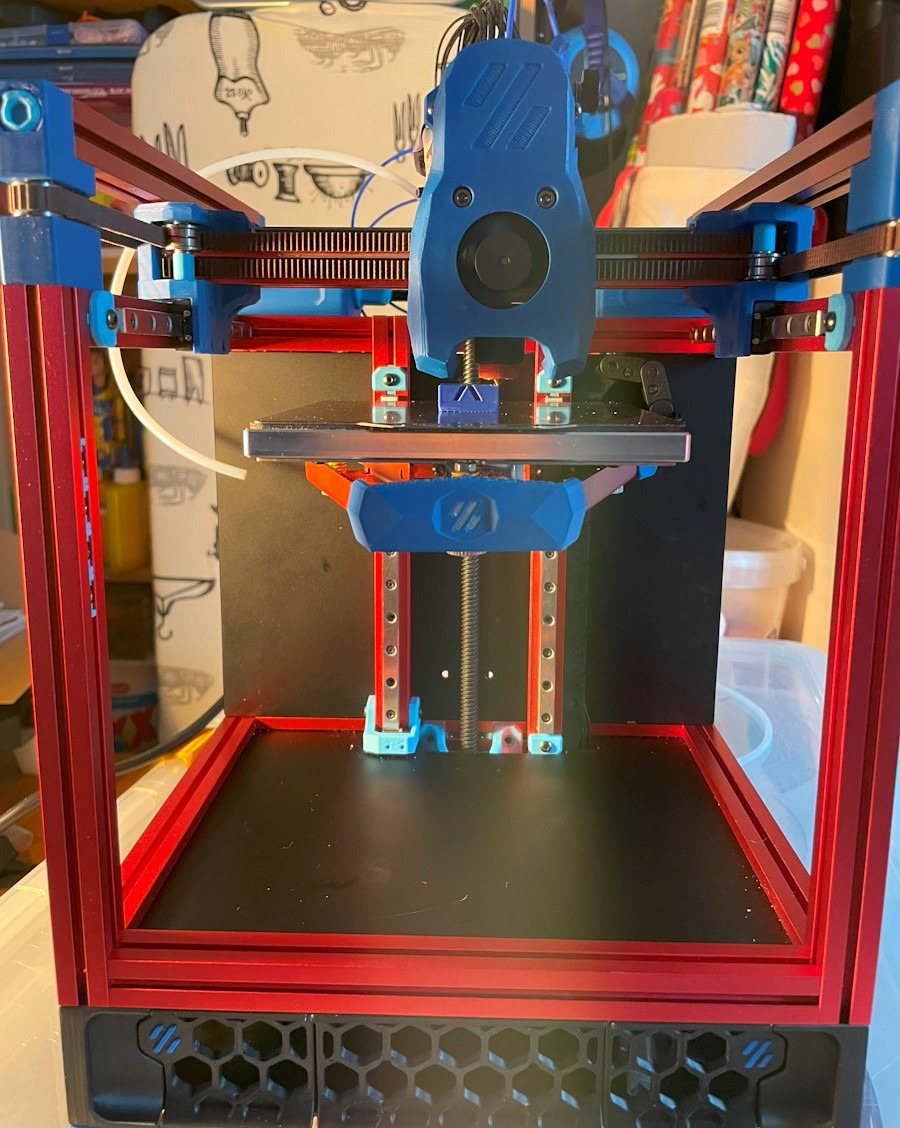 My Voron V0.2r1, which I nicknamed “MoronV0”
This article has been made possible thanks to PCBWay. More on PCBWay later.
I’Il cover:
Why (not) a kit?
Vorons are made so they can be self-sourced, but with all the delivery costs in the Netherlands I’m not sure how much cheaper it actually is. The lazy (or time-efficient) option is to purchase one of the kits, from sources like LDO Motors, Fabreeko, etc.
However, to distinguish themselves, the kit vendors deviate a bit from the base Voron BOM - and this is in my experience where things can sometimes be a little tricky, because the instructions aren’t very refined at all stages.
LDO distinguished themselves by the following things:
-
Using a different Z-bed frame (community-developed Kirigami bed)
-
Using a way to organize cabling to the hotend (community developed and LDO derived Picobilical)
-
Power supply to the Raspberry Pi and extra neopixel ports (driven by the frame board of the Picobilical)
-
The Picobilical hot-end board contains an ADXL accelerometer for tuning input shaping
General tips and tricks
First some general tips en tricks for undertaking the project.
-
Don’t hesitate to ask questions at the Voron discord to validate your assumptions. The community is - in my experience - responsive and there are dedicated channels for kit vendors like LDO. Some employees of LDO are also present there and answer questions. Some wiki pages were missing and links broken, and I continued building based on bad assumptions for too long. Don’t do that.
-
Use the pre-arranged build plates if the kit vendor offers them (like LDO does). These build plates contain, for the most part, all the parts you need in the right quantities. The only thing I needed to print is an extra mount for the mainboard.
-
In the LDO kit you will have plenty of spare screws and other materials. Not everything is surplus, so still be careful - but don’t be left with question marks at the end of the build because there are so many leftovers.
-
Check with the included manifest on which version of Voron kit you actually have (Voron V0.2 or Voron V0.2r1). Before I received the kit I already sourced (reused) some parts but that turned out to be unnecessary because the LDO Voron 0.2-S1 kit included the needed parts.
-
When fastening screws, don’t use too much force - regardless whether you have heat-set inserts or not. Tight is tight enough, except where explicitly noted.
-
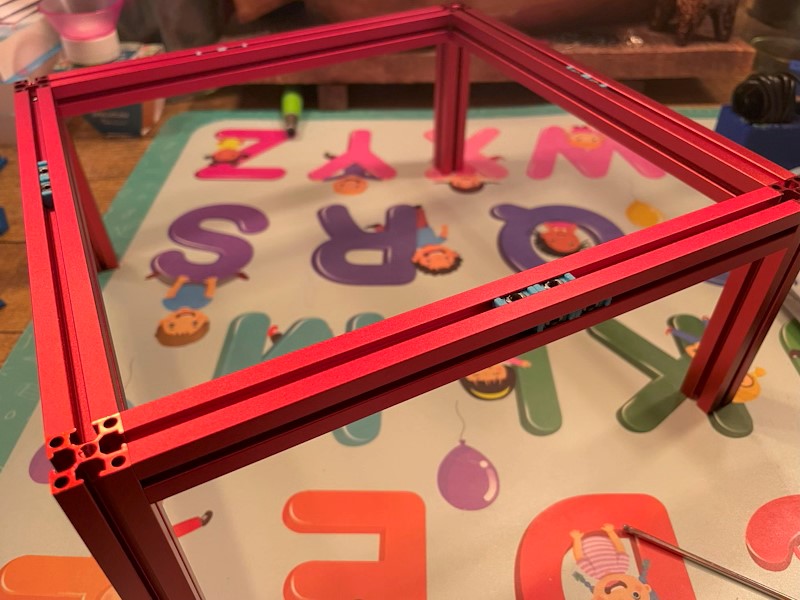
During several stages you will preload nuts into aluminium extrusions. Be extra careful there and read ahead in the manual how these nuts will be used. Especially where you preload nuts for the door magnets, you don’t want to use the no-drop-nut mod because you won’t be able to get the nuts close enough.
-
If you have forgot to preload a nut, there is margin to forget one nut (see Skirt mounting) for a picture.
-
The Voron Github contains the most recent version of the manual. In addition, keep the LDO Build Notes ready - note the page numbers deviate from the Voron manual at some point.
Printing Voron V0.2 parts
Keep to the material guide of Voron and the slicing instructions in the Voron build manual. I printed everything in blue and cyan eSUN ABS, which works fine. For the part that need to be transparent (bed logo), I used glow in the dark filament. It is transparent enough and as a nice bonus it stays lit for a short while after the printer is turned off.
I also had a roll of HIPS so I printed non-critical parts like the skirt and feet in that material. If you do decide to experiment, limit yourself to parts where you don’t need to take the entire printer apart.
For slicing, follow the recommendations in the Voron manual. I printed all parts in my insulated Bambu Lab X1C, preheating it on 110C for ten minutes, and then using Bambu Lab liquid glue on a PEI sheet (otherwise it doesn’t have enough adhesion).
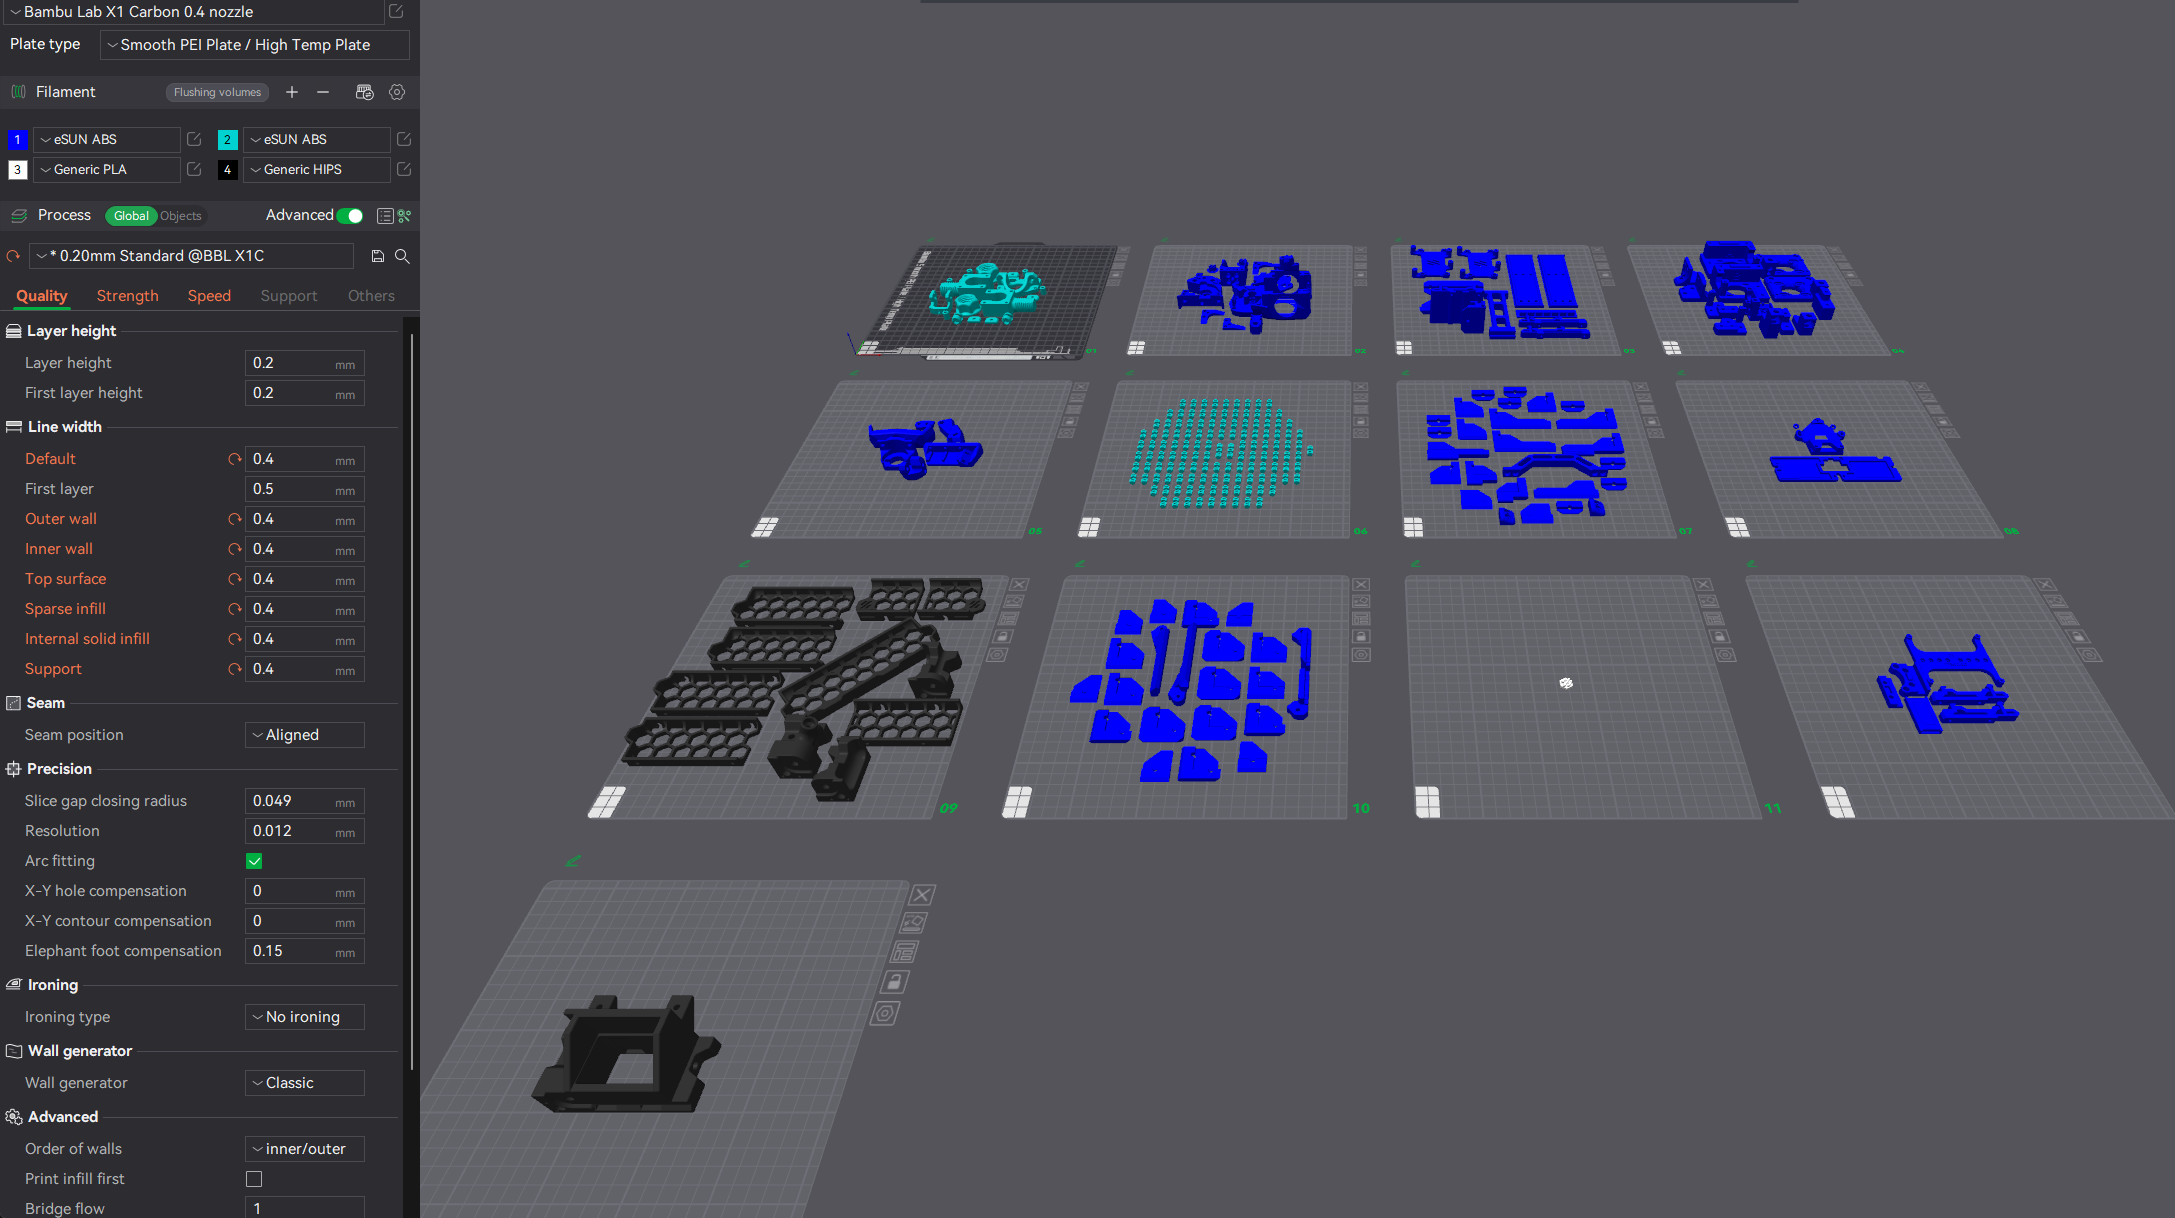 Download my Bambu Studio project here
Build notes
The necessary tools are included with the LDO kit. This also includes a ruler, which you will need to measure/check a few things during the build or to position components.
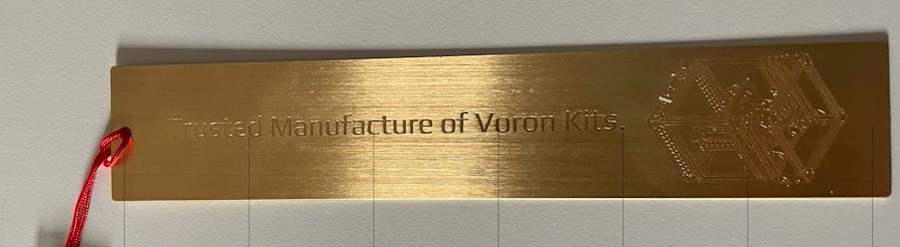 Despite the typo on the ruler, it is a useful tool to have and I did not need my calipers during the build
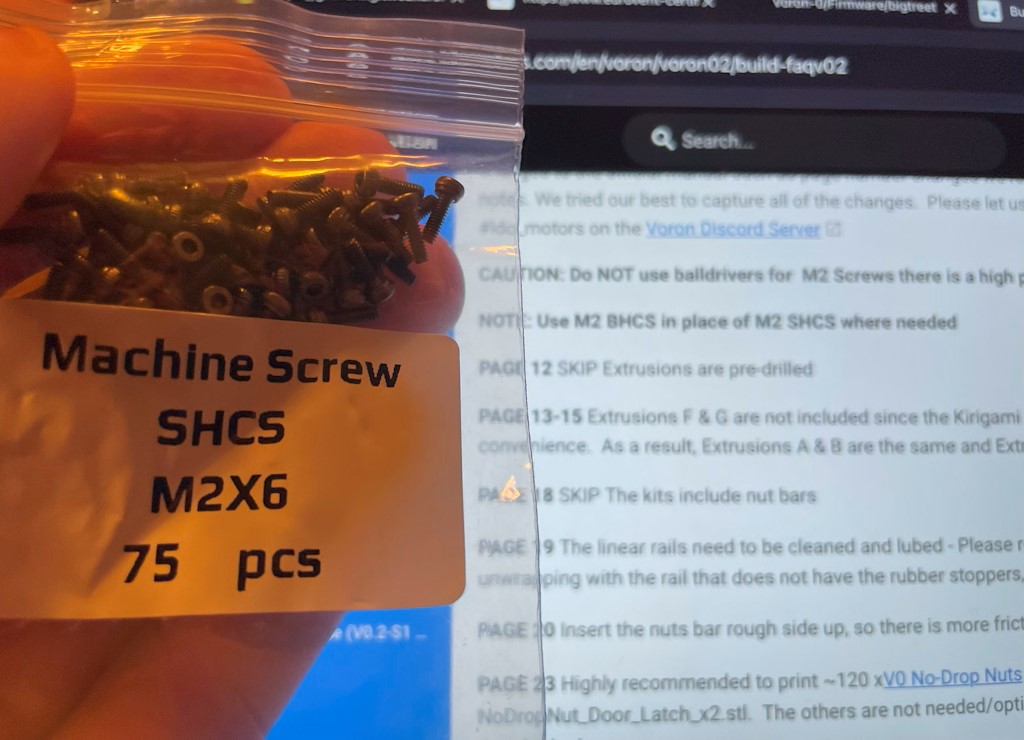 The LDO build notes calls out using M2 BHCS instead of M2 SHCS screws, but no such screws were included in the kit. However, the only place you will use them is mounting the linear rails.
Linear rails
The linear rails are used on all axes of the motion system. If you’re wondering why they are so hard to move on the rail: they are preloaded for a certain weight/force on the carriage, so if you just move them by hand, they are hard to move. It is likely not a quality issue what you’re experiencing.
One of the first things you’Il do is clean up shipping grease from the linear rails and then properly lubricate them. The LDO greasing guide mentions “Some of the most commonly recommended lubricants by Voron community members are Mobilux EP1 or EP2, Superlube 21030, or white lithium grease”. I picked Superlube 21030, since it is easy to get where I live.
Before you do this make sure that on each rail the rubber endstops are present and properly pressed in, because you don’t want the carriage to fall off the rail. The HIWIN X-axis rail does not have endstops included, so I pressed some tie-wraps through the holes to make sure the carriage couldn’t fall off.
To clean the rails I reused the original packaging of the linear rails and filled those with isopropyl alcohol.
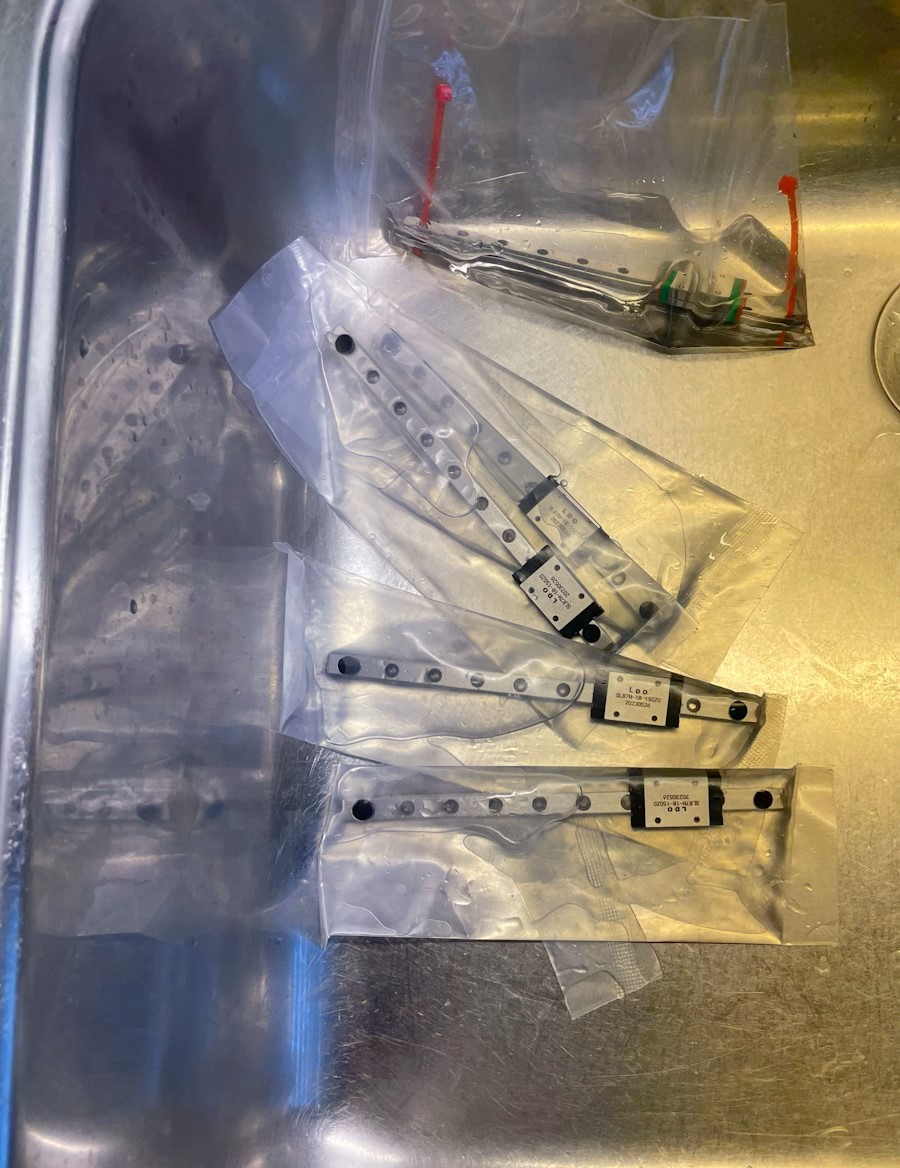
I’ve let the rails rest for about 10-15 minutes and agitated them from time to time. After that, I emptied the bags and let the rails dry on kitchen paper towels.
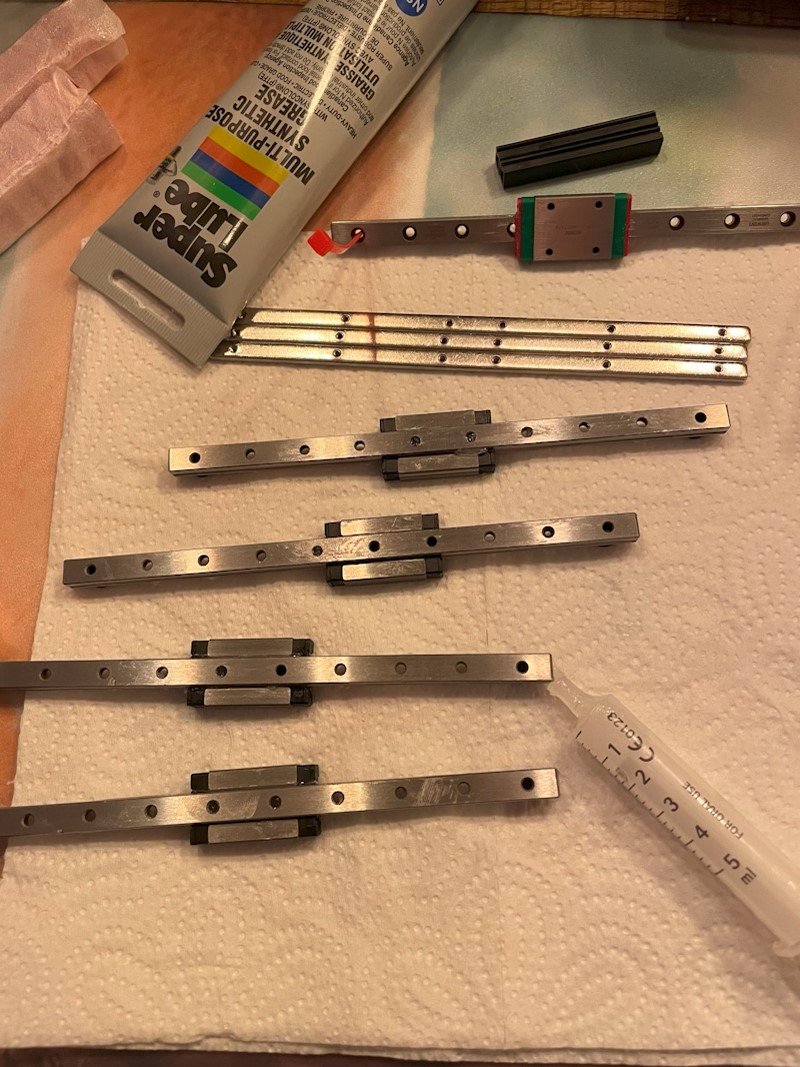
For lubrication I used the recommended lubricant (Super Lube Synthetic Grease), and applied them into the carriage from the backside, using a simple syringe. If you press it against the backside you can force the lubricant in. When it comes out of the side of the carriage, the lubrication has filled the entire carriage.
After lubrication, you need to clean up the rails to prevent the leftover lube from attracting dust.
Note the rubber endstops on the linear rails, and the tie wraps I used on the X axis
Hotbed
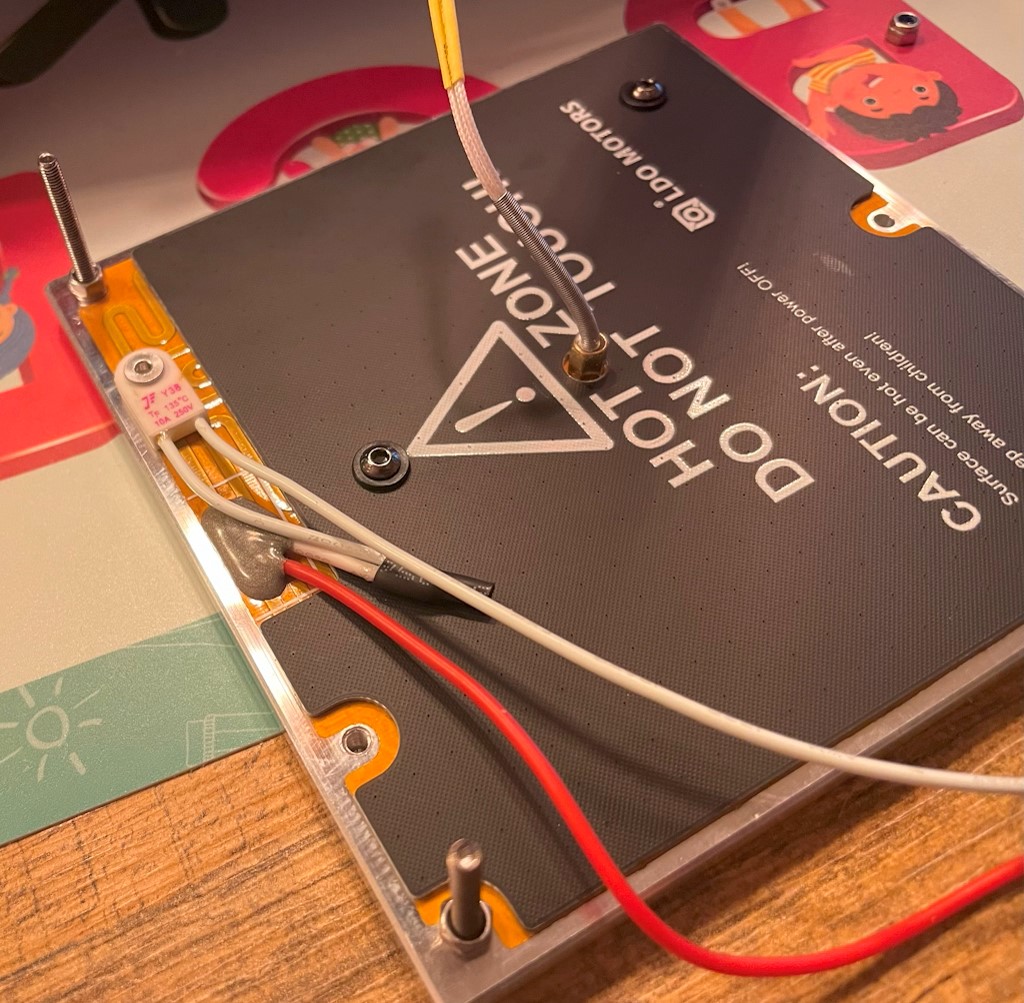
During the assembly you’Il fixate the bed screws with nyloc nuts on the hotbed. The Voron instructions suggest that you put the nylon nuts on screws the wrong way. I suppose it protects the PCB heater.
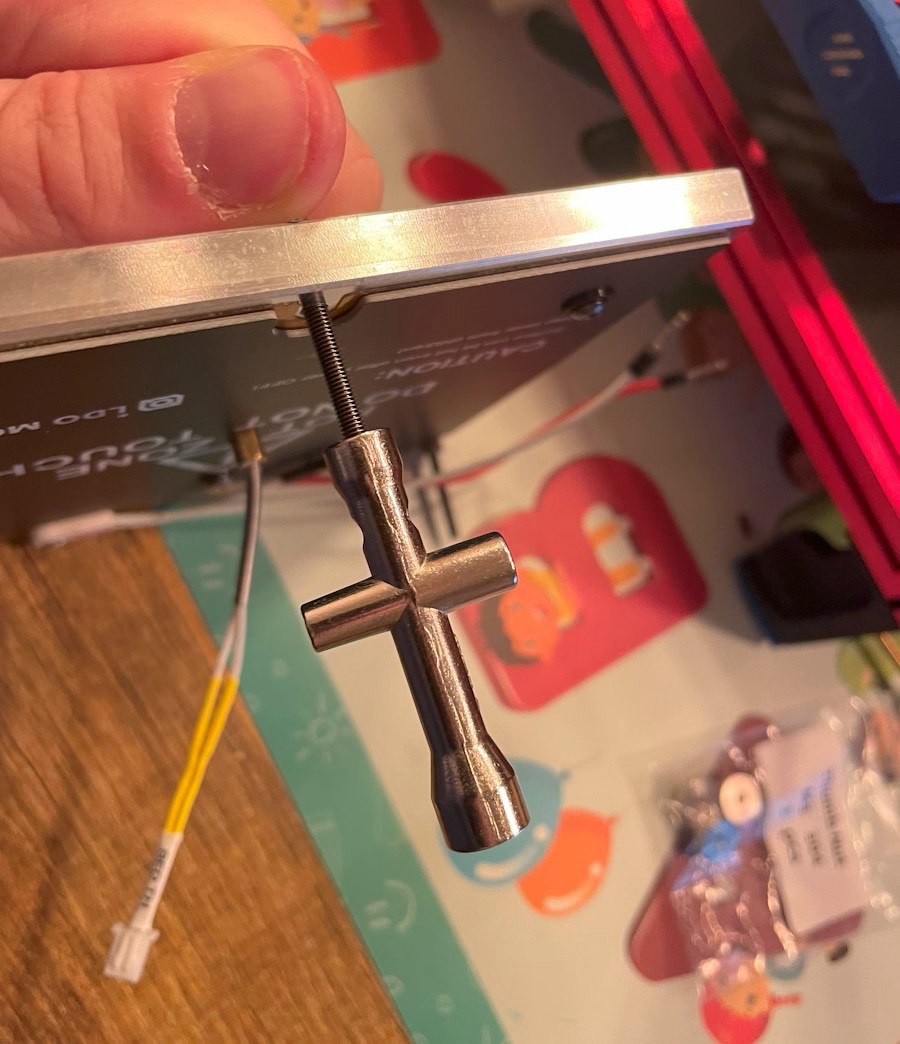 A nozzle screw tool helps with putting the nuts on the screws
 The nuts I put on in this way.
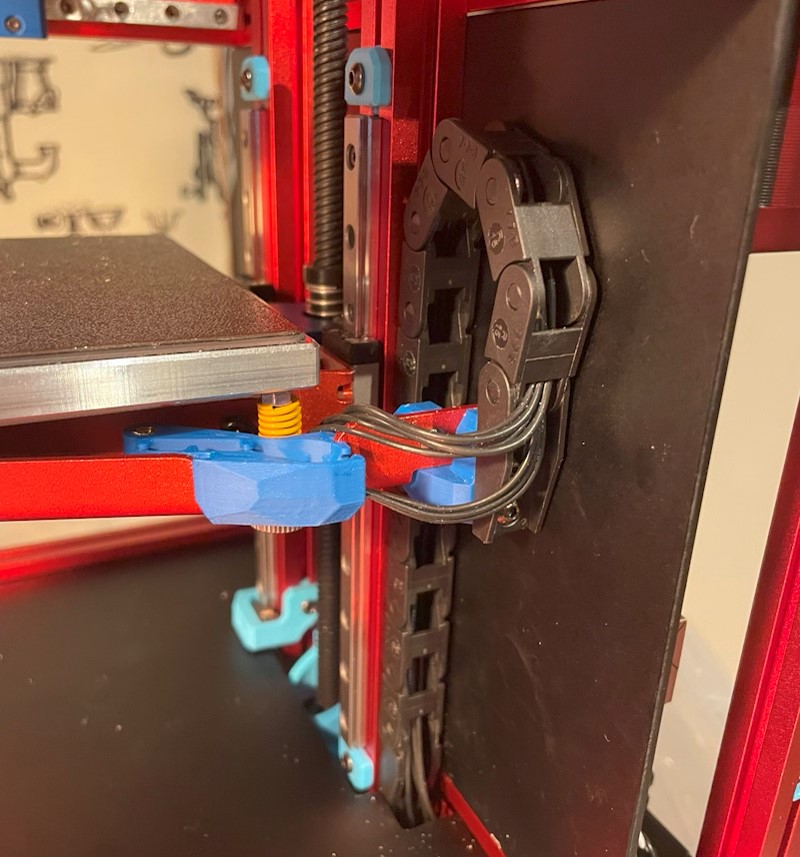 The drag chain is put on like this. The wiring is subject to some improvement though.
Hotend & X-carriage
For belt tensioning it helps to first loosely attach the belt to the carriage that LDO provided and loop the belt according to the instructions in the Voron assembly manual. Pull the belt as far as possible using pliers, making sure that you have the same number of teeth, then tighten them to the carriage. That makes you have by default a good tension to start with.
 Instant pareidolia! 😨
Then mount the X-carriage to carriage the linear rail and verify the movement. Verify the belt is secure. After that you can cut off the leftover of the belt.
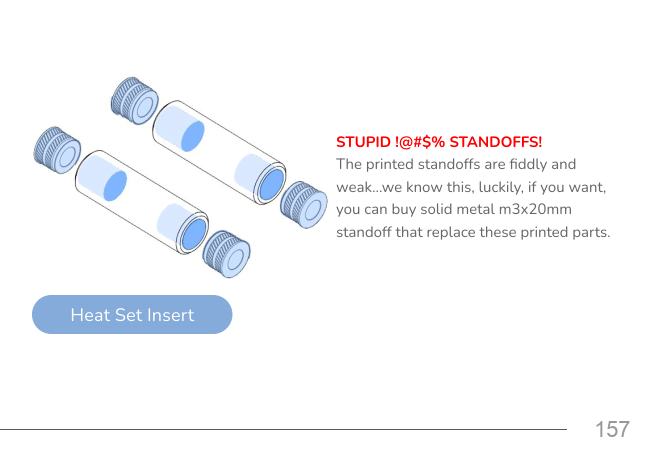
The Voron assembly manual calls out “plastic standoffs” that may break easily. The LDO kit fortunately contains aluminium standoffs that won’t break. You will find them in the picobilical kit. They are not mentioned in the BOM document of the LDO kit.
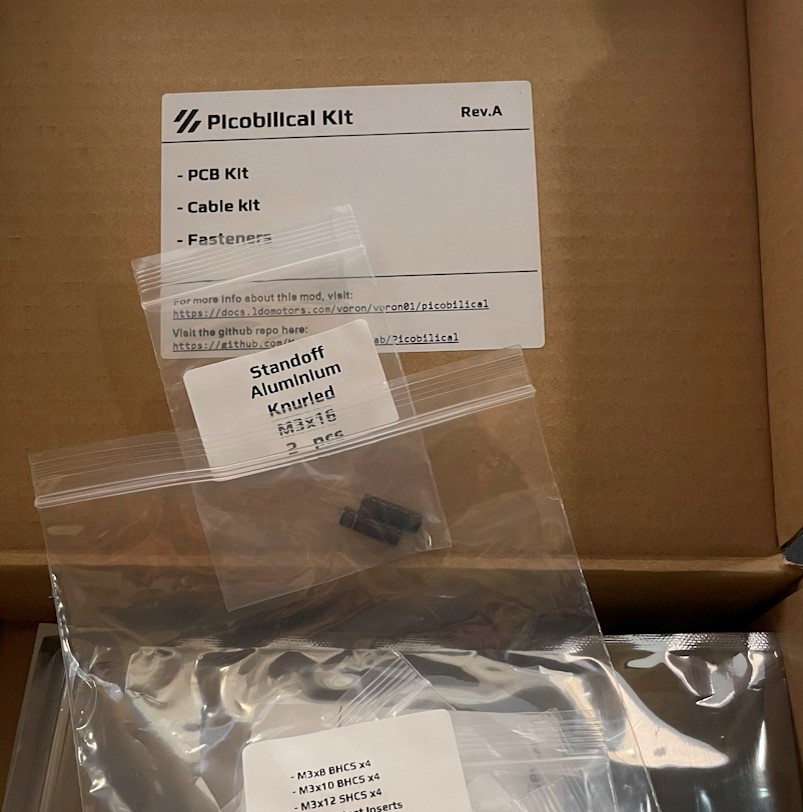 It was a search, but I found them in the picobilical kit.
Electronics
A bunch of stepper motors don’t do anything by themselves - you need electronics. The stepper motors are already pre-wired correctly, so you don’t need to worry about that. Also keep the LDO wiring guide as a reference.
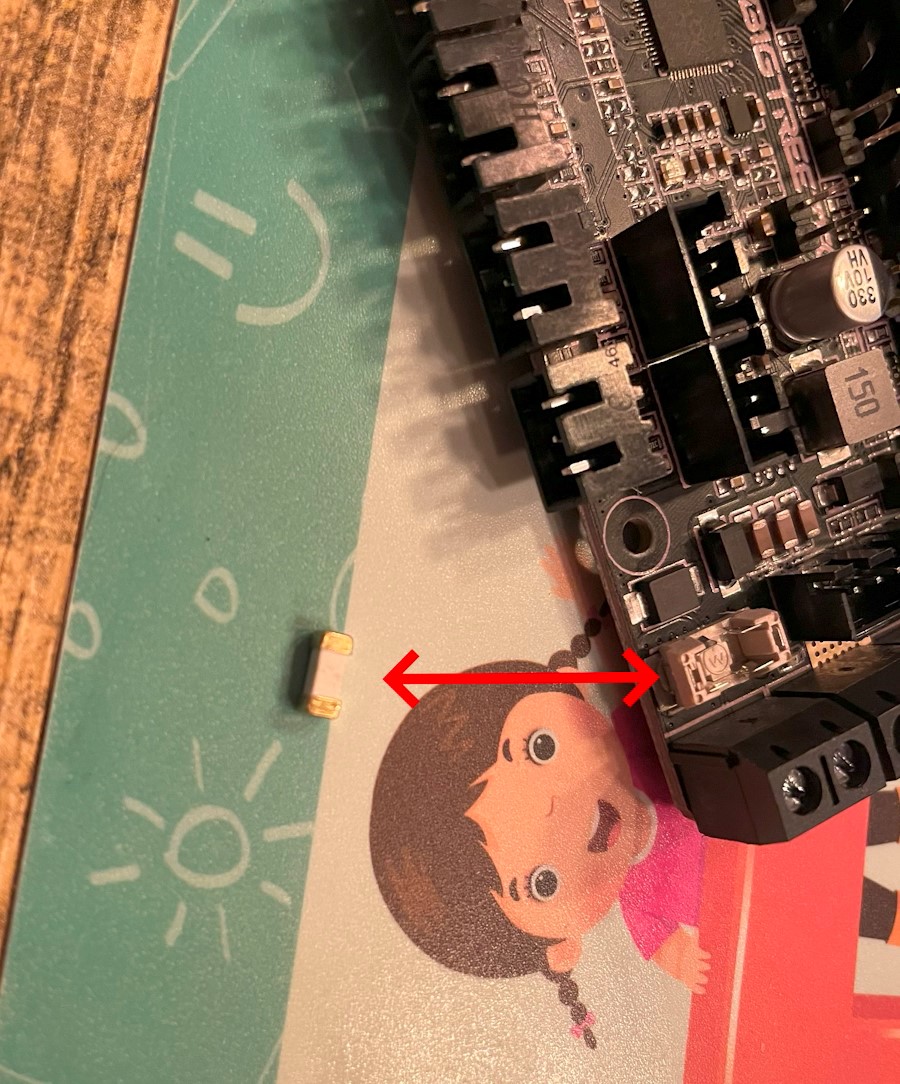 Beware of the fuse: Mine was loose in the packaging of the motherboard. At first I thought I was being careless and dislodged a ceramic capacitor, but this is a fuse and it wasn’t properly held in the BTT SKR Pico mainboard. Some tweezers made quick work of it.
The Voron manual isn’t very clear on how to mount the electronics, nor is the LDO wiring guide, especially because the pictures seems to be about an older Voron kit. Both mention that you can use a DIN mount to mount the electronics, and then mention using tape to mount the electronics - but I don’t want these sensitive electronics potentially falling down.
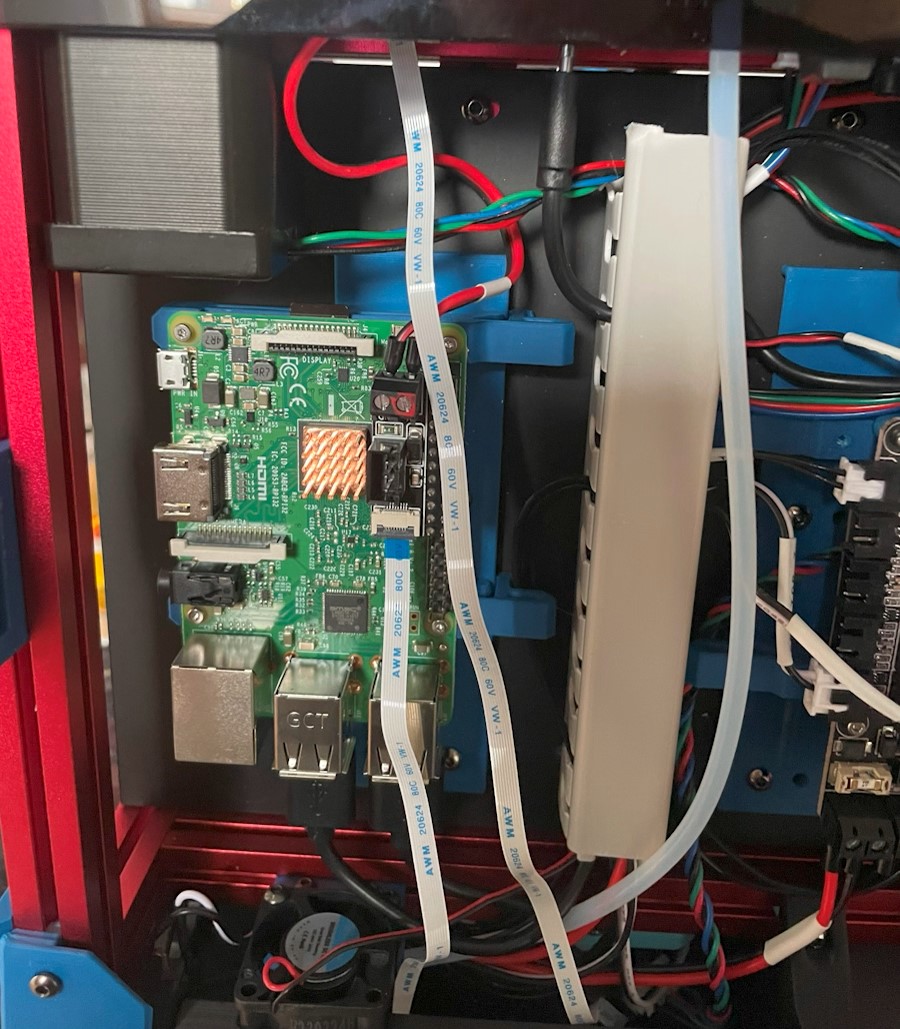
What I figured out is shown below. The largest square blue pieces are DIN rails, and you can mount them using to the nuts you’ve preloaded earlier. Use M3x10 screws as shown earlier. This will fixate the DIN rails securely, with the acrylic plate, to the frame.
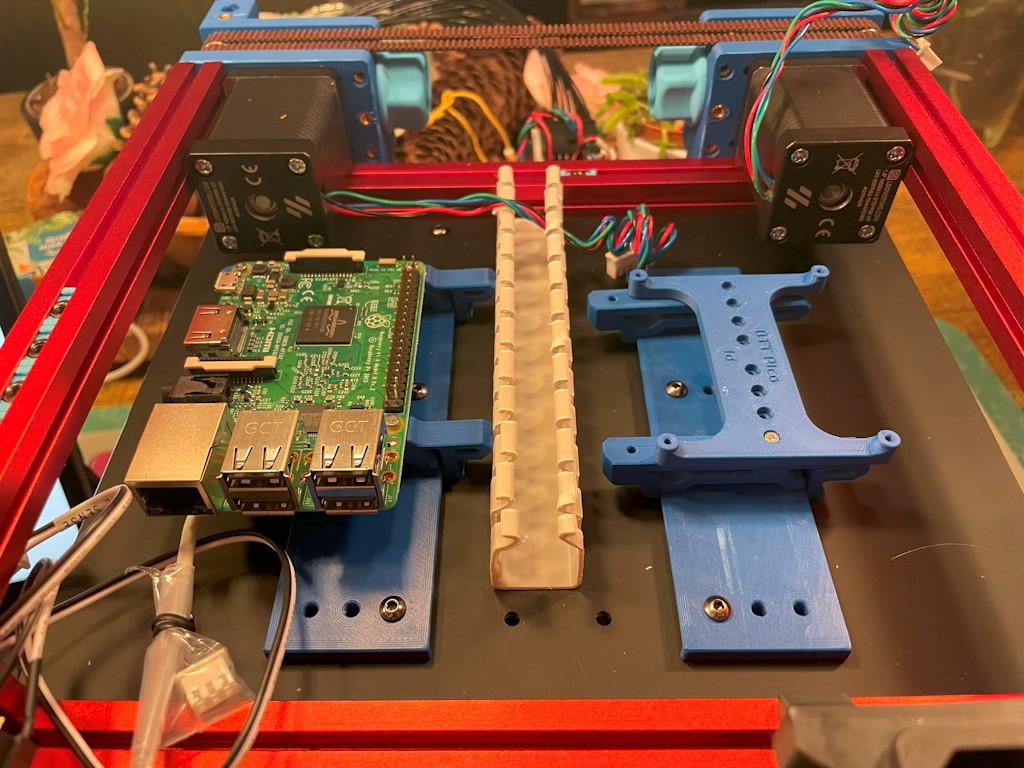
I printed the “spider” piece at the right side twice: one for the mainboard, one for the Raspberry Pi. They easily secure on the printed DIN rails. Once you got the mainboard and the Raspberry Pi in place and it looks okay, you can then fixate the cable guide with VHB tape.
The Raspberry Pi normally gets fed power from the mainboard, but in the kit of LDO the Picobilical frame board can provide the power. Polarity is documented on a separate page in the documentation, so for clarity I’ve also shown it below.
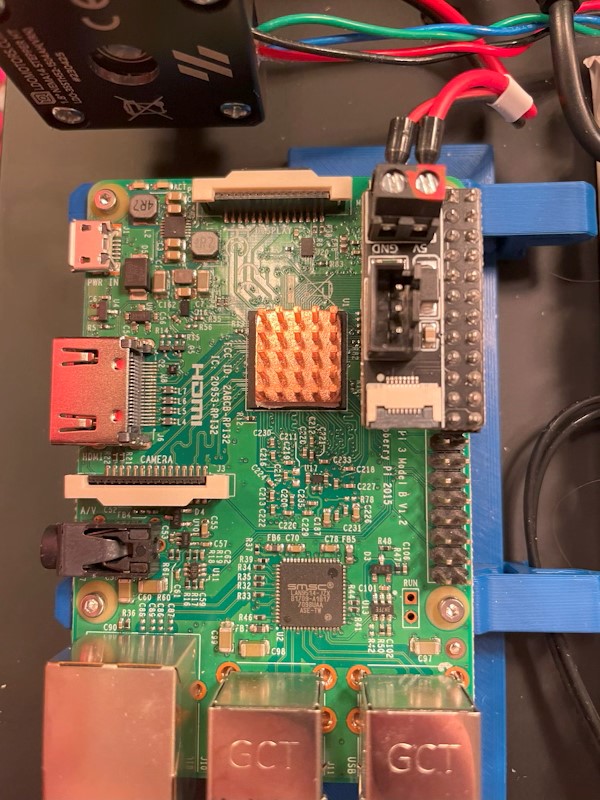 The Raspberry Pi gets fed power through its pin headers. Note both the orientation of the PCB and the polarity of the power cable. Also don’t forget to include the heatsink to cool the MCU of the RPI.
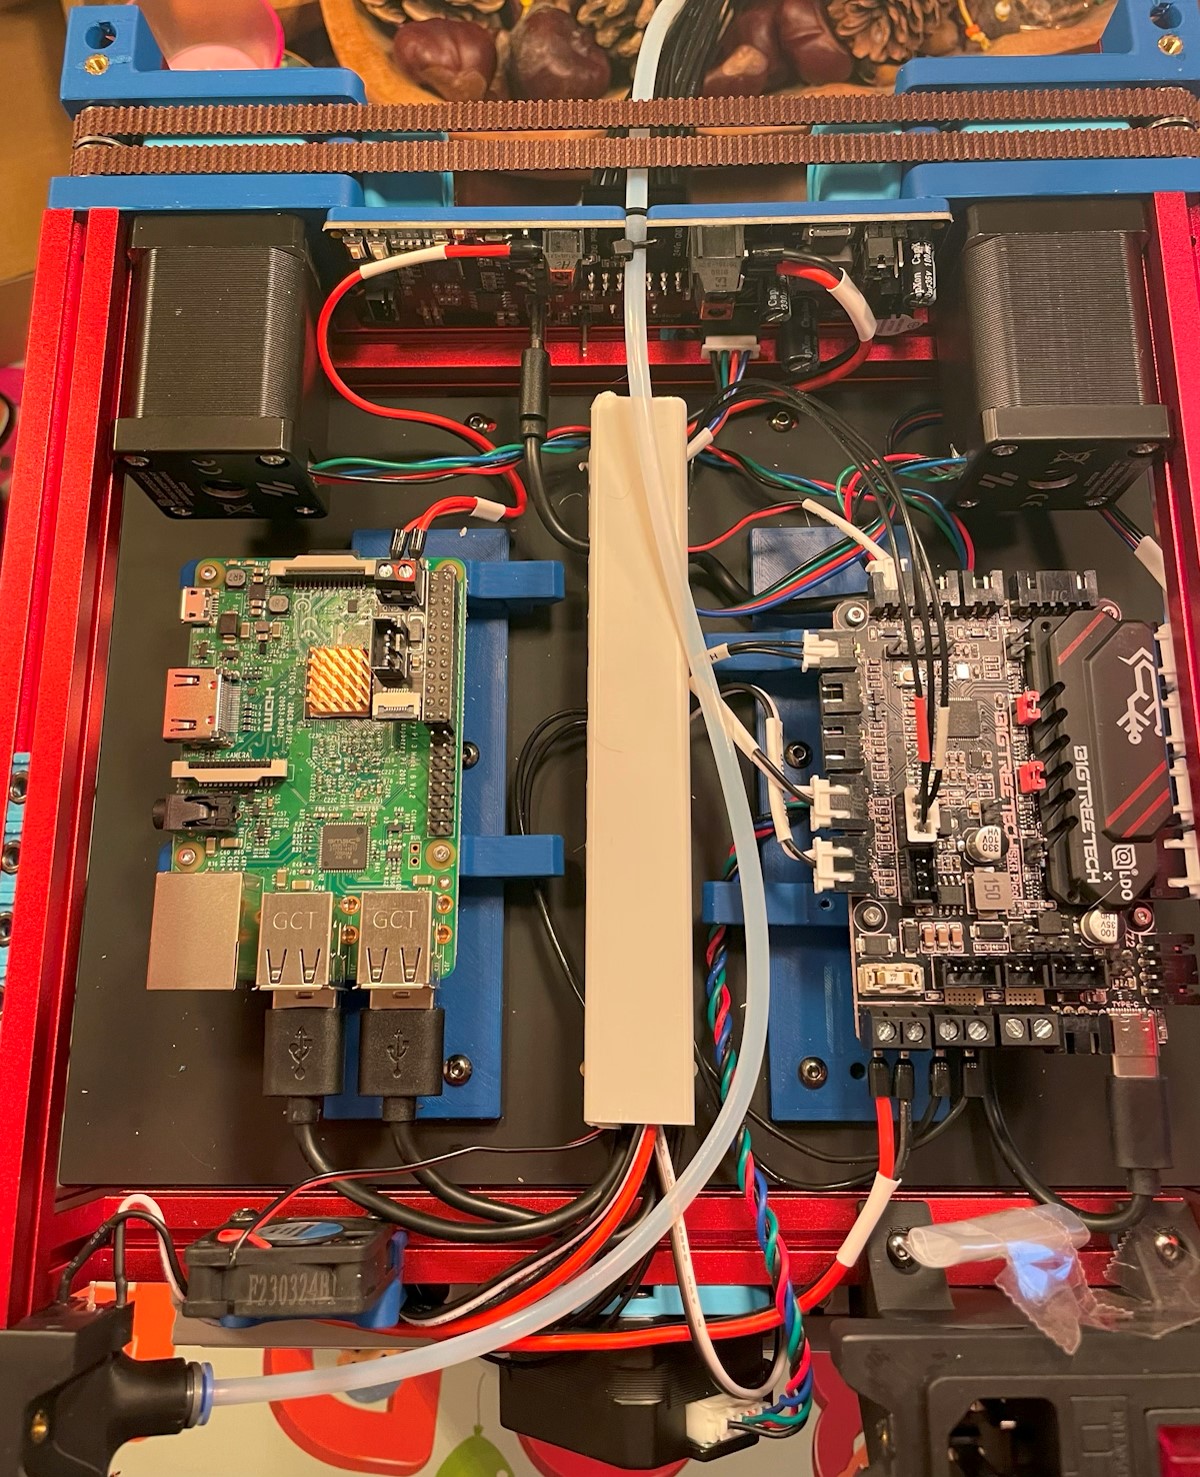 This is what I ended up with
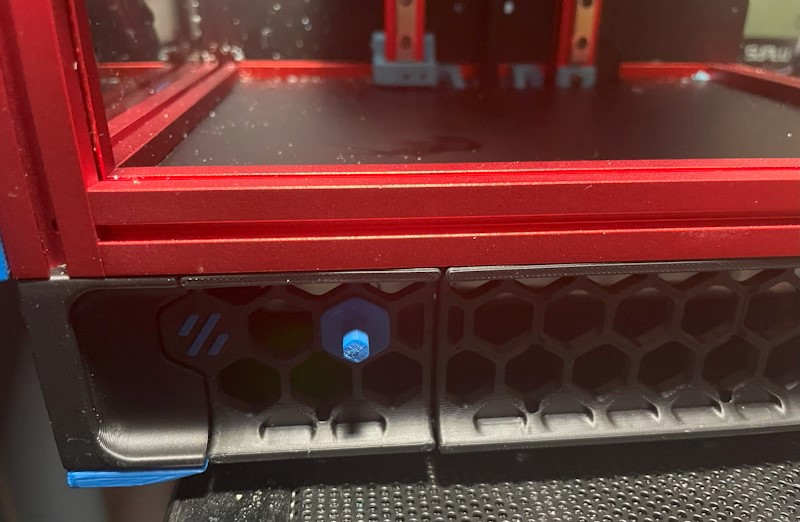
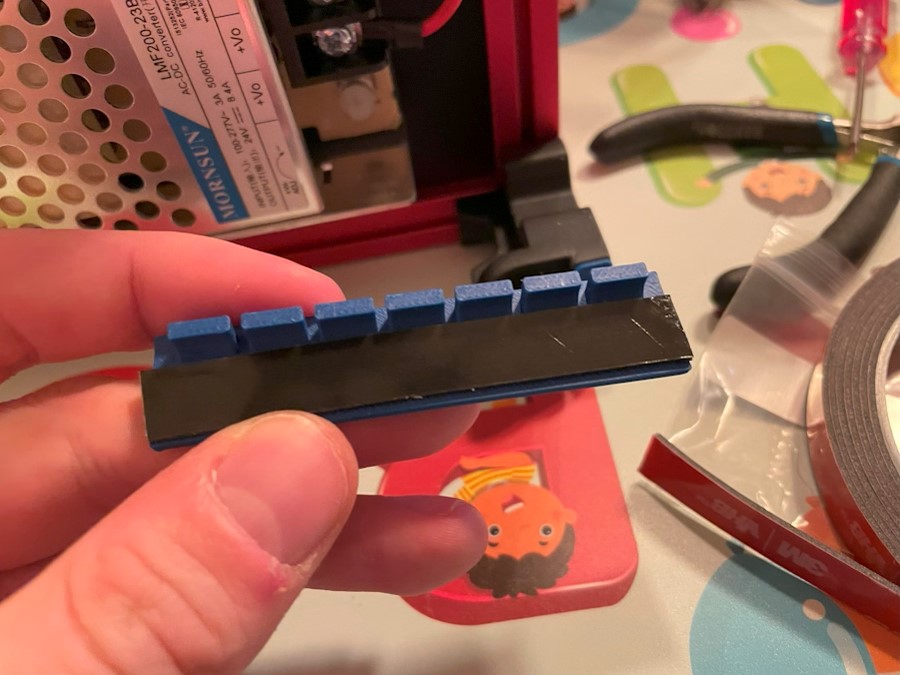 The PSU finger guard is supposed to have a friction fit, but I didn’t trust it, so I used some VHB tape to stick it in place
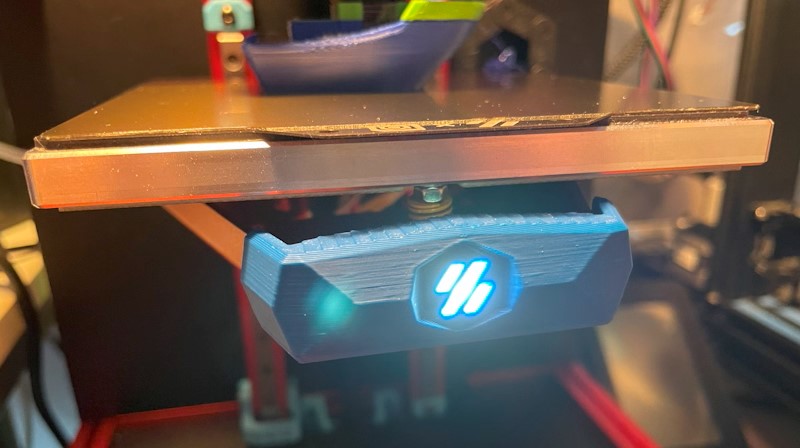 Don’t forget to connect the bed light to the RGB port of the SKR Pico
Now we’re mentioning PCBs and electronics, it the perfect opportunity to introduce todays sponsor PCBWay - you partner for projects like the automatic orchid watering.
Creating your own PCB with PCBWay
PCBWay.com is a reliable and affordable platform for creating PCBs. They offer a wide range of services, including PCB prototyping, PCB assembly, and PCB layout. They also provide a variety of materials to choose from, including FR-4, aluminum, and flexible PCBs. PCBWay.com’s services are easy to use and affordable, making them accessible to everyone.
If you’re looking for a reliable and affordable platform for creating PCBs, PCBWay.com is the perfect choice. They offer a wide range of services and materials to choose from, making it easy to create the perfect PCB for your project.
Using PCBWay I can easily create PCB boards for the reverse engineered hot-end board of our CR-6 SE. This can keep our CR-6 SE running for many more years.
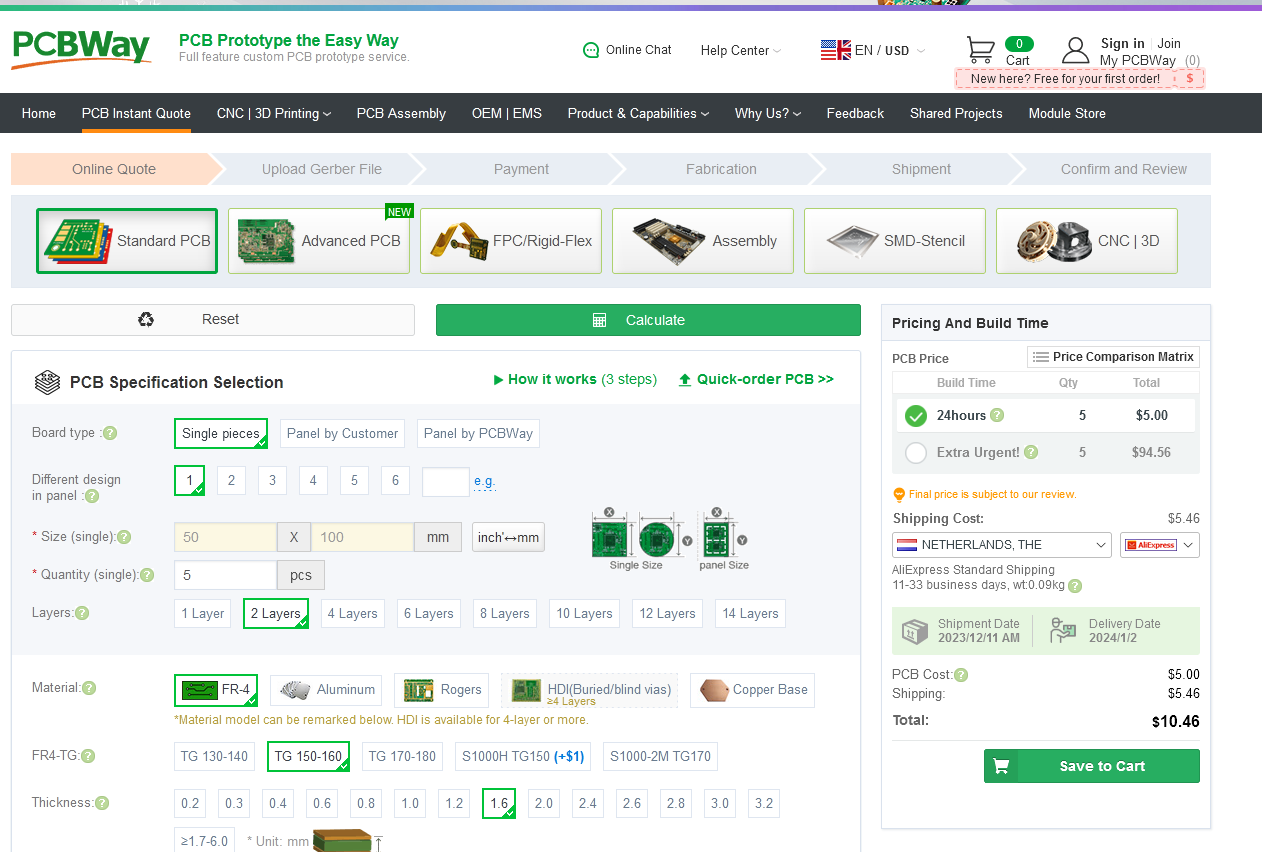 You select the PCB you need
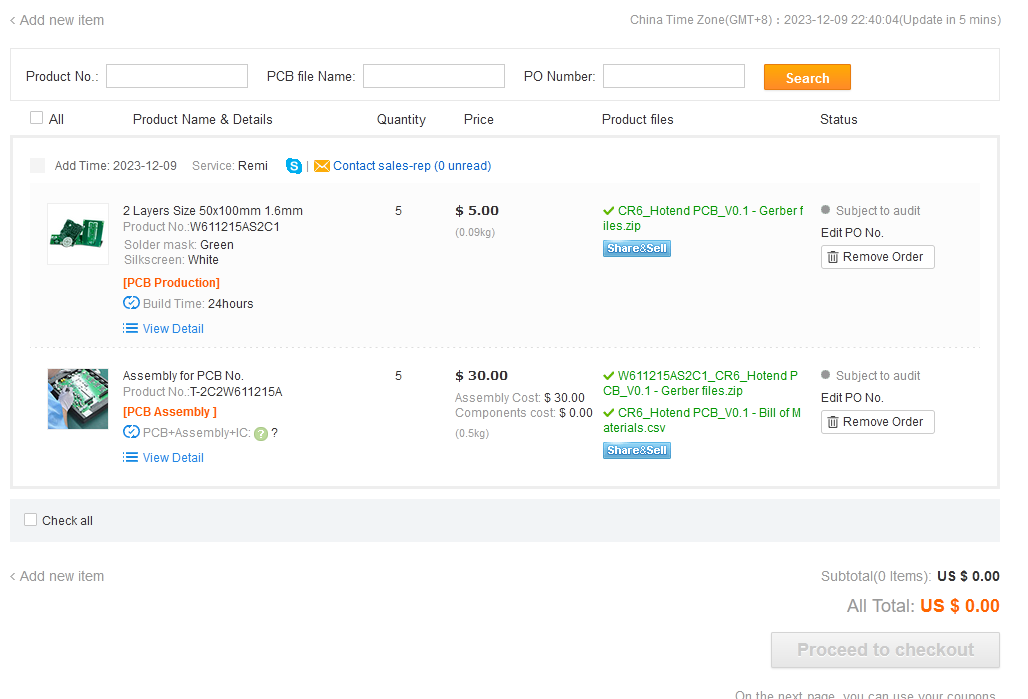 Upload the Gerber file, assembly and BOM
After you’ve uploaded the files, there is an automatic auditing done on the uploaded files. If you have any questions, you can easily contact someone on Skype to help you through. After this you can order the PCBs and have them shipped within a matter of days.
First software installation & test print
Before mounting the side panels, take your “naked” printer, install the necessary software and firmware, and do a first test print like a calibration cube. Preferably level the bed, and run a test print. If you don’t want to go that far, at least ensure that the motion system can home the printer, and all the temperature sensors and heaters operate as expected, and that you can extrude some filament.
 Running a first test print can prevent the need from taking your print apart later to troubleshoot obvious issues you could have found earlier
To get started:
-
Double, no, triple check all the wiring. Take special attention to the polarity of all the cabling. The inputs of all PCBs are not tolerant to receiving the wrong polarity.
-
Disconnect the USB cables of both the SKR and the Picobilical board. This is to prevent interference of Klipper.
-
Optionally connect an HDMI cable to a screen or capture device, this allows you to monitor the boot process.
-
Install Klipper (Mainsail) using the Voron documentation using the pi-imager onto an SD card.
-
Use the Klipper config provided by your kit vendor. For instance the LDO motors printer.cfg config file or use all the files in my repository as a basis. You can upload them after Mainsail has booted.
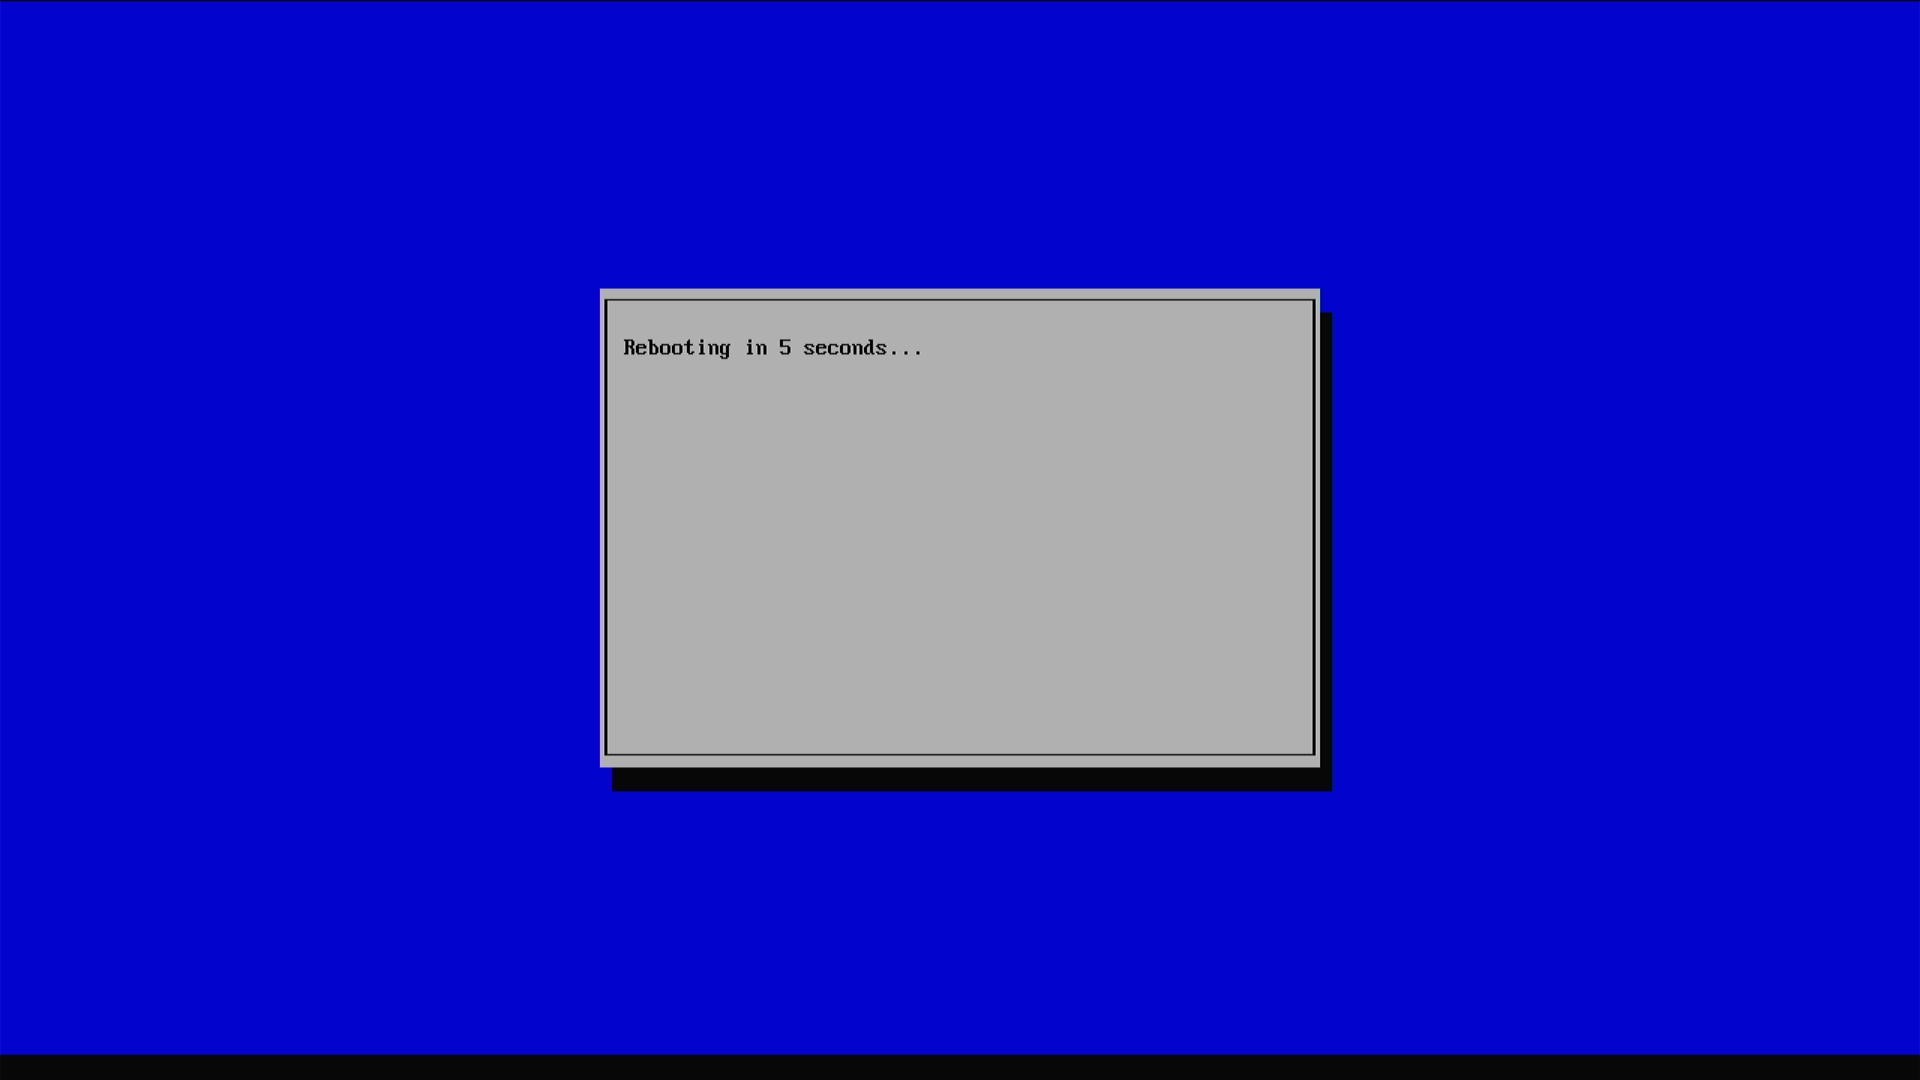 During the first boot the SD card partitioning will be modified to fully take up all space; after that a reboot will be triggered
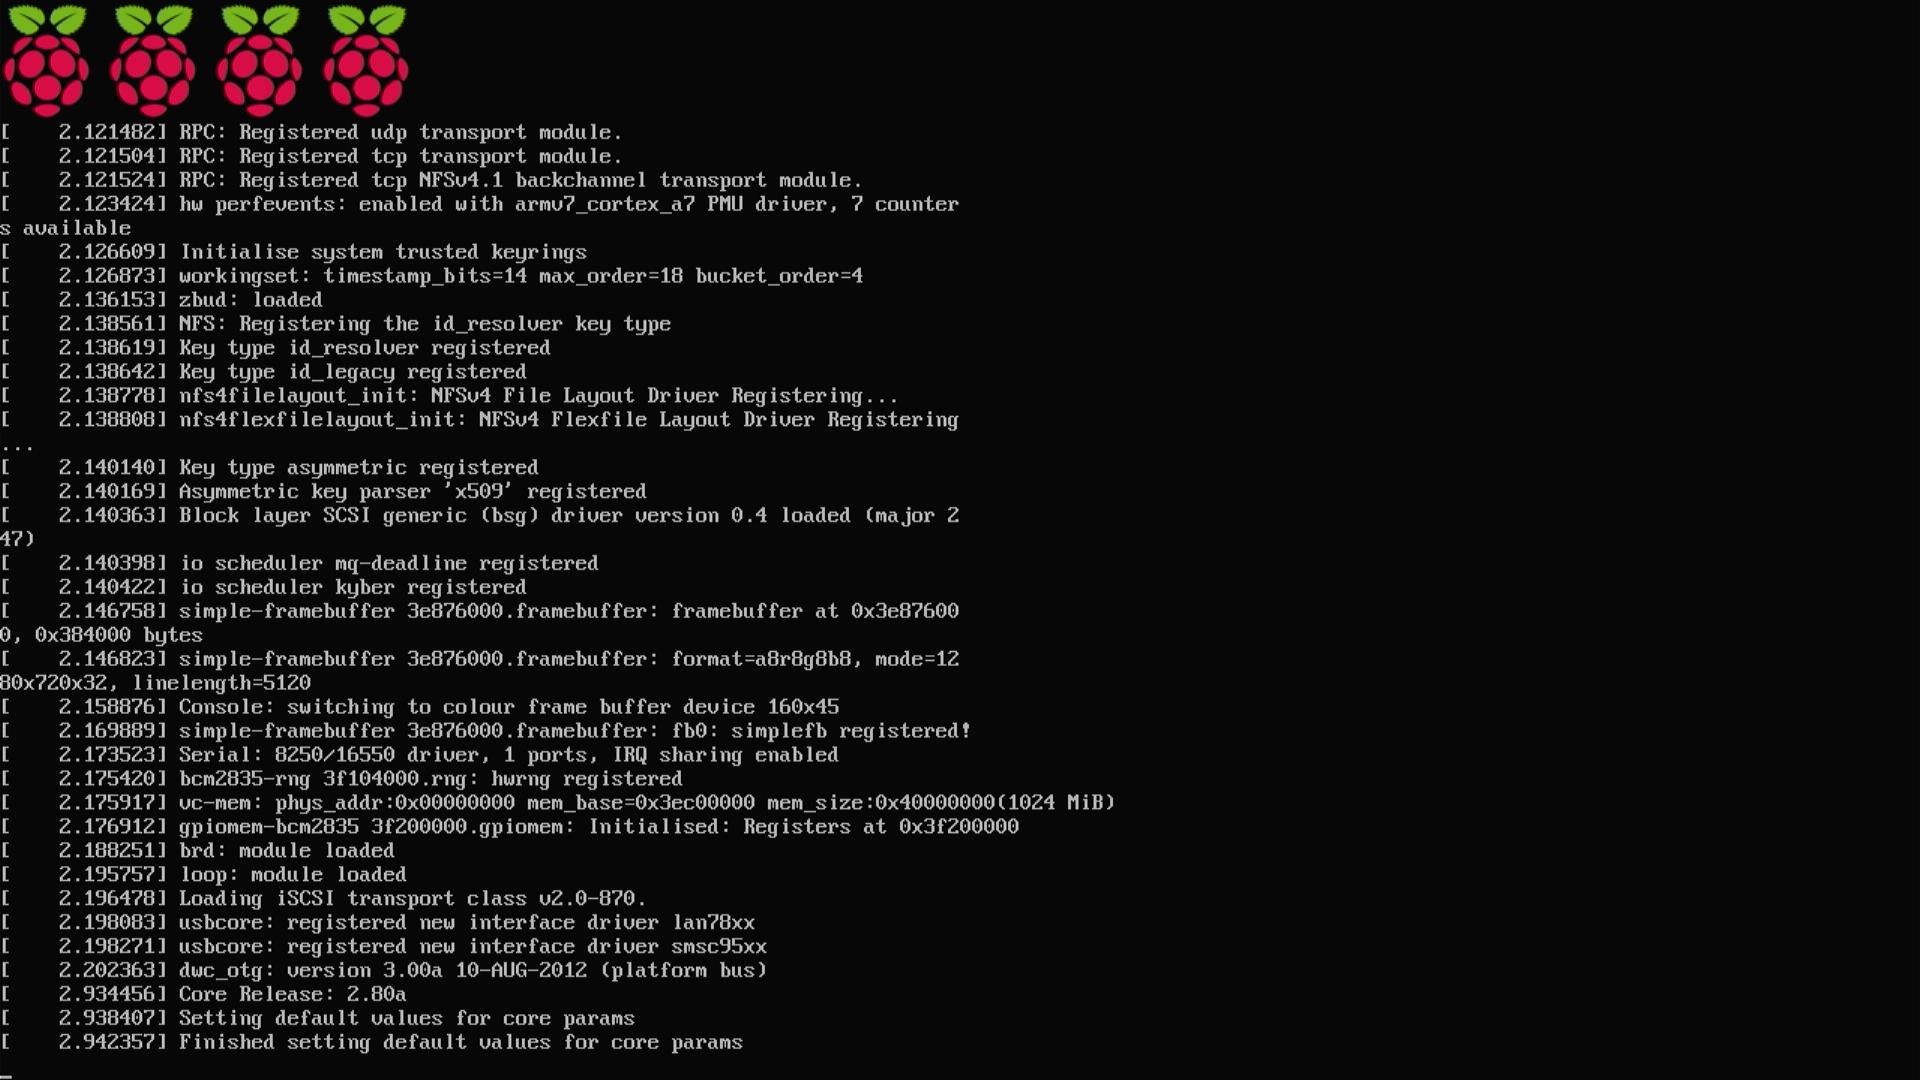 Booting…
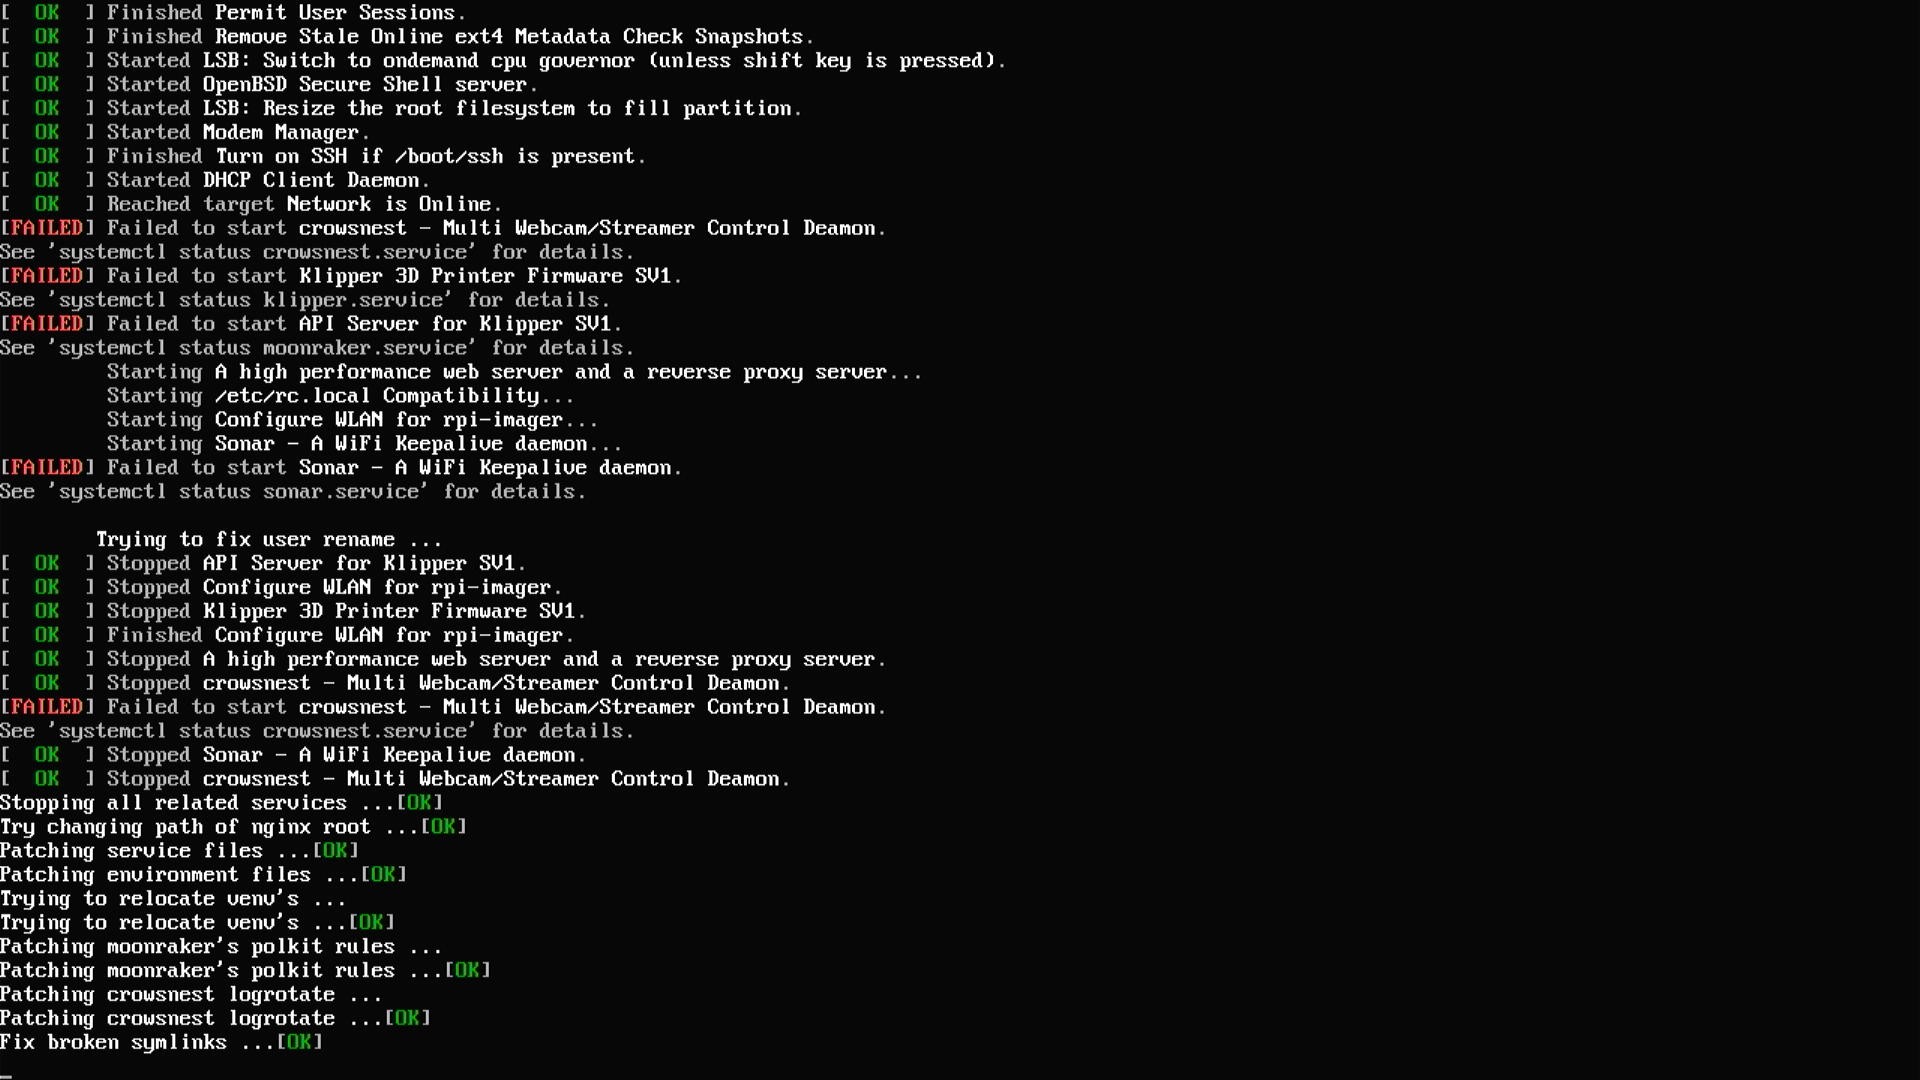 Don’t worry about these errors. Klipper hasn’t been fully set-up yet, so it will throw these errors and do some set-up
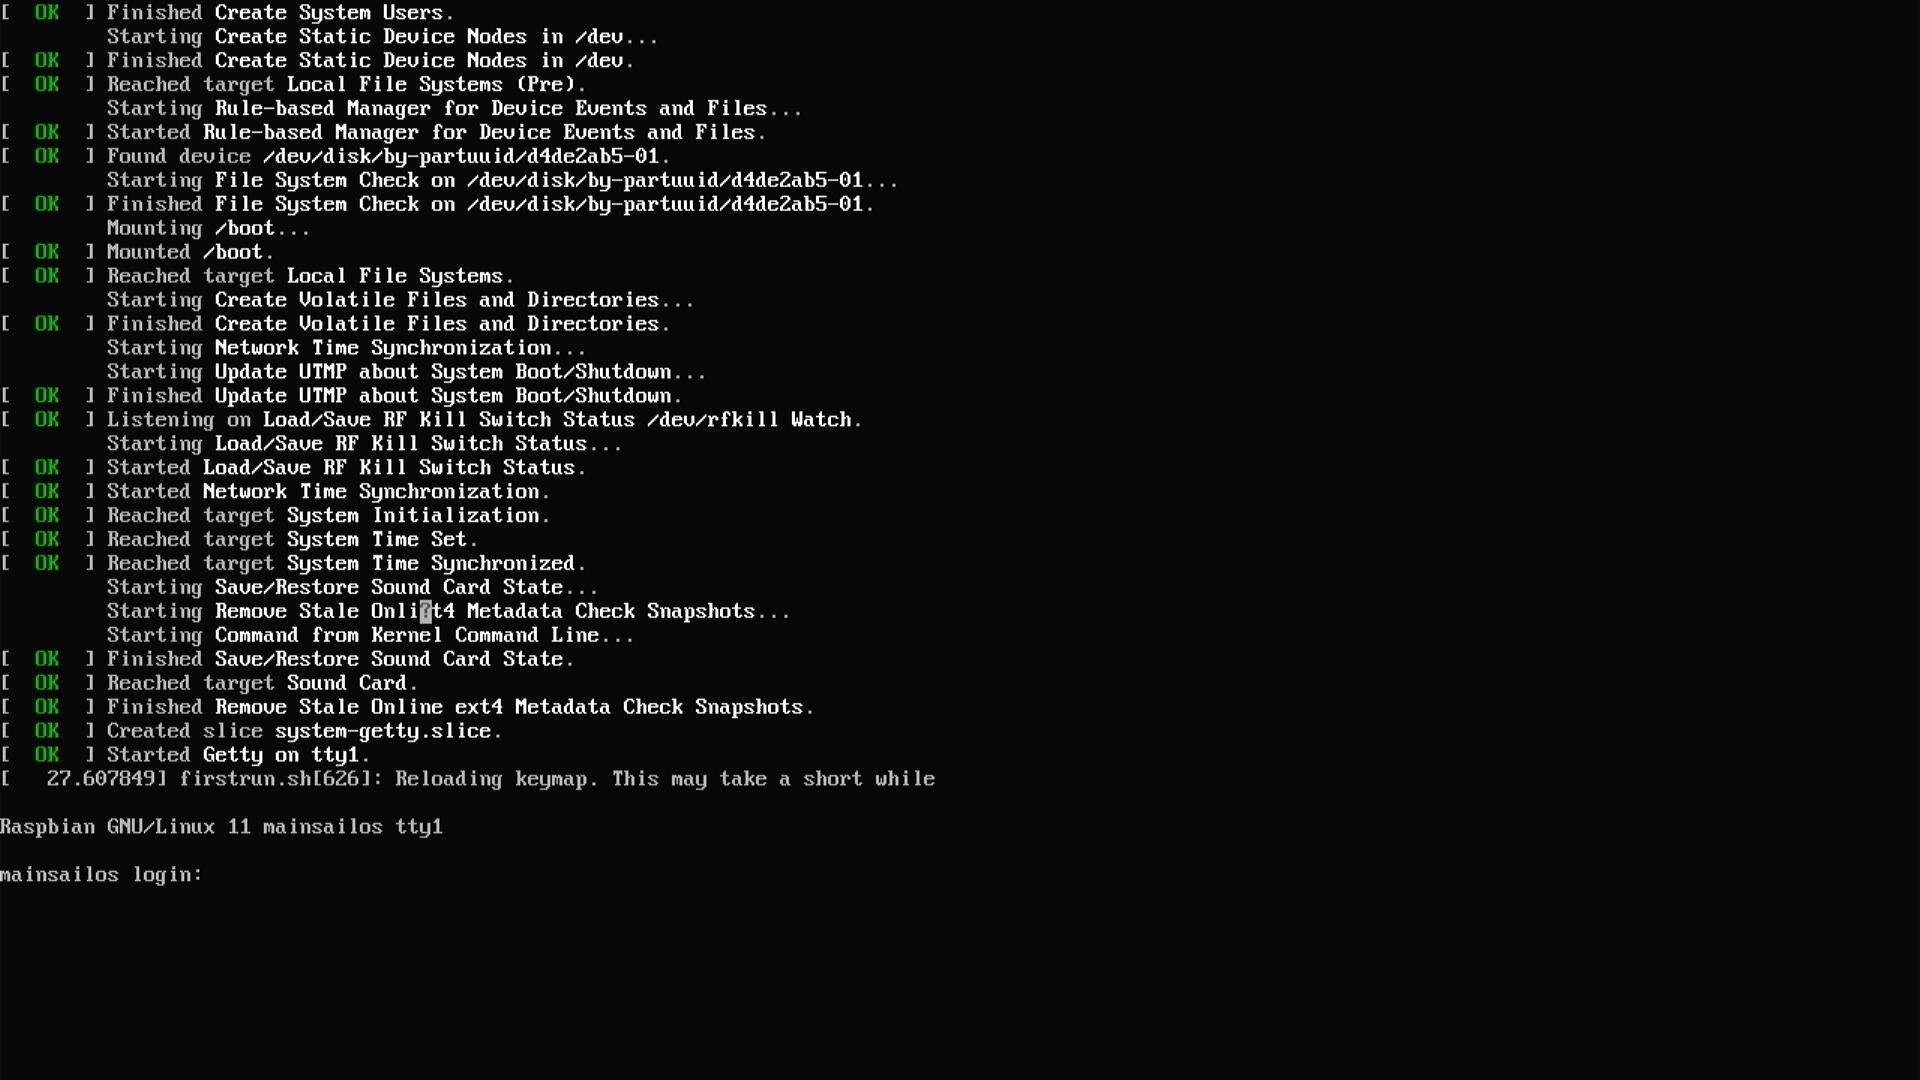 Now the stage is yours!
Now you can set-up Klipper and follow the LDO guide to further set-up Klipper and flash it to both boards. They use the same MCU, you can flash them both with the same binary. You’Il also want to set-up the Raspberry Pi as an MCU in Klipper to allow resonance calibration.
To finish the most critical part of the Klipper config, make sure you change the MCU paths accordingly to the LDO documentation.
When Klipper is successfully running, follow the startup checks on the Voron documentation site to do the initial tests and set-up of the printer. When homing and the heaters work correctly, you can continue with your first test print.
Bambu Studio has built-in profiles for Voron, and I find more user friendly than PrusaSlicer. Alternatively, you can download this test print and run that.
If everything seems in order, let’s continue with the skirt and panels to finish the build.
Skirt
The skirt parts have holes at the bottom that you can use for your hex key.
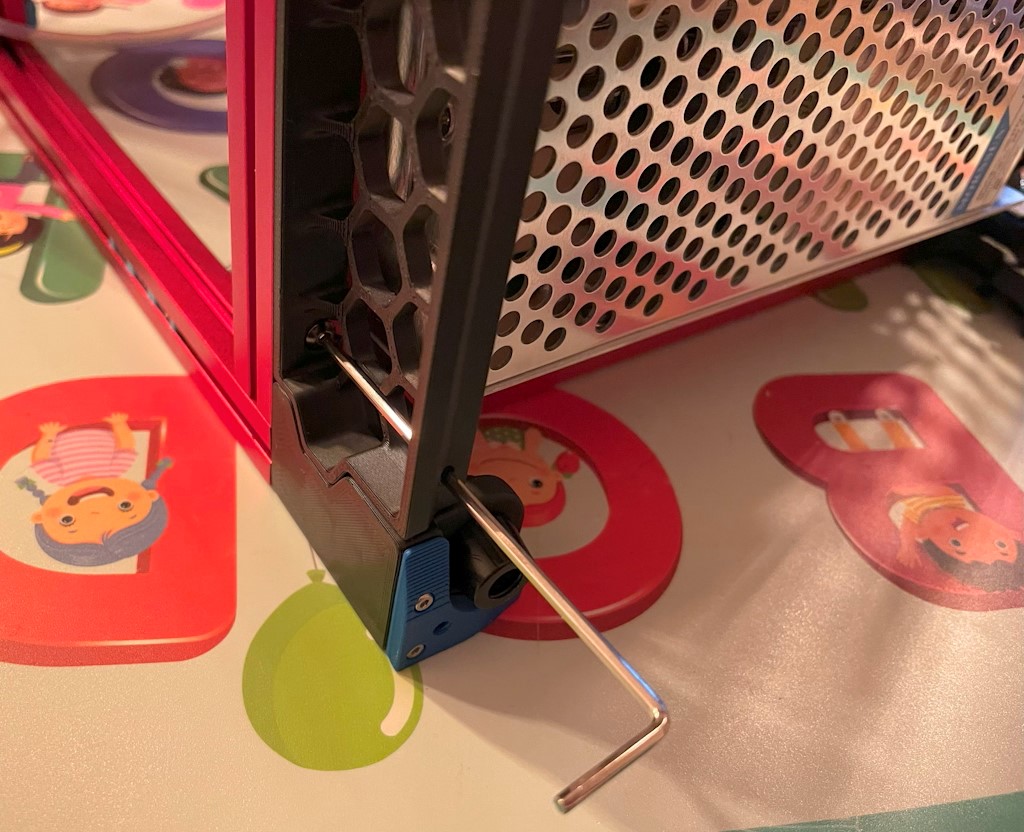
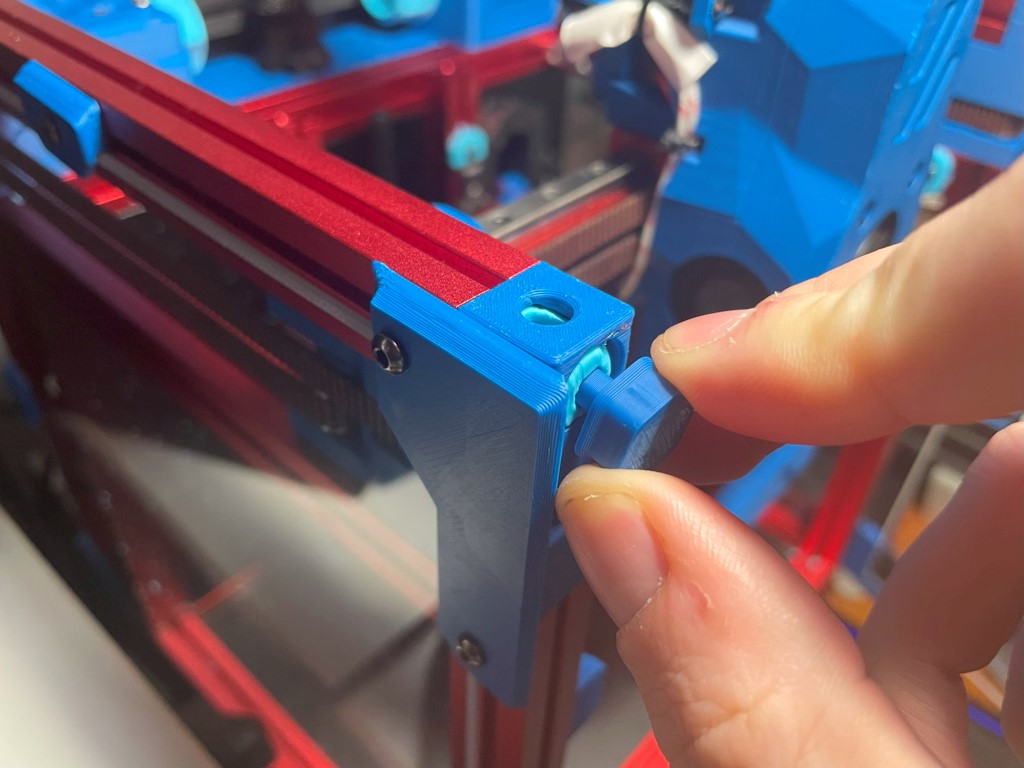
If you happened to forget preloading a nut, you’re not completely out of luck. There is one spare T-nut included in the kit, which you earlier used for attaching the belts to the X-carriage.
 You can simply push this into the extrusion and align it with an allen key. That saves some time taking the whole printer apart again!
Mounting the panels
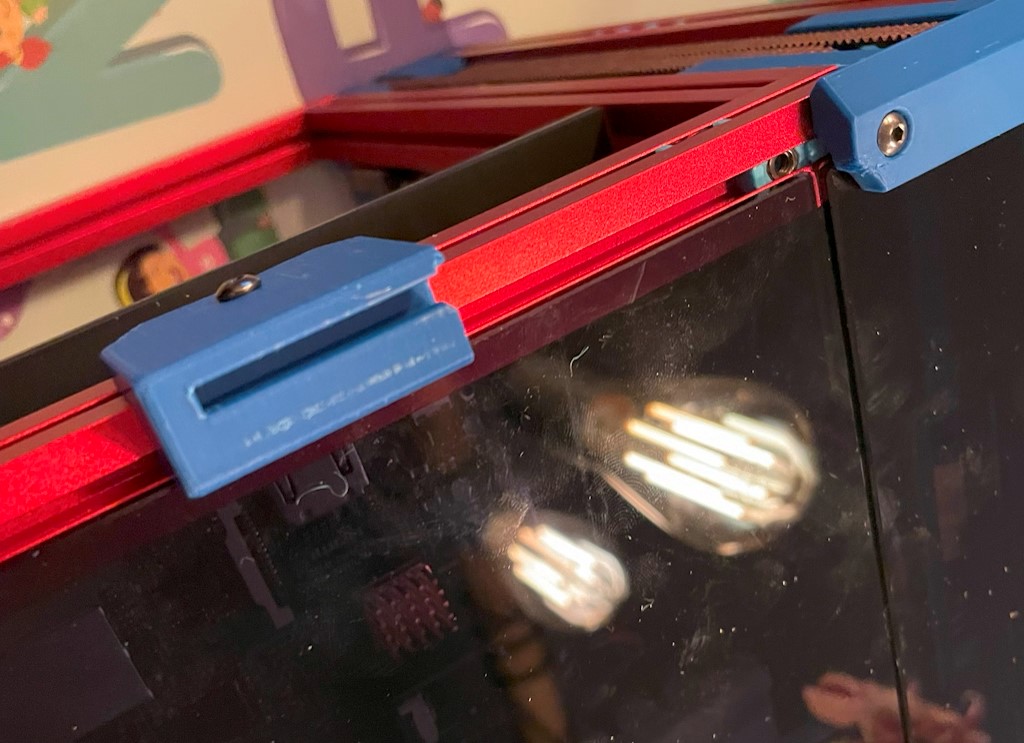 The LDO spool holder is mounted like this. The tolerances are pretty snug, so it may help to sand the spool holder itself a bit to prevent it getting stuck.
Tophat build
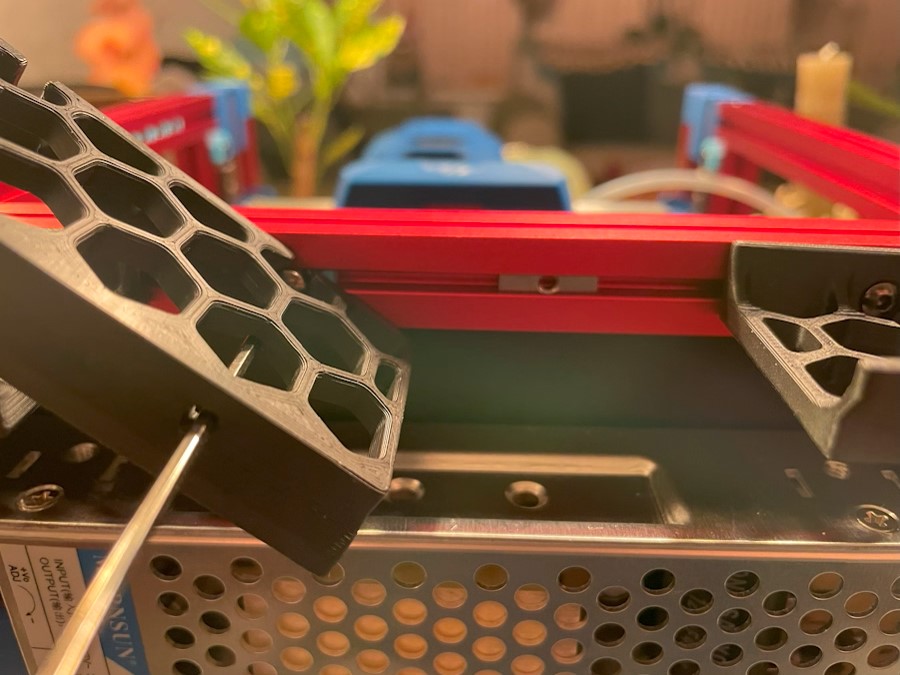
The nuts in the tophat should be preloaded like shown below.
When the tophat is assembled you can lock it into place. You can use the jig for aligning the stepper motor pulleys as a key, if you like you can also use this tophat key I designed (Printables link | Makerworld link).
Further calibration
Now you can do further calibration, like resonance compensation and pressure advance. The Klipper docs are the perfect place to review those procedures.
If you’re looking for an accelerometer, and happen to have purchased the LDO Kit, you’re in luck. An ADXL accelerometer is actually included on the Picobilical hot-end PCB.
 Which the printer turned off, connect the ADXL ribbon cable to the Raspberry Pi and to the Picobilical.
Be very careful connecting the ribbon cable, both the connectors (which swivel upward to allow insertin the ribbon cable) and the ribbon cable itself is very sensitive. This ribbon cable is not meant to be connected directly, only use it when calibrating resonance compensation and then tuck it away. Also be careful that it doesn’t get pinched during homing.
Conclusion
I hoped I could shed some light on the build of a Voron V0.2 kit by LDO and take away some doubts you may have during the build.
Good luck and have fun with your new Voron!
What are your thoughts?